Where I Keep and Work on My Kits |
|
UPDATED 12/29/19 |
|
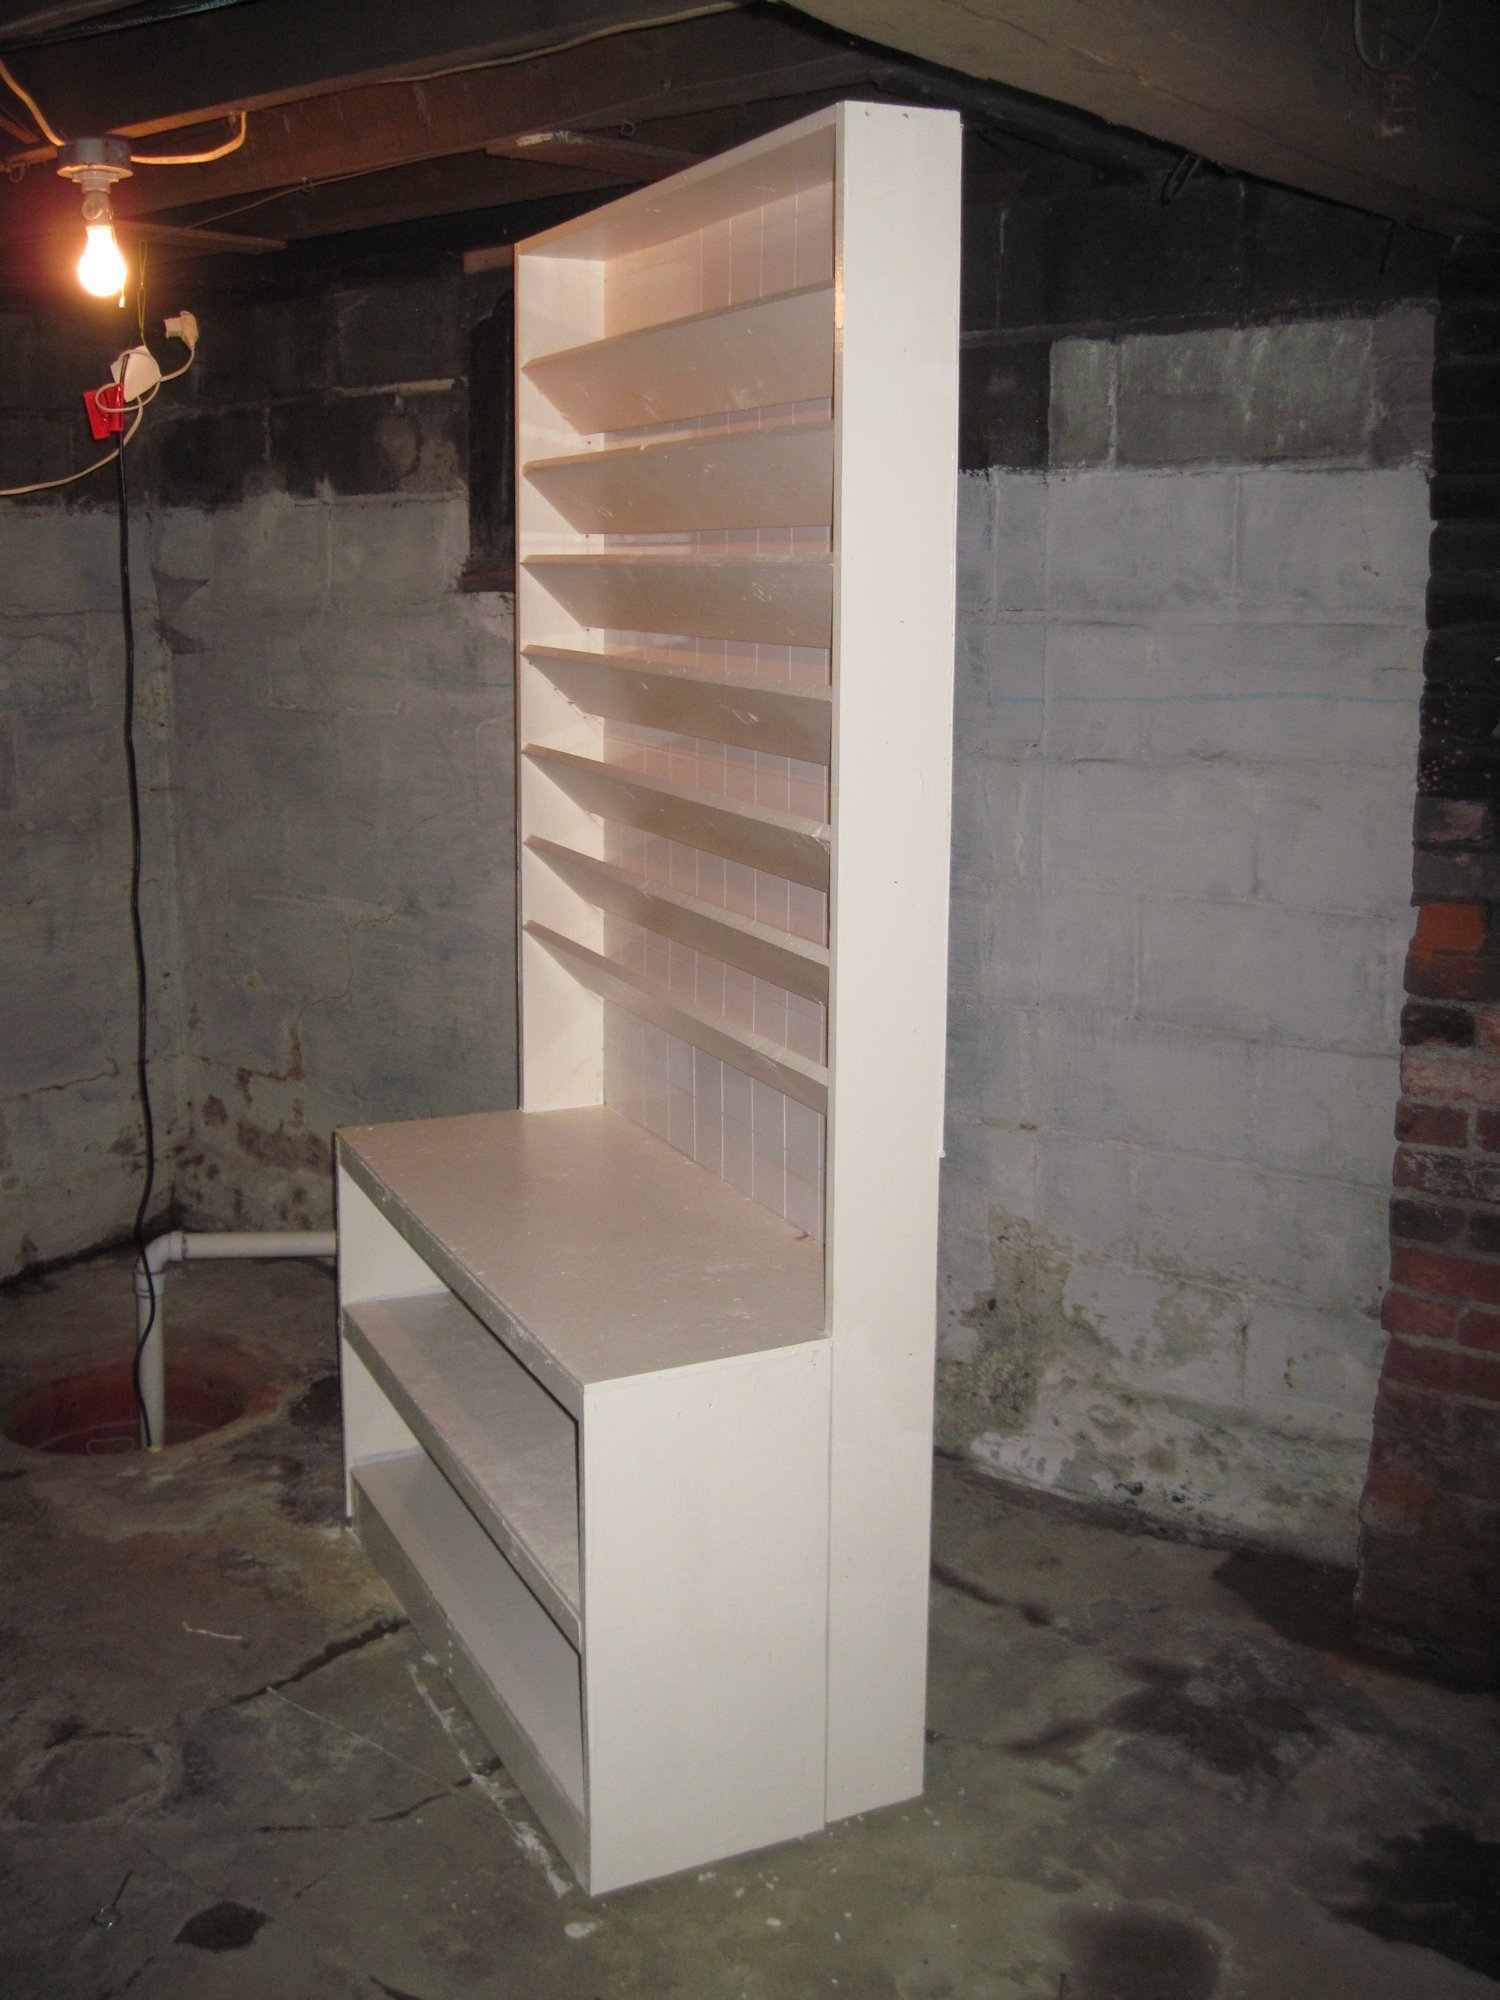
Spray Paint Shelf
|
|
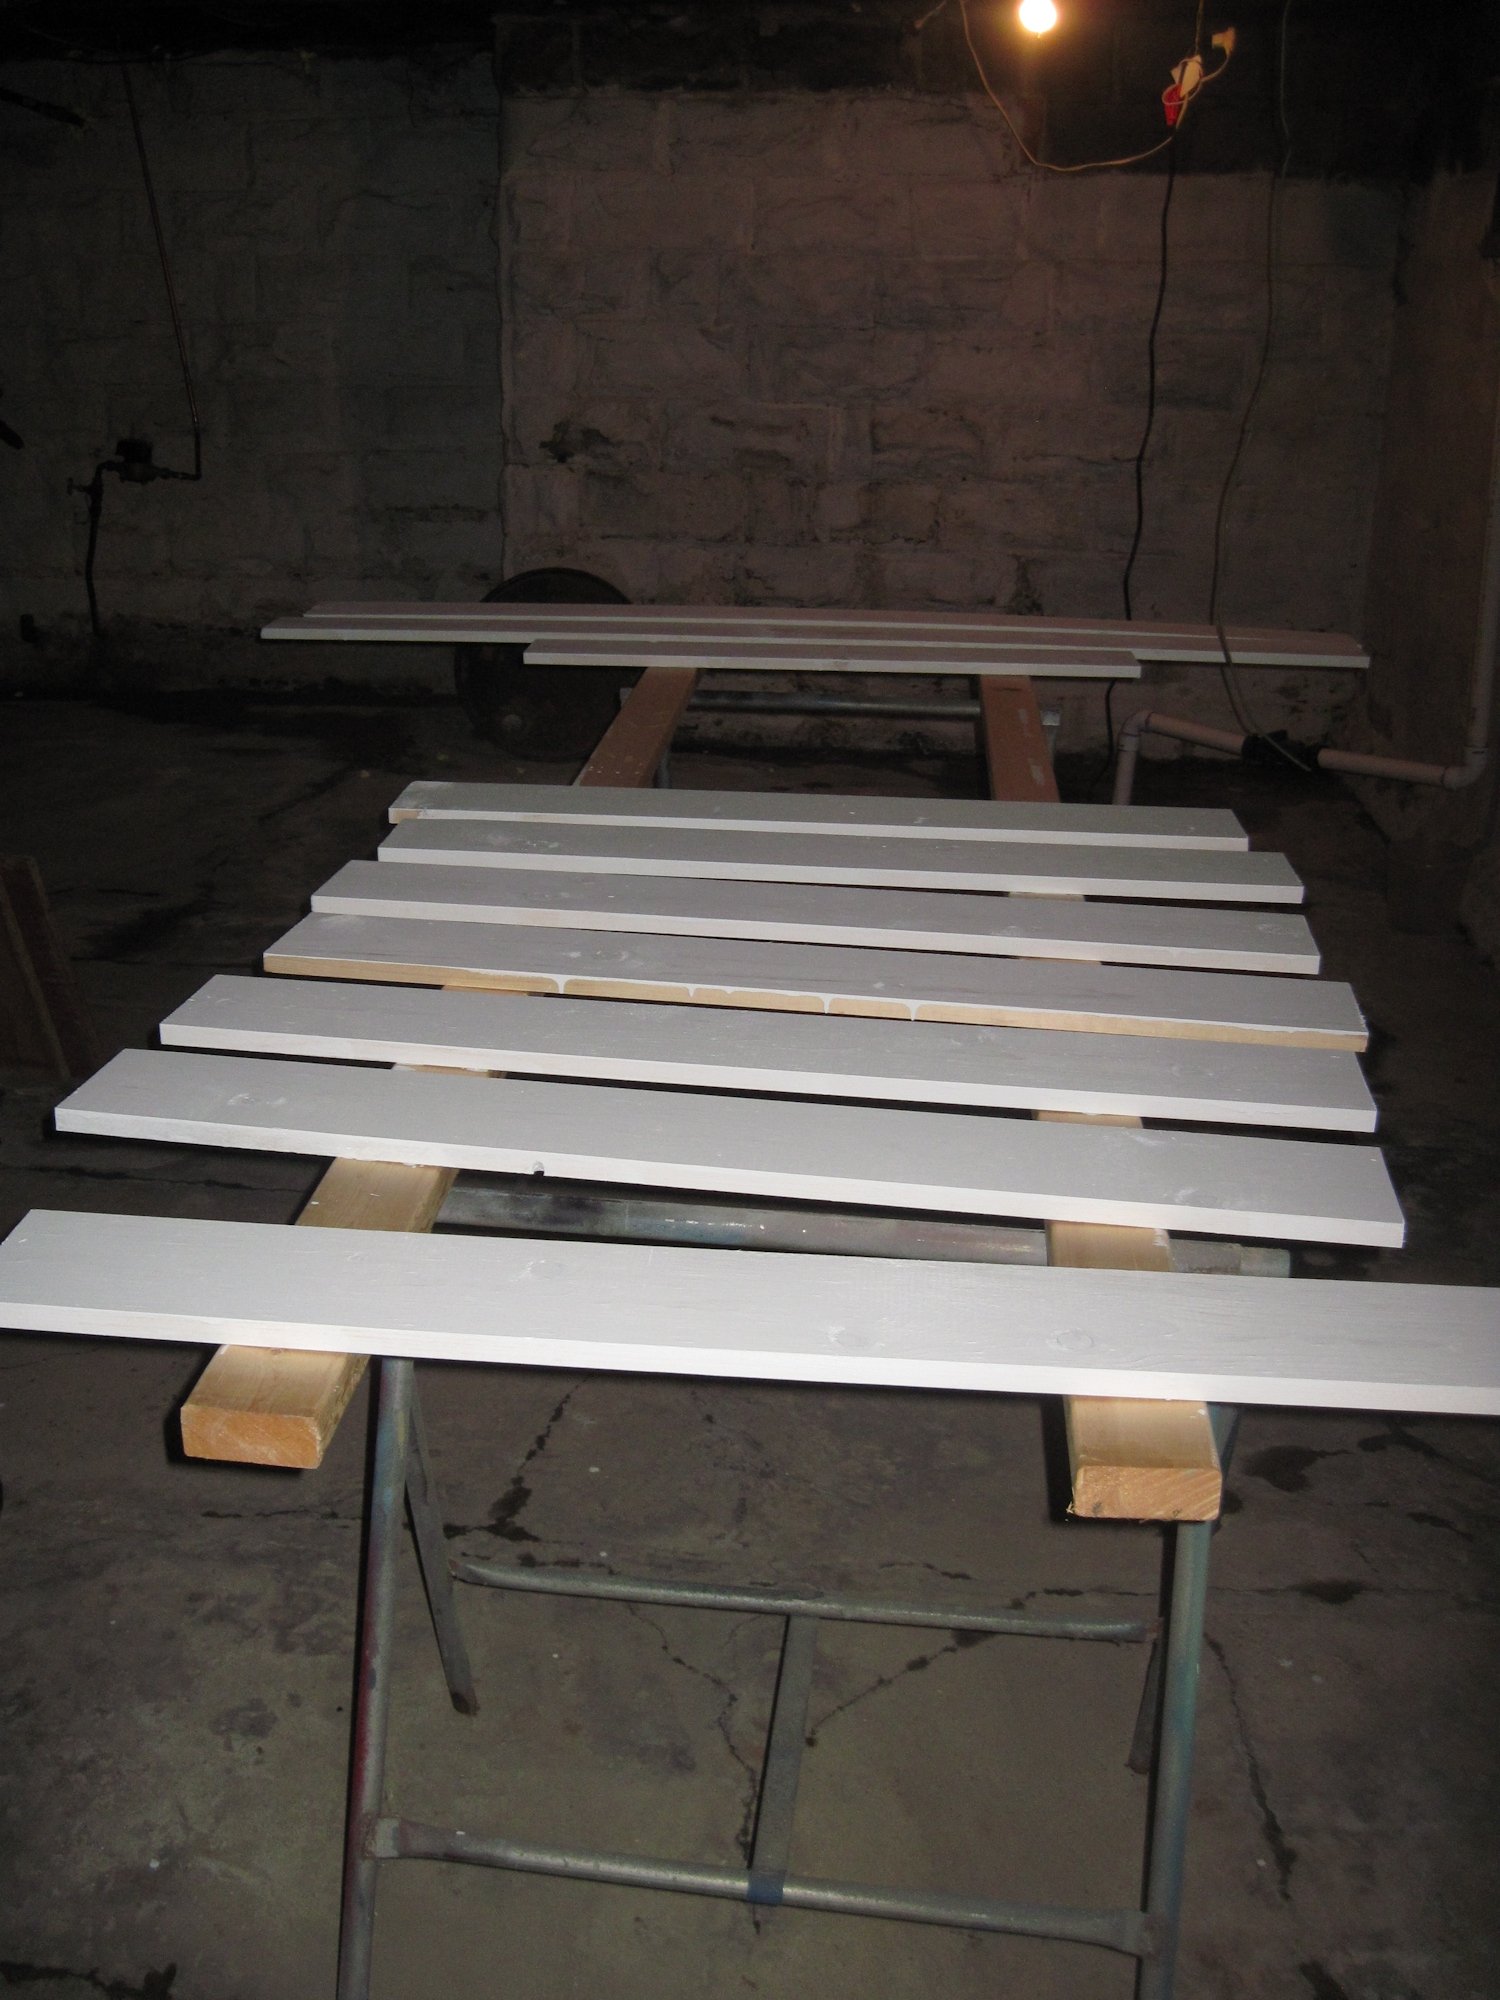 Step one, cut the wood and prime. |
The bulk of this project is made out
of regular 1 x 6 boards. I cut 8 pieces for horizontal pieces I think they were 44 inches and 2 verticle boards at around 7 feet. Then I primed the face, sides, and ends. I could have primed the other side too, but didn't bother as they won't be seen, and I don't think it will really effect the wood. |
 paint |
Obviously the next step was to paint. Much easier to do it now, rather than when it is all assembled. |
 layout |
Next up was laying out the shelves and
pre-drilling the holes. I set both boards on my workbench with the paint side up then marked it out. If I remember correctly it is something like 7 or 8 inches between shelves. The first shelf is a little taller, as I wanted somewhere for tall cans, and didn't know if the ceiling would get in the way of pulling them out. So, I marked for the top piece, then
down 9 marked top and bottom for that board I just used 45 degrees for my angle. I could have
gotten fancier but saw no need. |
 assembly |
Now for the fun part. Assembling it. Was kind of tricky all by myself, another set of hands would have made it immensely easier. Started with the 3 pieces of treated 2 x 4 for the base. (gonna be sitting on concrete so it needs to be treated) Could have used another one in the back, but I am cheap and only wanted to buy one 8' board Then attached the verticle pieces, being careful to keep them sqyare to the base. Then I layed it on it's side and put the top board on followed by the 7 shelves being carefull to keep them aligned to the layout lines I had put on them. Painted side in for the verticles and top piece, paint side out for the shelves. |
 base section |
Next I put a piece of the back on.
This is both to hold the cans in, and to square up the
shelf. I clamped it to one verticle piece, screwed it in place, then used a framing square to make sure the shelf was true before attaching it to the top, and other side. I was just going to use plywood, but I had pieces of this tileboard left over from the laundry room renovation. A piece of 3/4" plywood on the base for the bottom shelf. Then another piece of 3/4" plywood for the side piece Which is attached to the base, then tied together with the verticle piece with 1x3 furring strips. These serve a dual purpose of tying the sides together, and providing support for the shelf. (you may have
noticed the odd colors of things. I had a bunch of scrap
plywood laying around from |
 more base section. |
Here I have the other side piece in
place and am putting the 2nd shelf in. The plywood is set on the furring strips then screwed in. Then I clamped the 1x2 furring strip across the front of the plywood and screwed the plywood to it. Then ran screws into it from the side to hold it in place. Repeated on the back side of the shelf. Next I puttied the screw holes and sanded after it was dry. |
 complete the bottom |
Basically the same step for the top of
the base. Only difference, is the top sits on top of the side pieces (and the furring strips) Putty and sand. |
 prime |
Prime |
 paint and finish |
Paint Then add the last back piece. Not shown are the 2 furring strips I added to the back for extra support on the tileboard. Didn't want the thin material bowing from the weight of the spray cans pressing against it. So I ran furring strips from top to bottom. |
| Overall, the project isn't hard. Can
be done with just a handfull of tools. Circular saw, drill, tape measure, level, square. screws, paint, primer, and paint brush/roller 1 - 2x4 treated 6 - 1x6 2 - 1x2 furring strips 1 - 1x3 furring strip (2 more optional for back support) 1 sheet 3/4" plywood for base 1 sheet of something for the back If you worked at it
steady you could probably get it done in a weekend. |
|