My
Prehistoric Scenes |
|
| The Cave | |
| Go BACK to the map page | |
| Finished in 2002 then redone in 2006 |
|
 |
 |
 |
 |
 |
 |
 |
 |
 |
 |
 |
 |
 |
 |
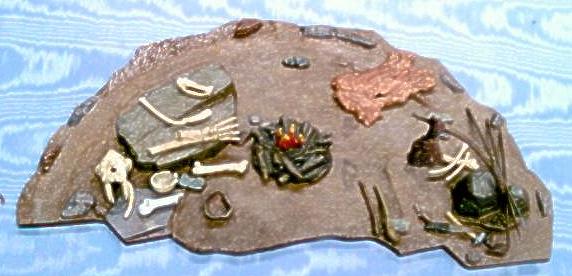
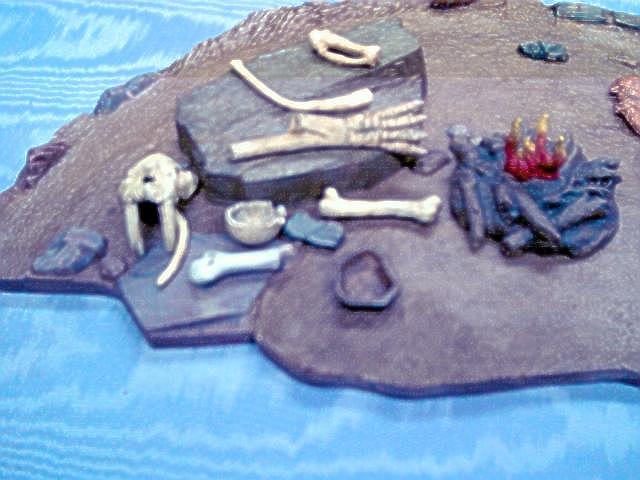
| This kit was actually tougher to do
than I thought it would be. I figured, not much
assembly to do, a little painting and I'm done. Boy was I
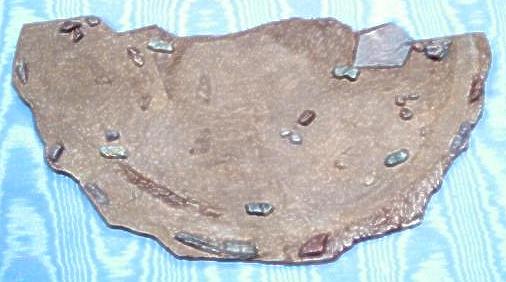
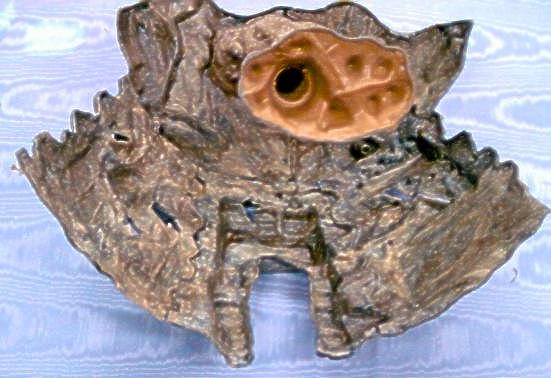
wrong. First, the base took me forever. Hopefully you can't tell, but the base is made up of 5 different parts. I don't even want to think about all the puttying, sanding, re-carving I did to it. It was all worth it though. I always think the seams can be better after I finish a job, but realistically I think this is as good as it gets. Unless of course, I covered the whole thing with a layer of putty and resculpted everything. The painting, while fun, was very time consuming. Doing multiple layers over such a large area, with clear coats between each, took a long time. That coupled with all the small parts that needed painted individually almost made the painting seem like work. The saving grace was that the colors fell together so well. After I got started and saw some of the results, I couldn't wait to see it done. The base was basecoated with a brown primer. Then I went over it with a really thin coat of light tan. Then I used some brown antiquing gel over that (if you want to know more about antiquing get, read the armored dinosaur reveiw). Then it really came together. I highlighted different things with greys, blacks, tans, and browns, then tied it all together with the antiquing gel again. The roof and walls of the cave were done in silver on the outside and black on the inside. The reason for that was because the parts I had were already painted when I got them. Originally I was going to lighten up the inside and go over the outside with a black wash. After I covered the inside with a thin ,almost a wash, coat of yellow ochre, I got the idea to do the outside with the same treatment. I think it came out well. Looks like there is a dust covering the rocks. Well, I decided
to do more work on this kit. |
|
 |
 |
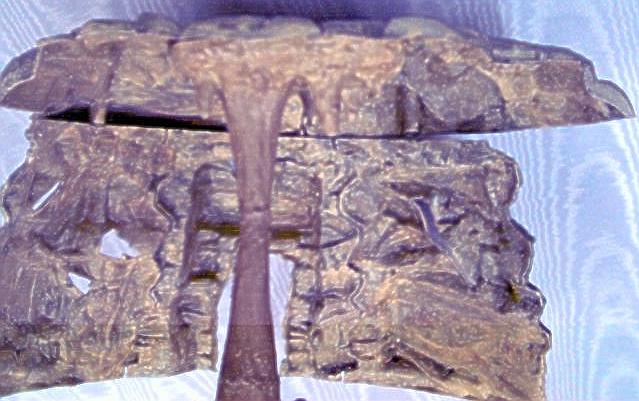
| As you can see in the pic
above, the gaps were huge. The two pics on the right show where I put the putty. And let me tell you, I ended up using a whole lot of putty on this kit. At least a pound, probably closer to about 3 pounds! |
 |
 |
 |
 |
 |
 |
 |
 |
 |
 |
|