My
Prehistoric Scenes |
|
| Sailback Reptile | |
| Go BACK to the map page | |
| My
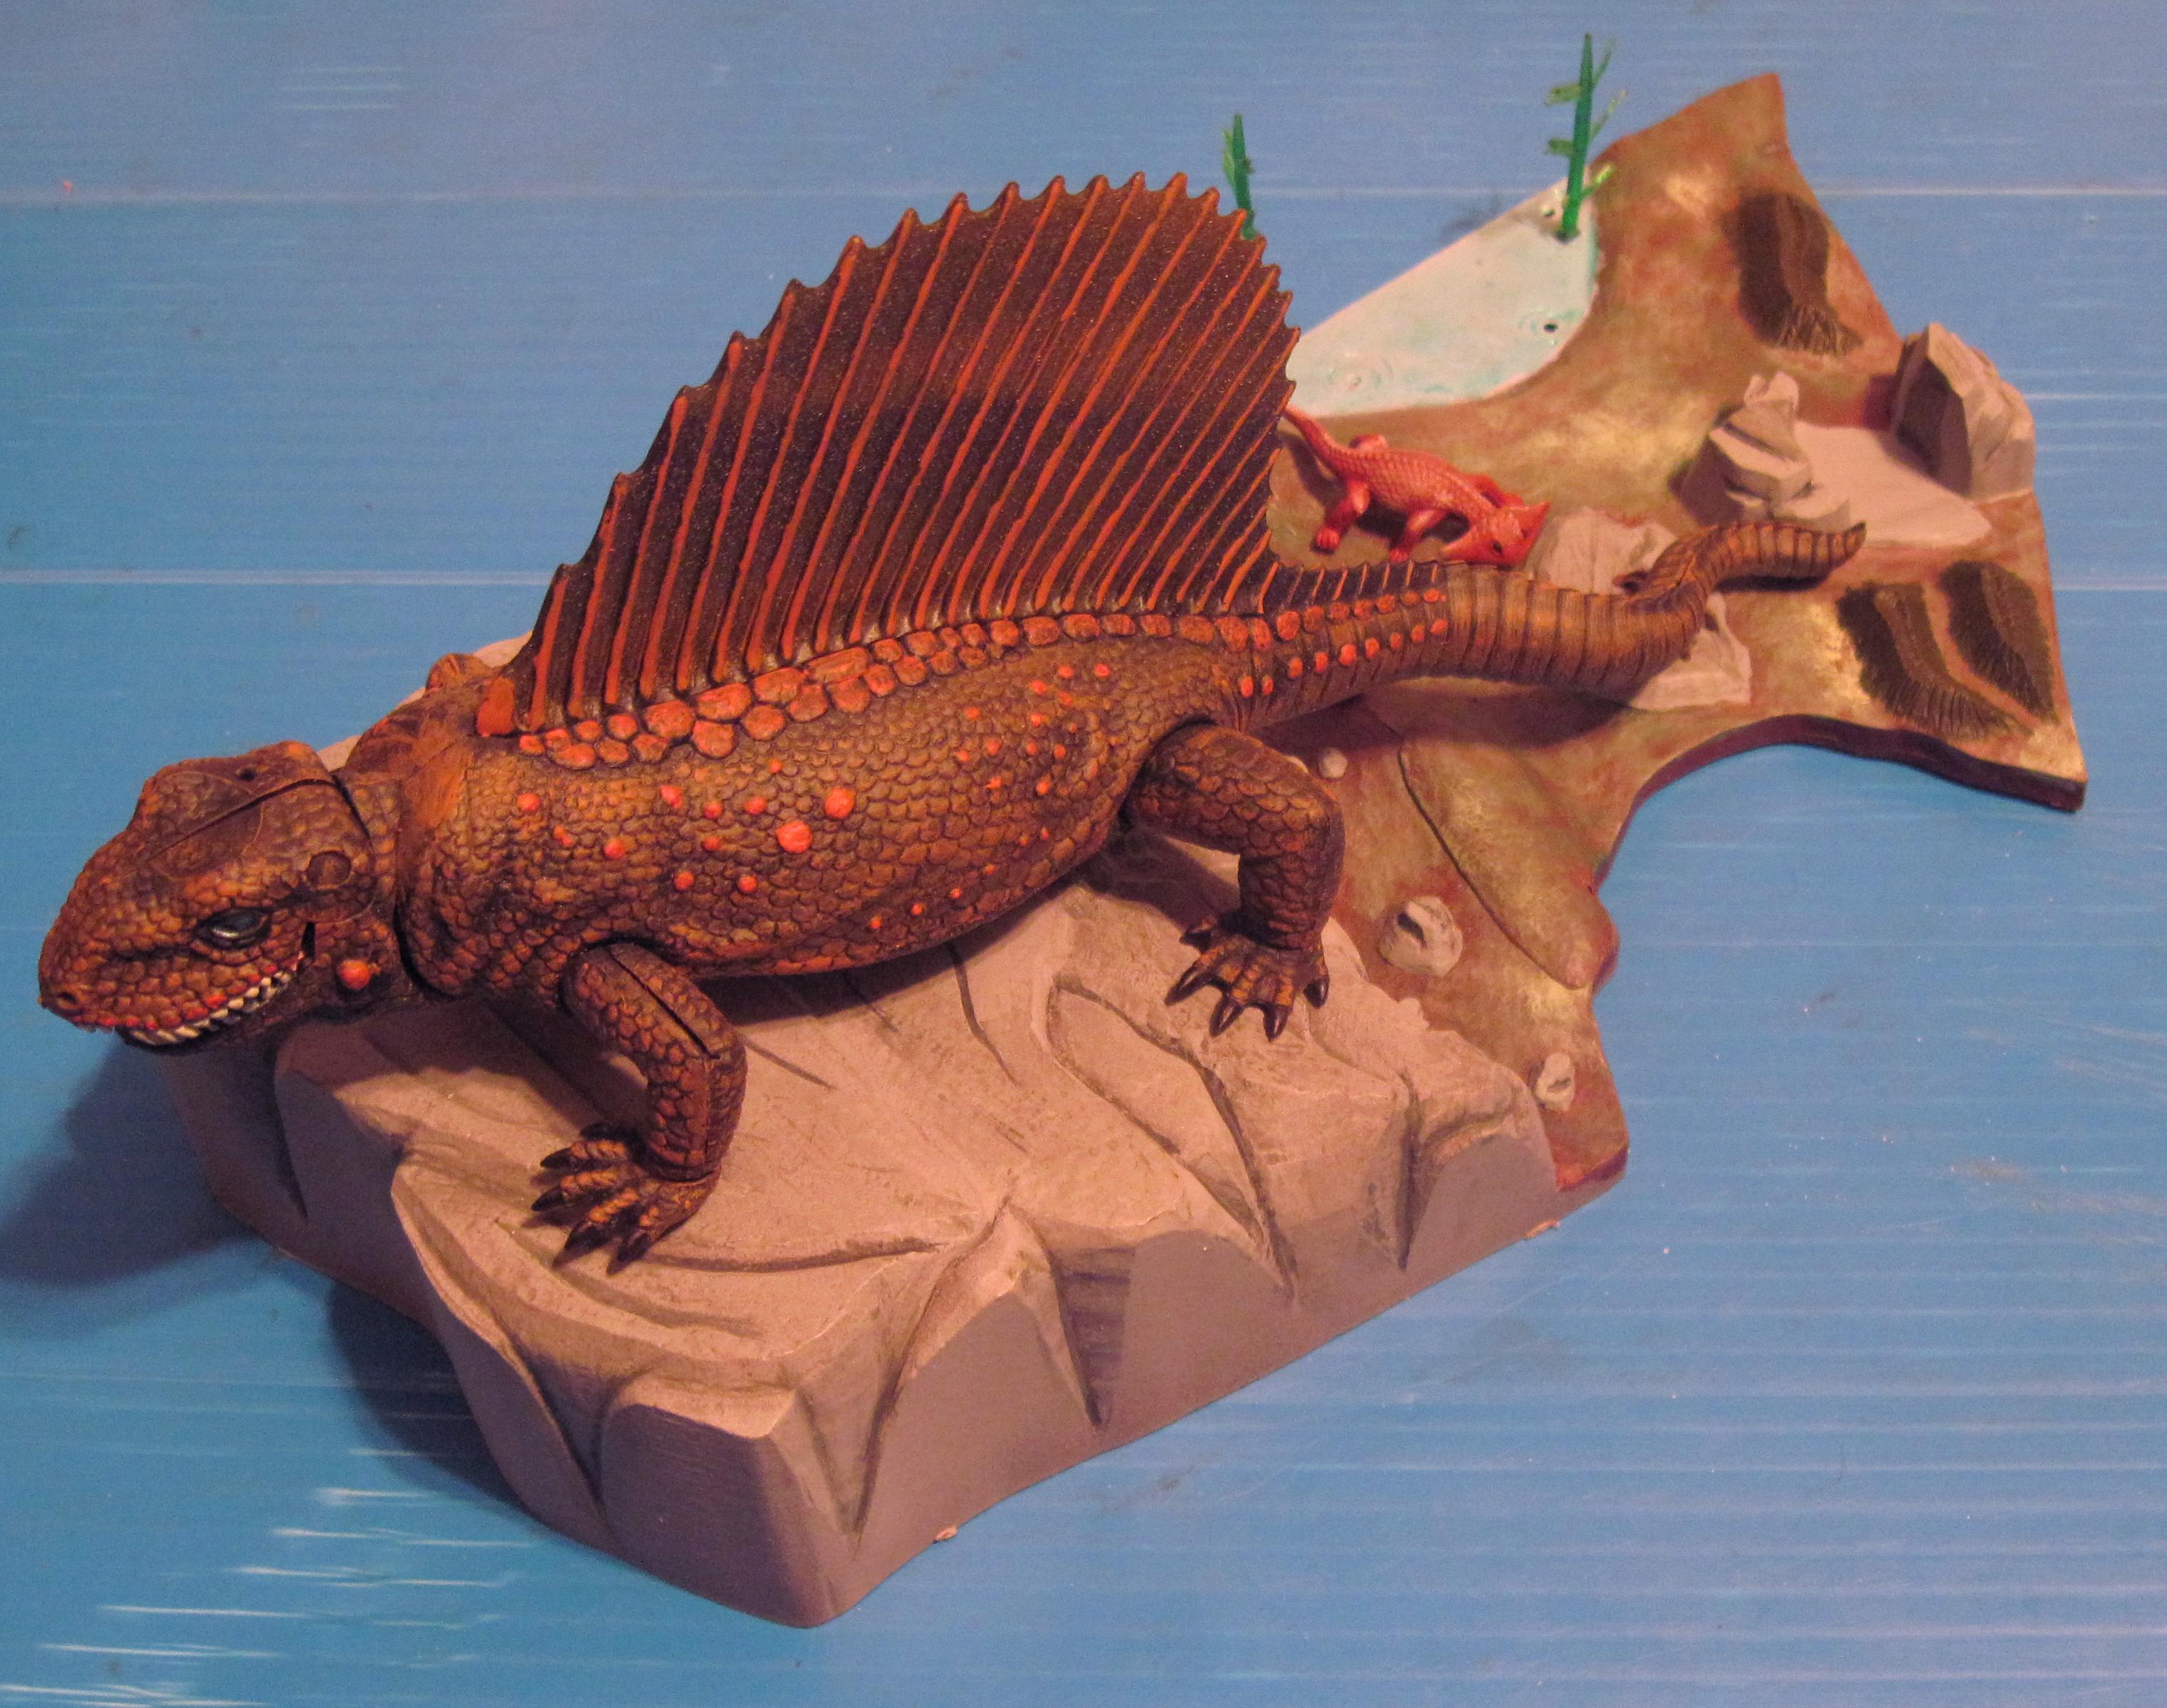
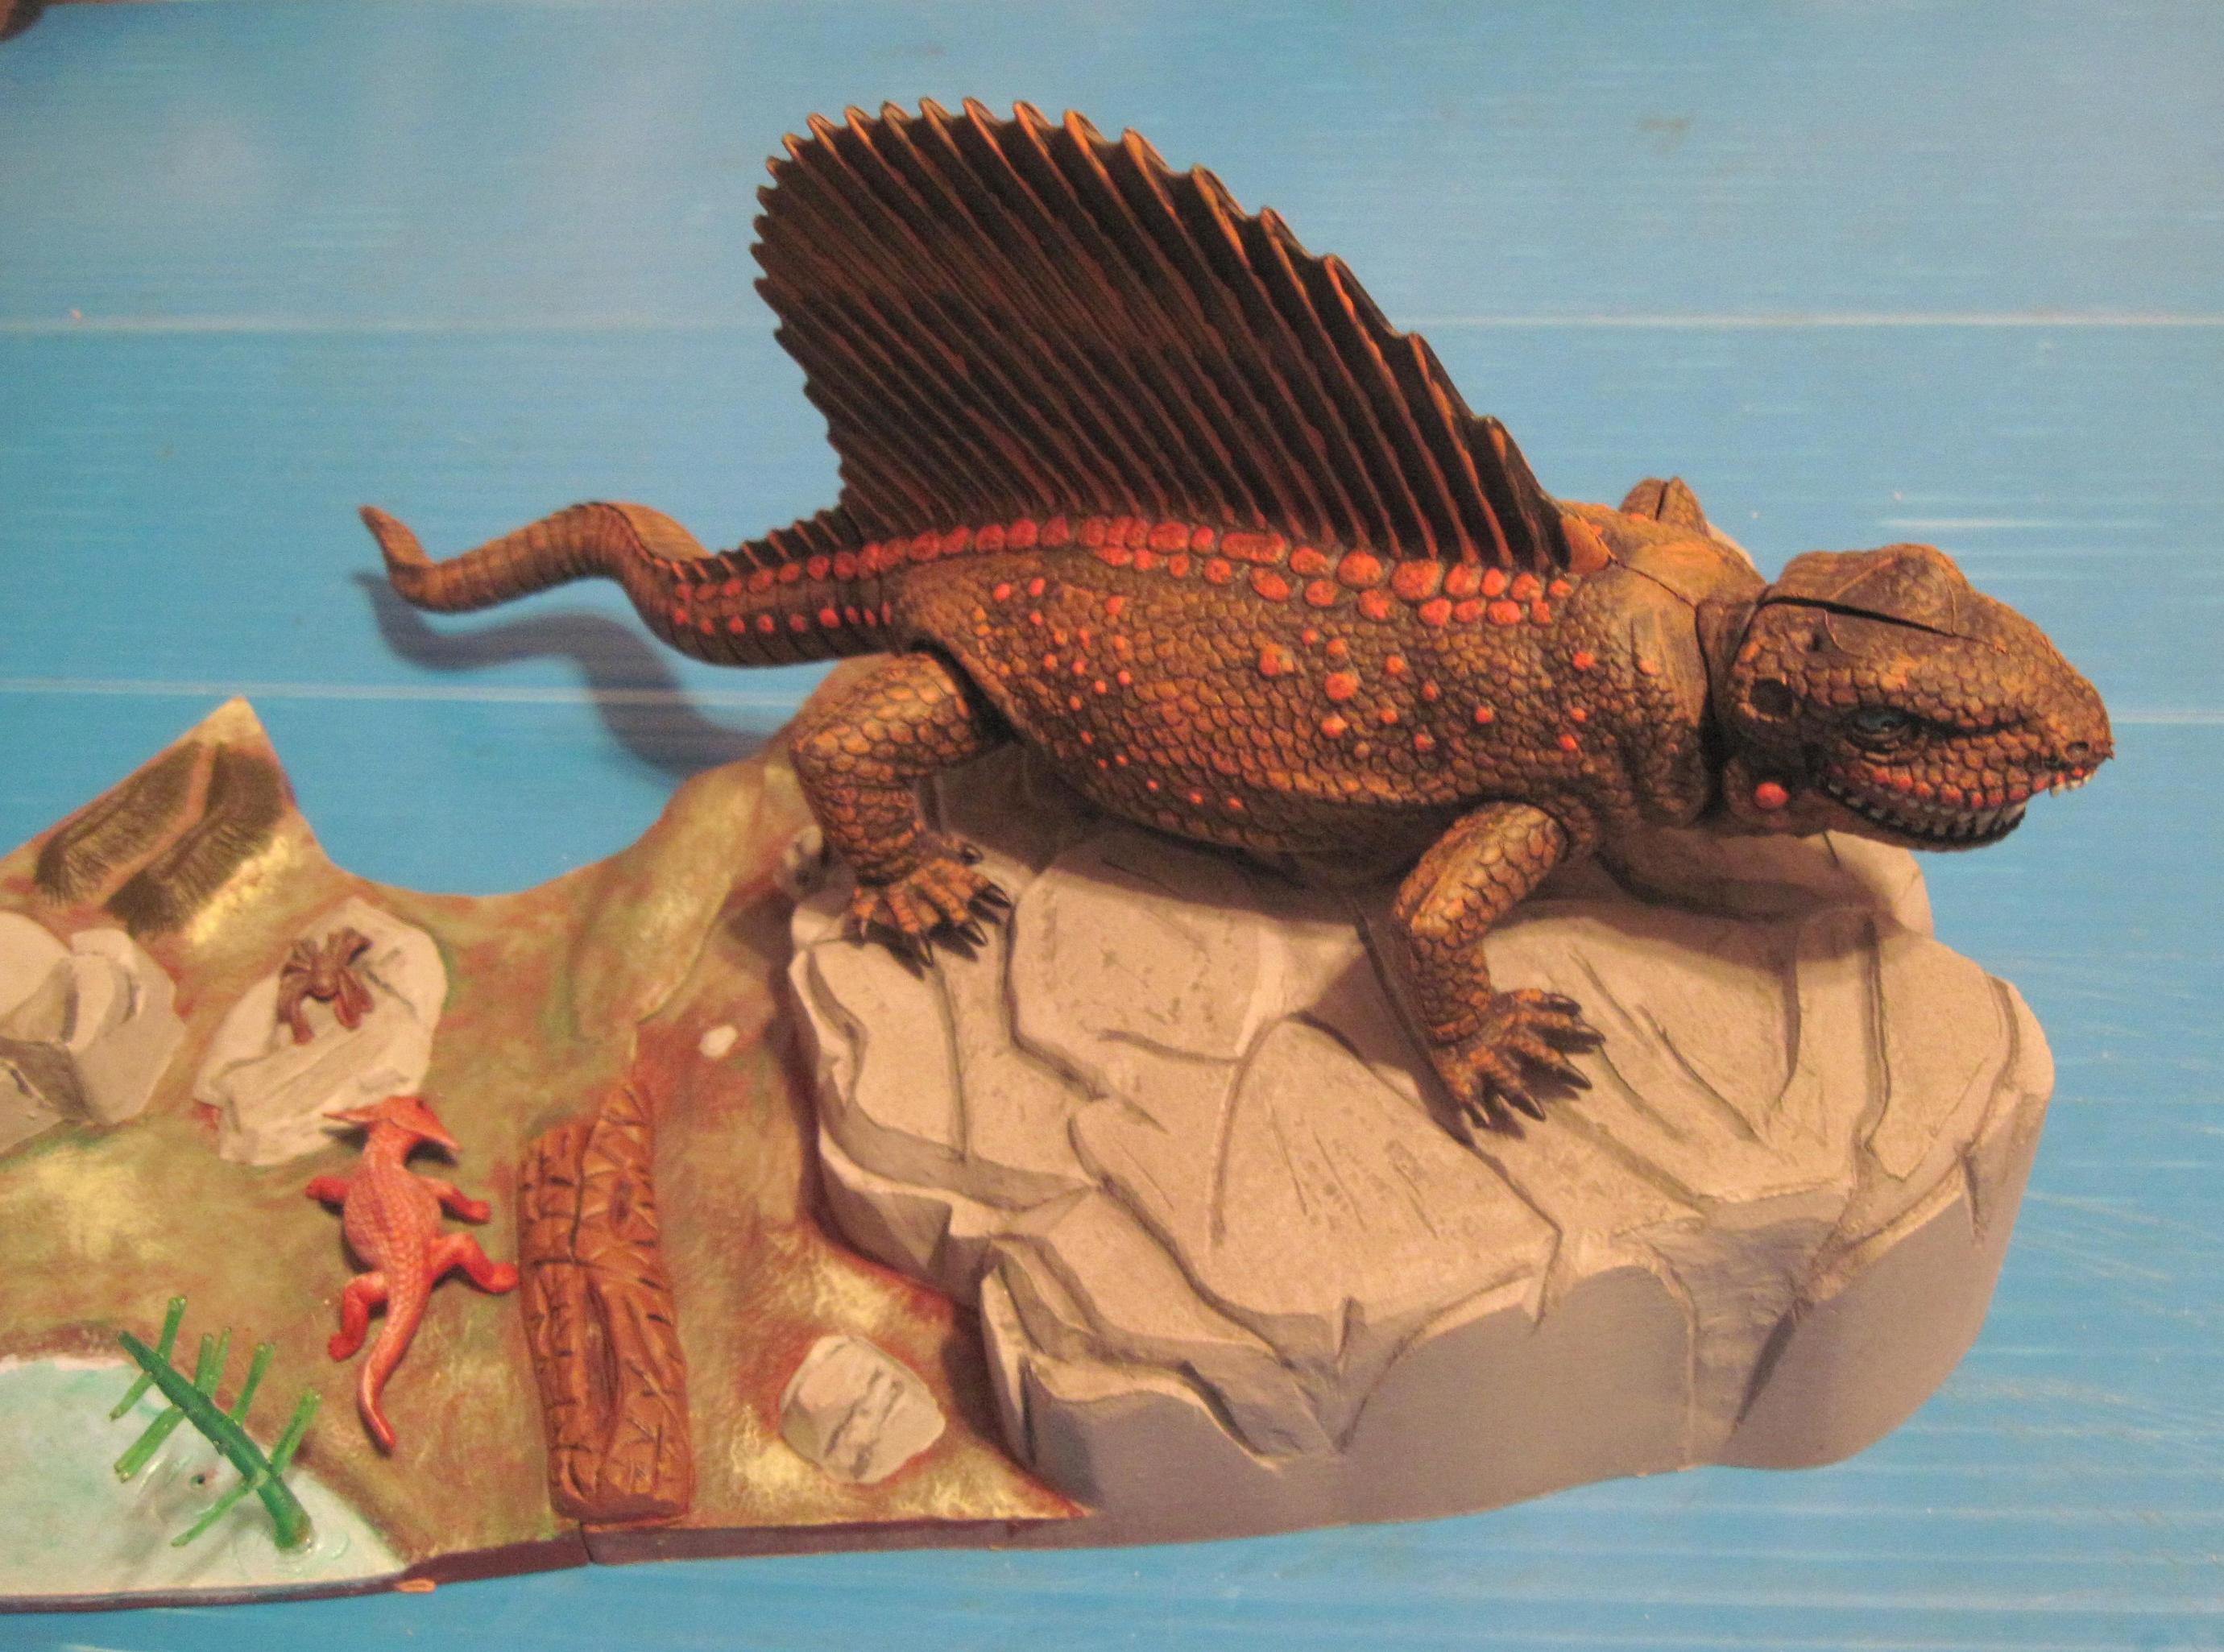
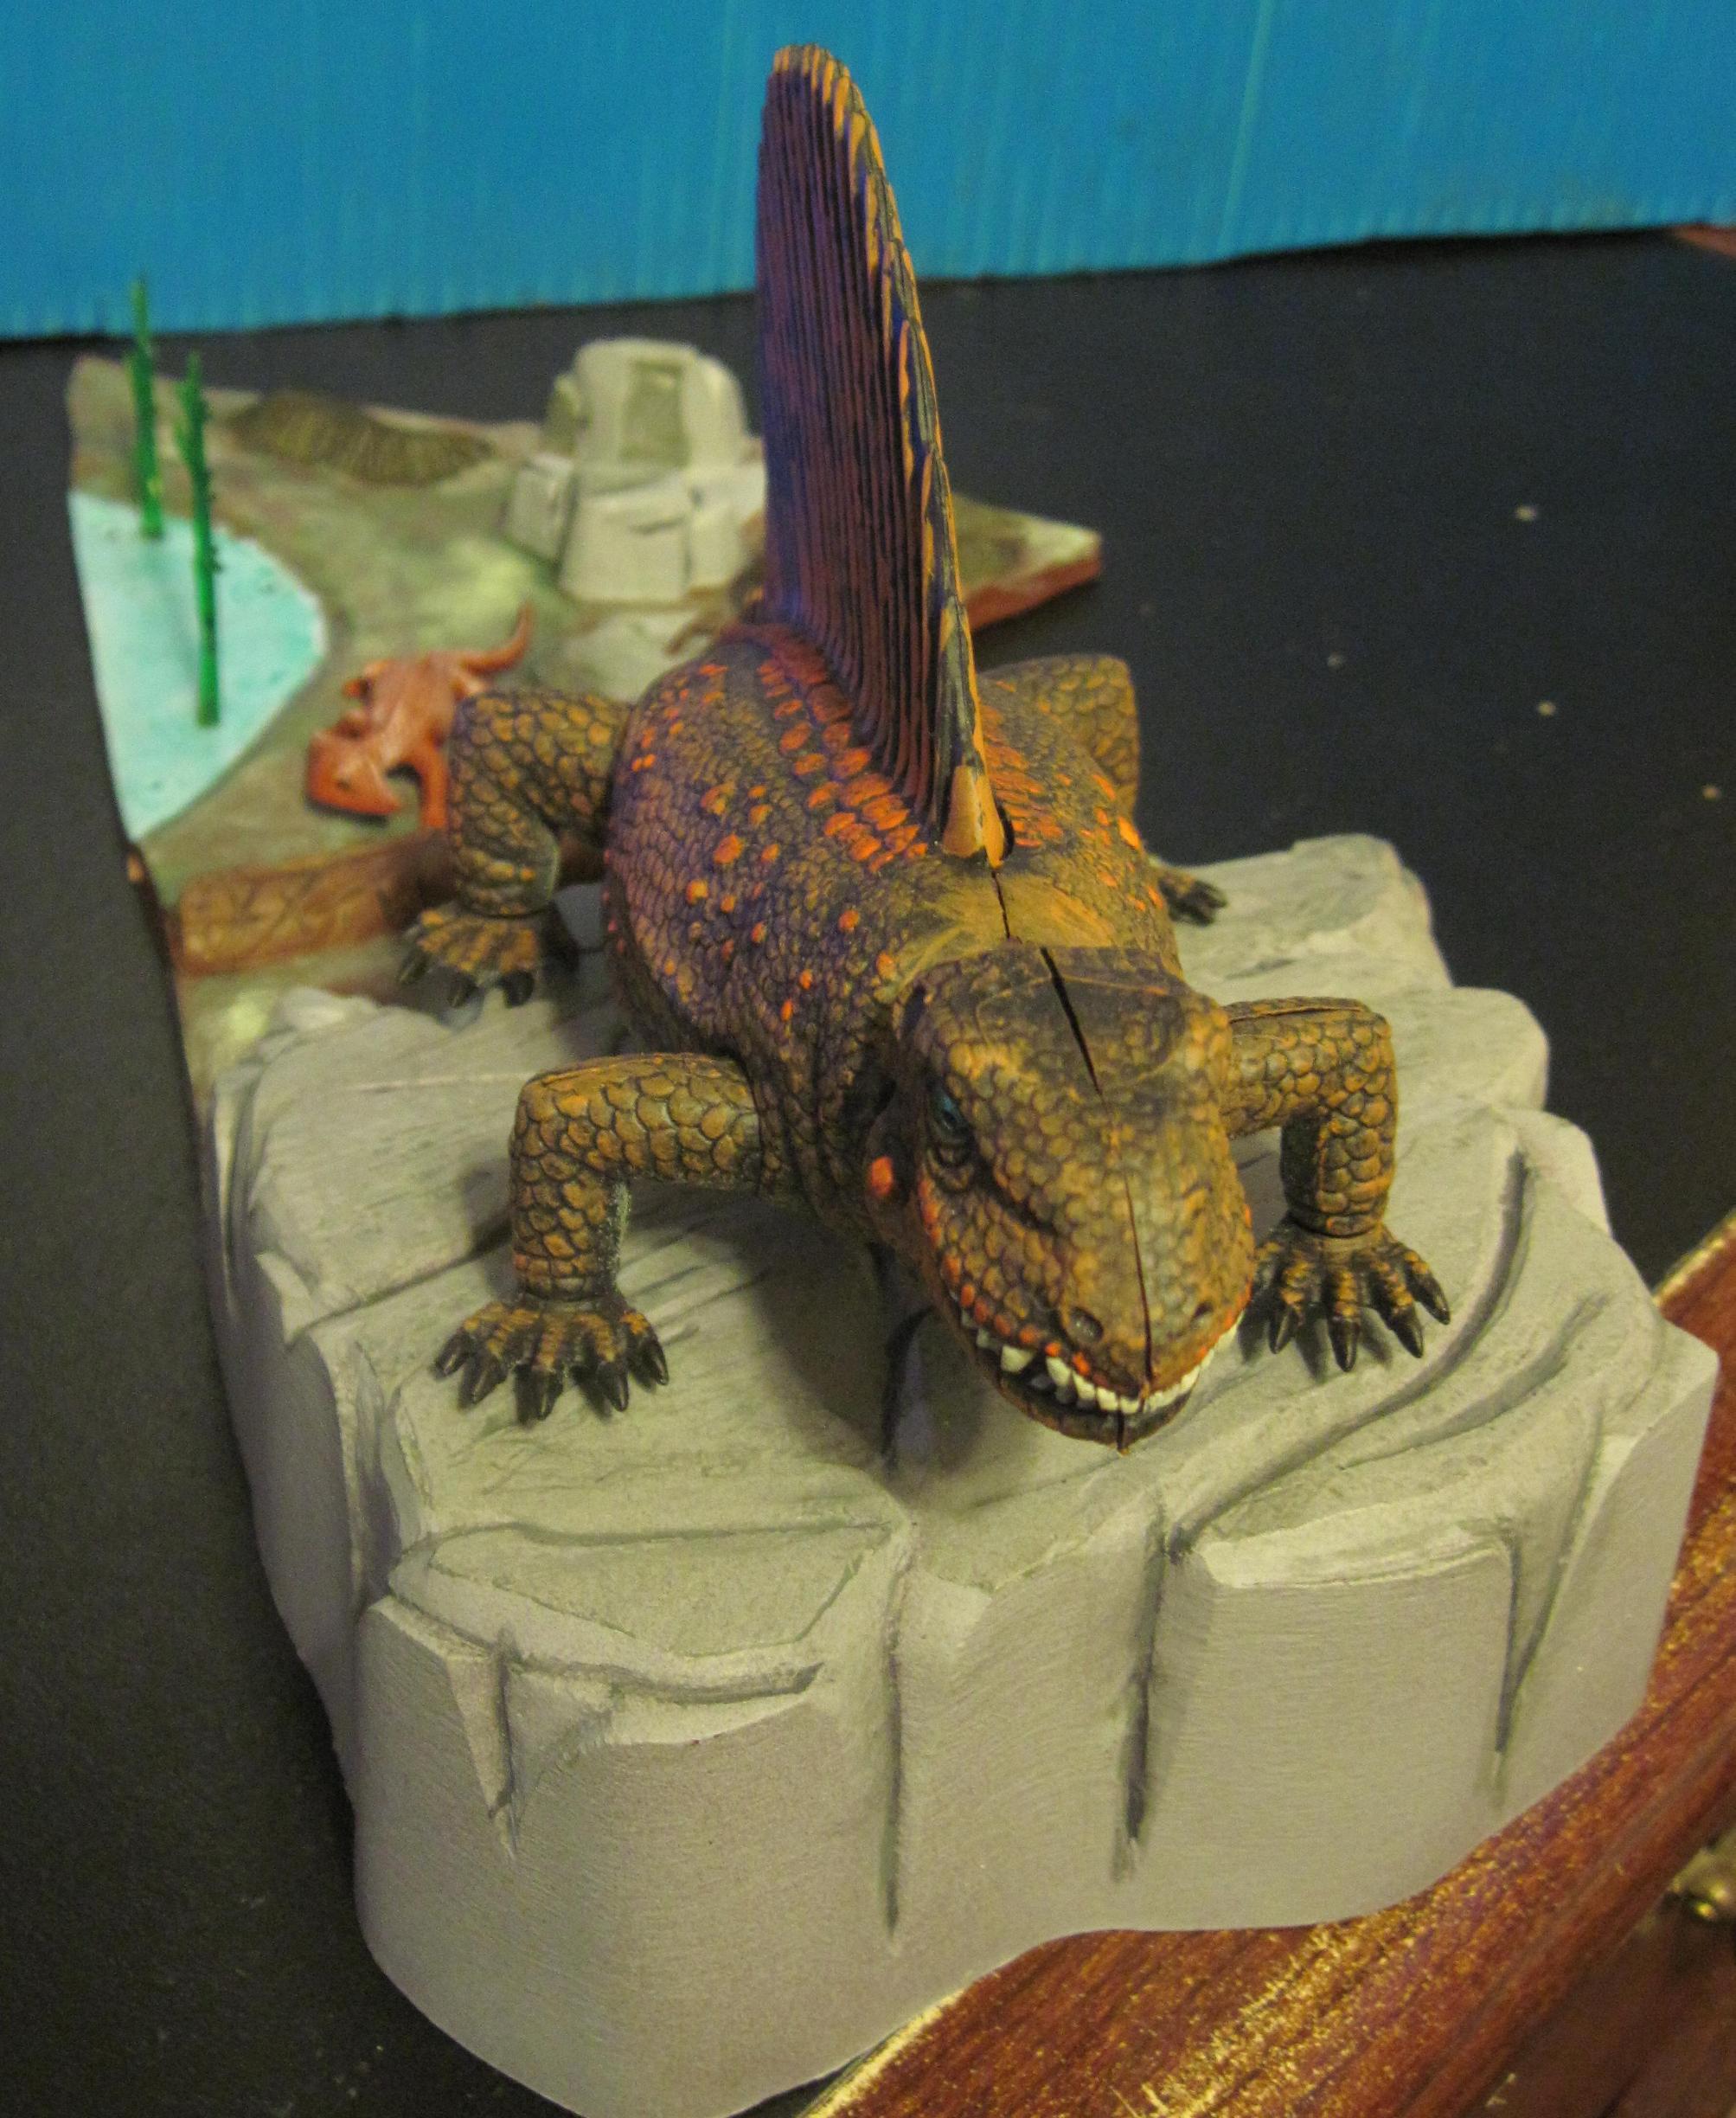
first take on the Sailback Reptile. (2011) Had a lot of fun with it, and was very pleased with how it turned out. |
|
 |
 |
 |
 |
 |
 |
 |
 |
 |
 |
 |
|
 |
 |
 |
 |
| Below I will show the WIP on this kit. | |
 |
|
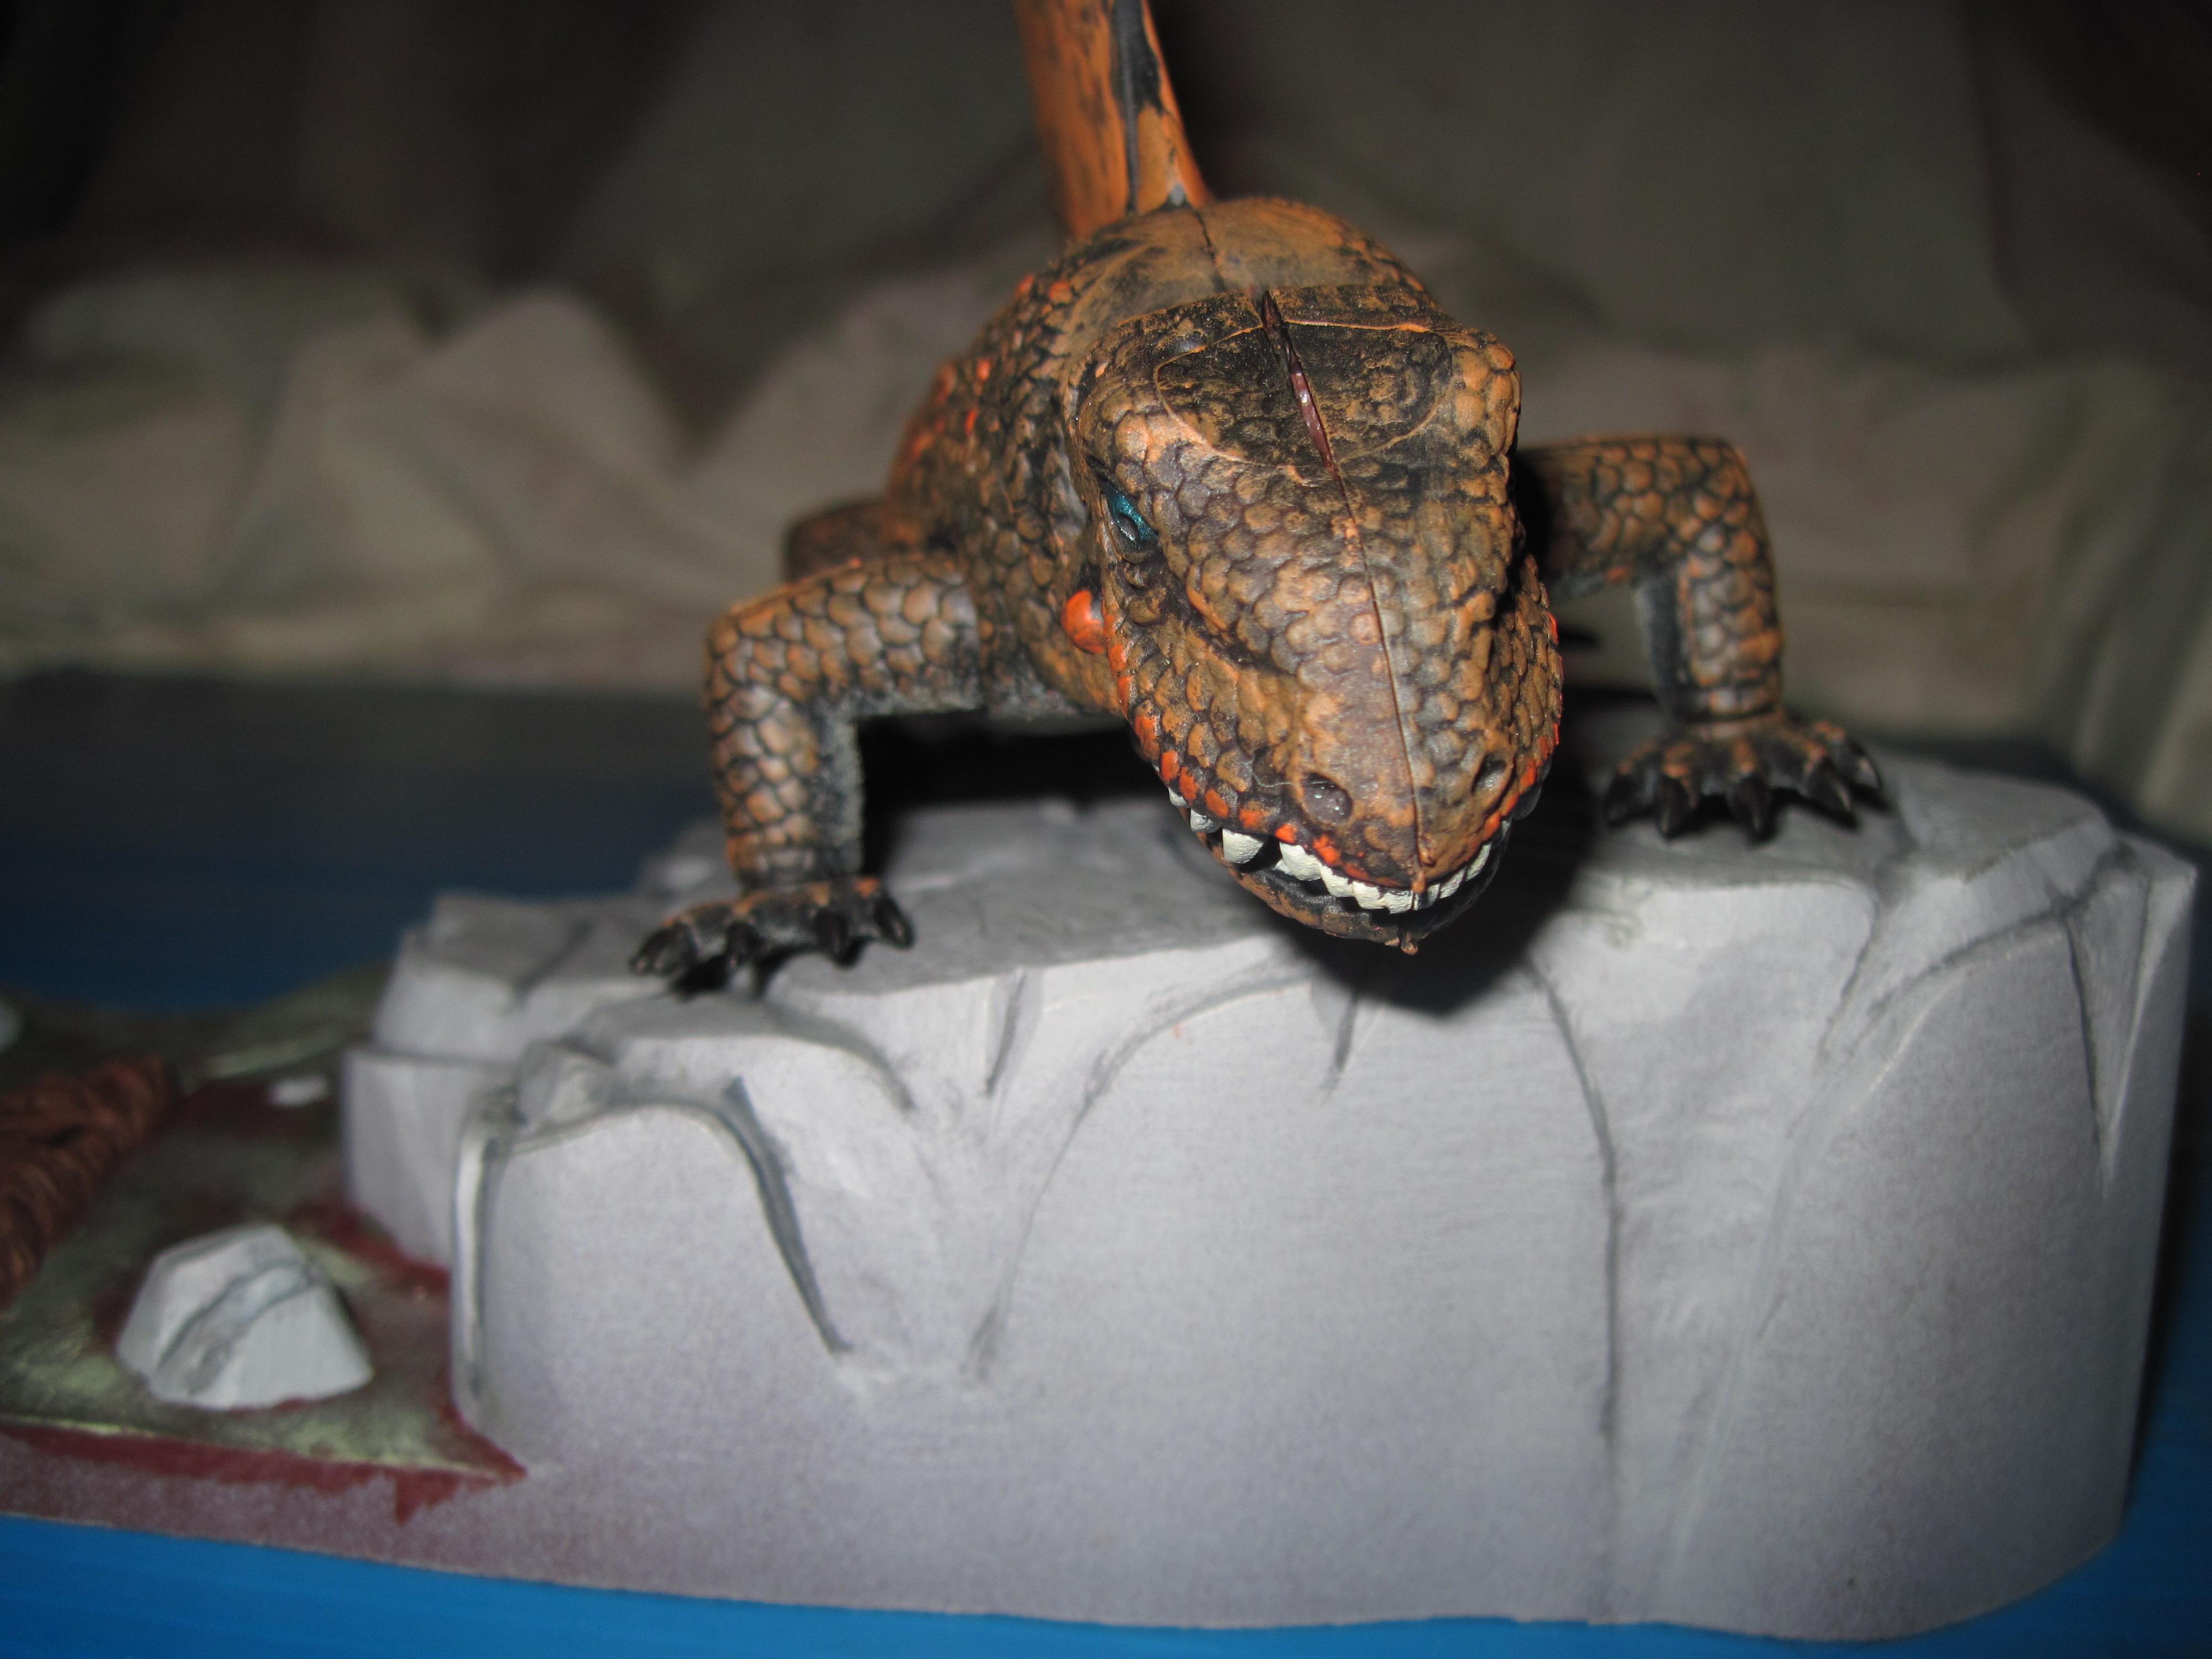
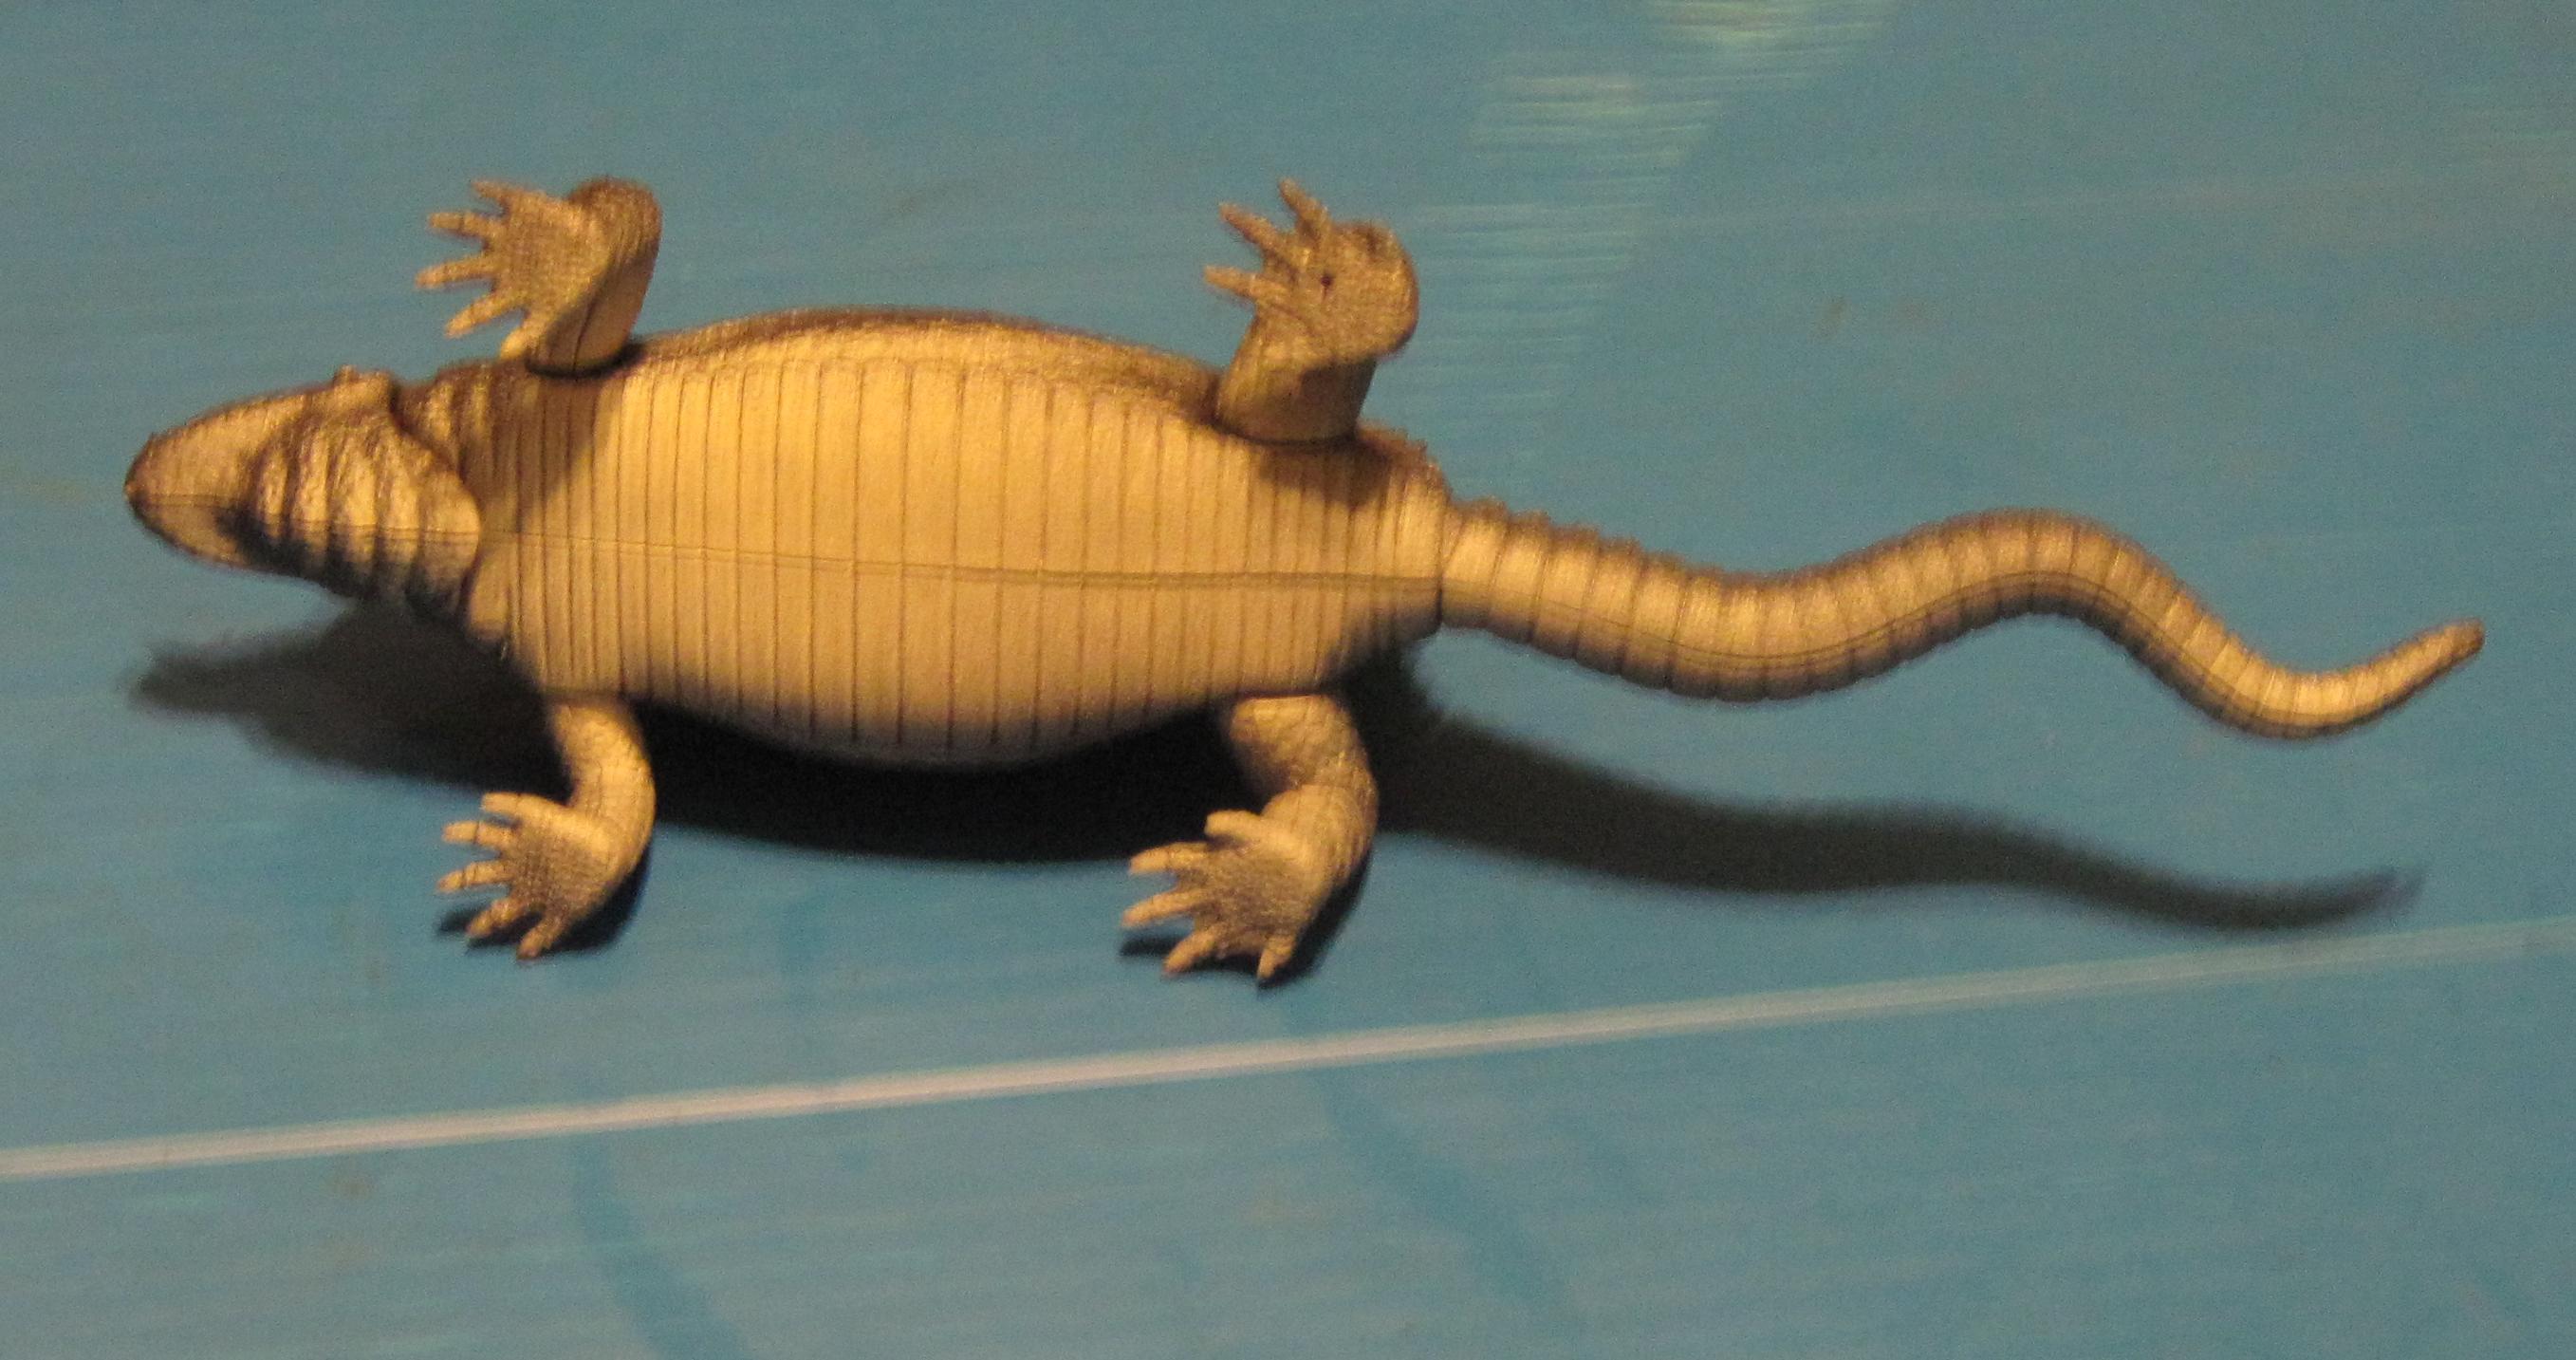
| I
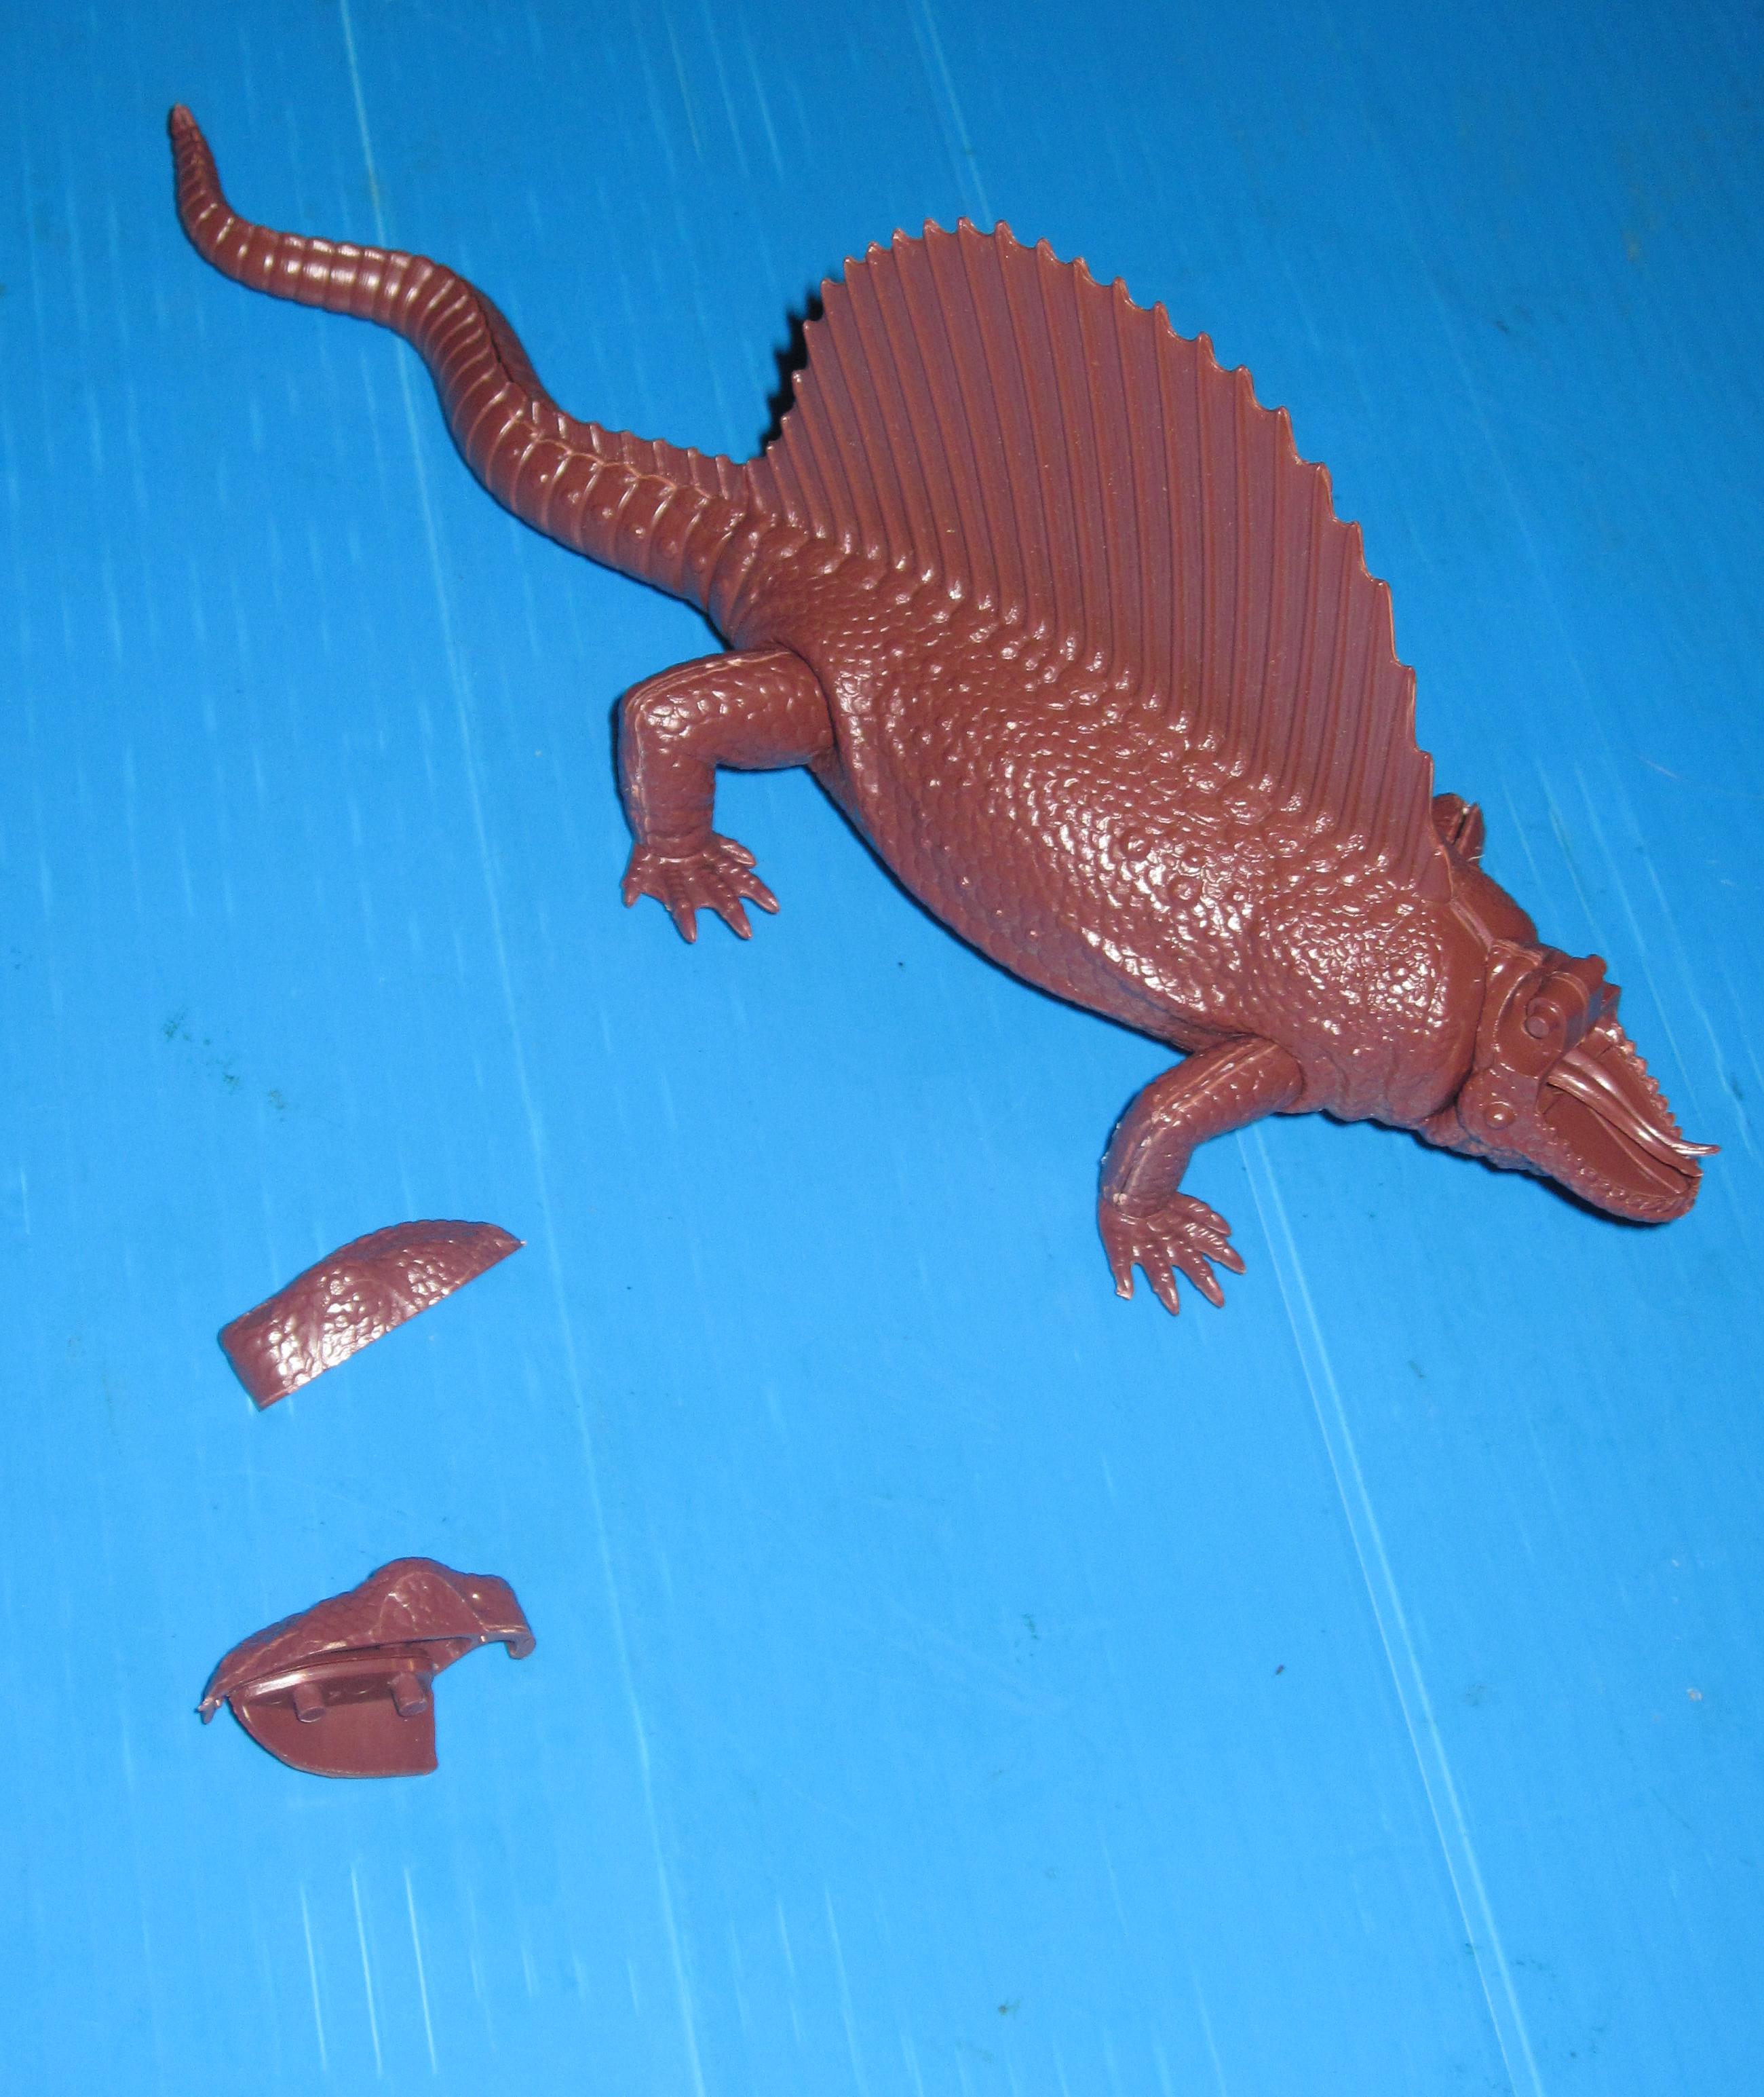
slapped the kit together real quick with no seam work
done to it. A real oddity for me as I usually obsess over the seams. But I was on a deadline and needed it in time for WF2011 for the PS display. The only glue used was on the legs. I needed to glue those together, as they kept wanting to come appart when stuck in the body. |
|
 |
 |
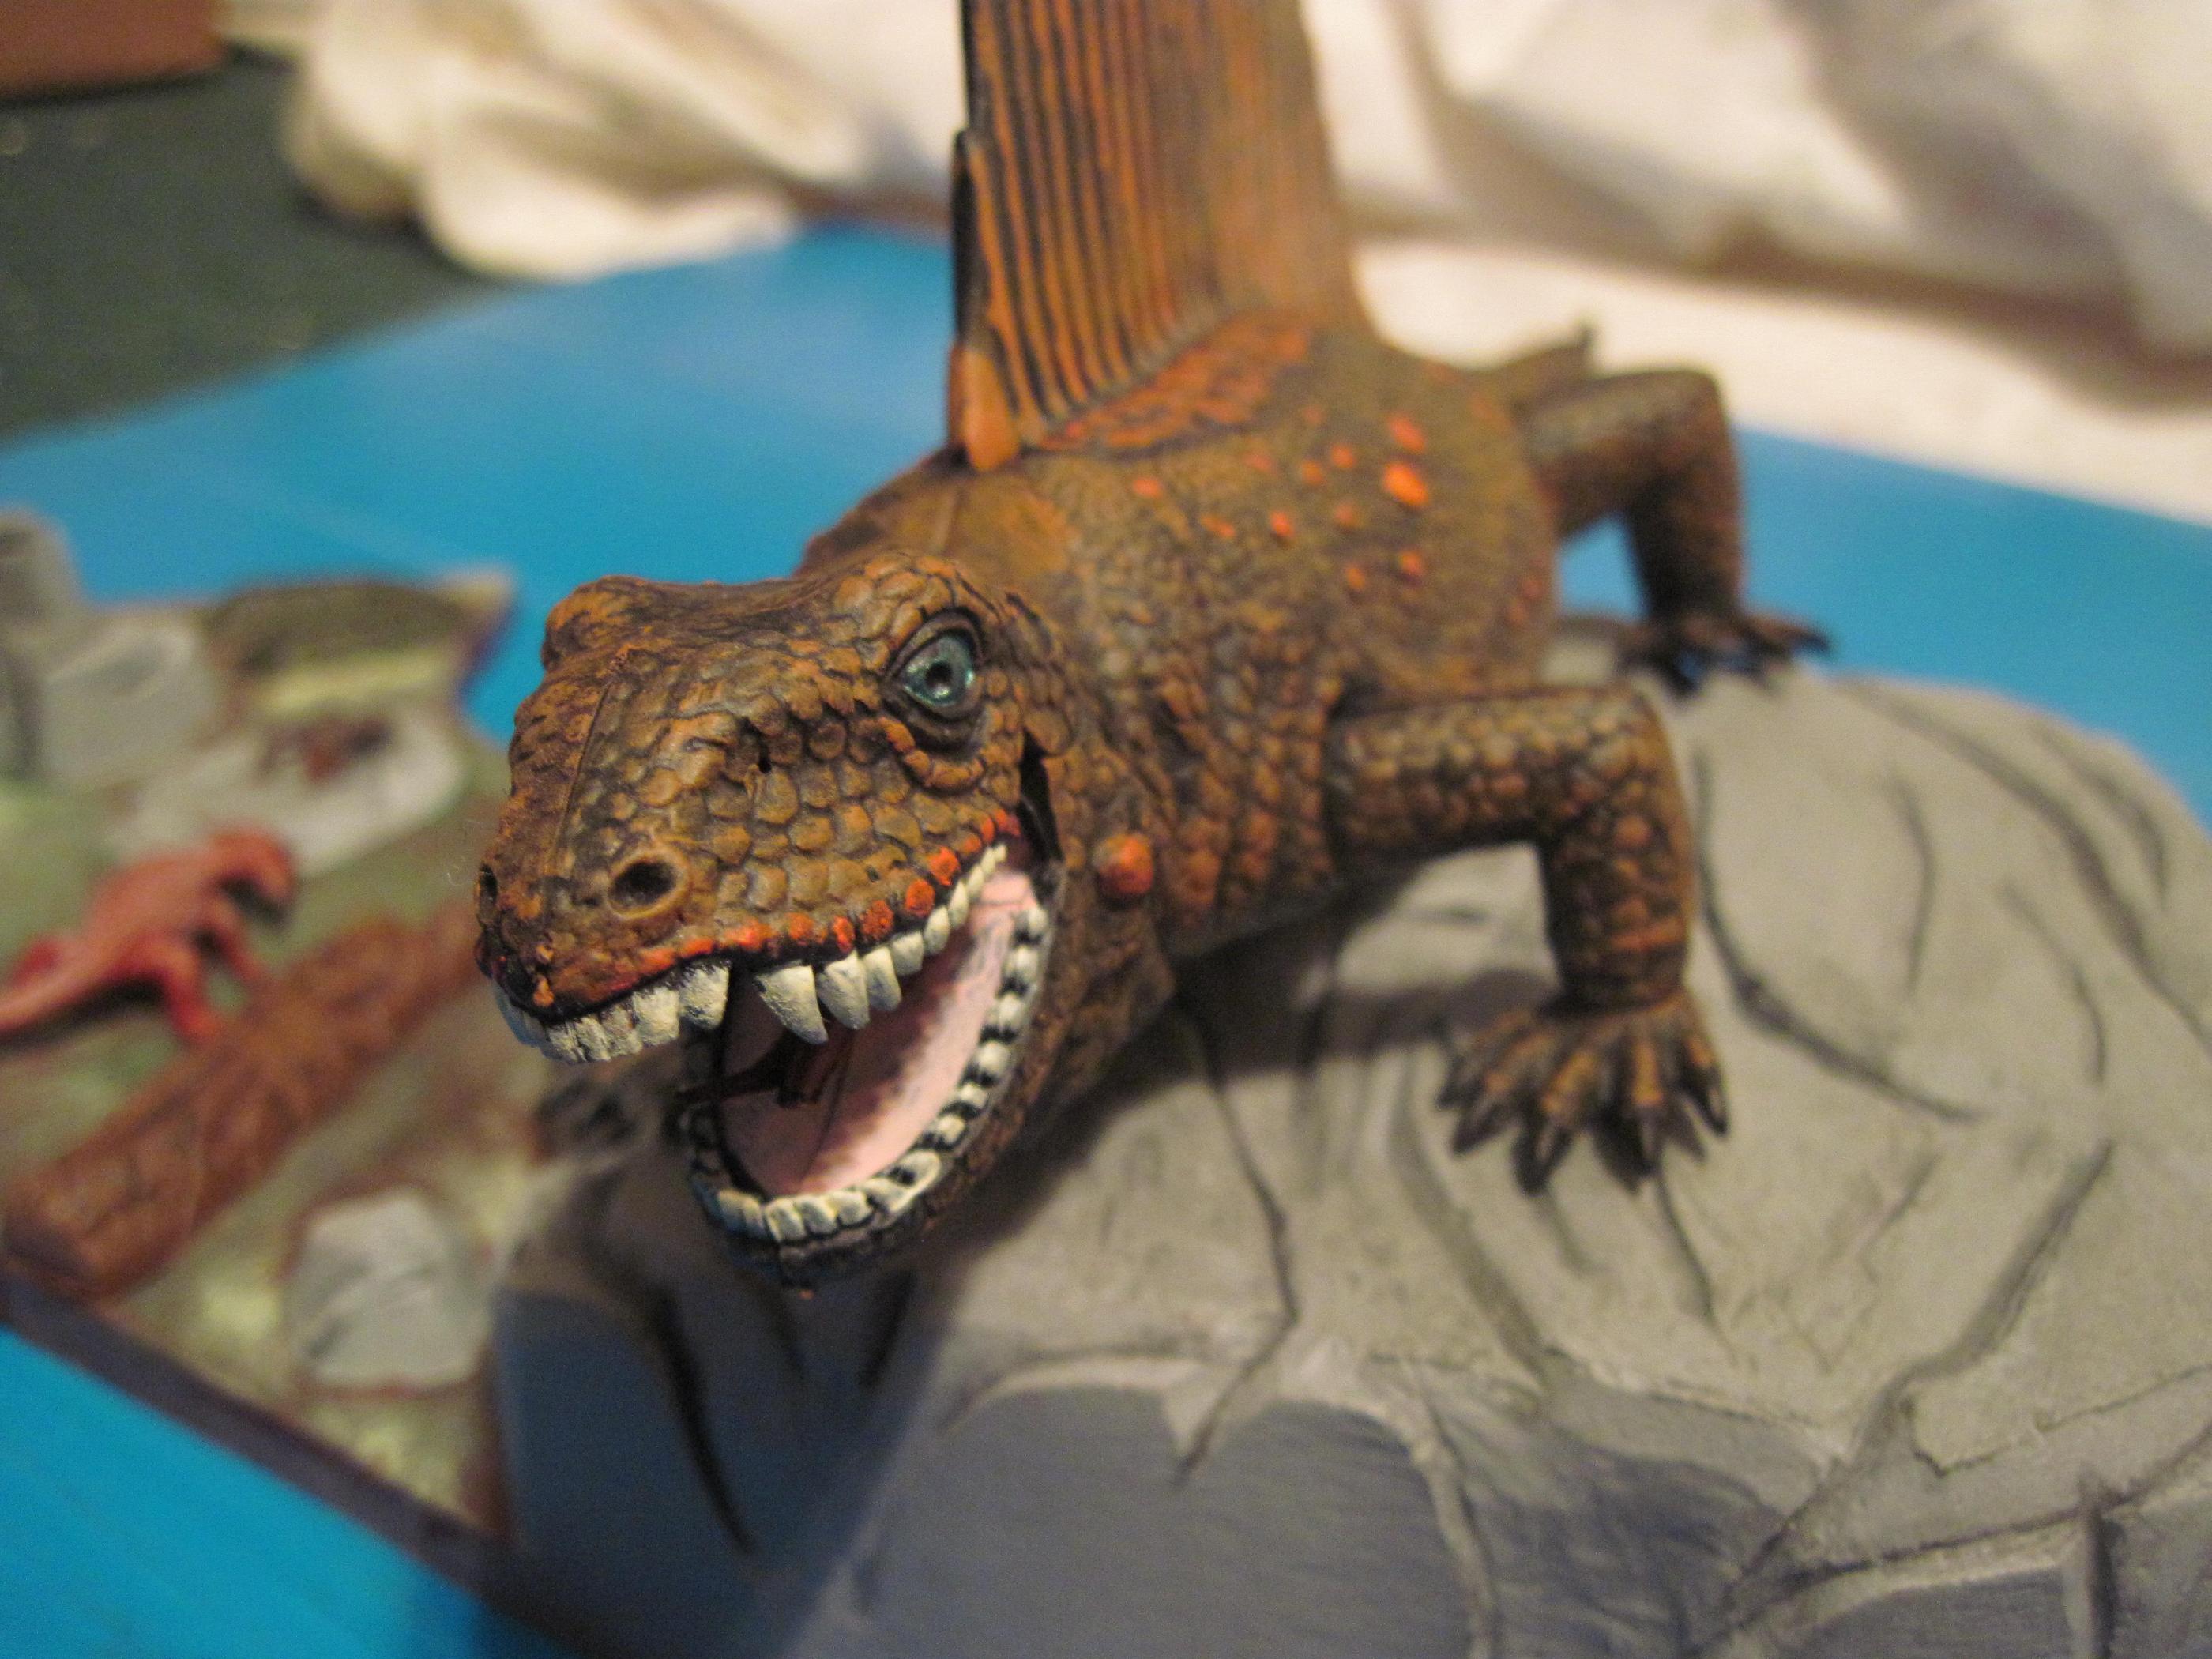
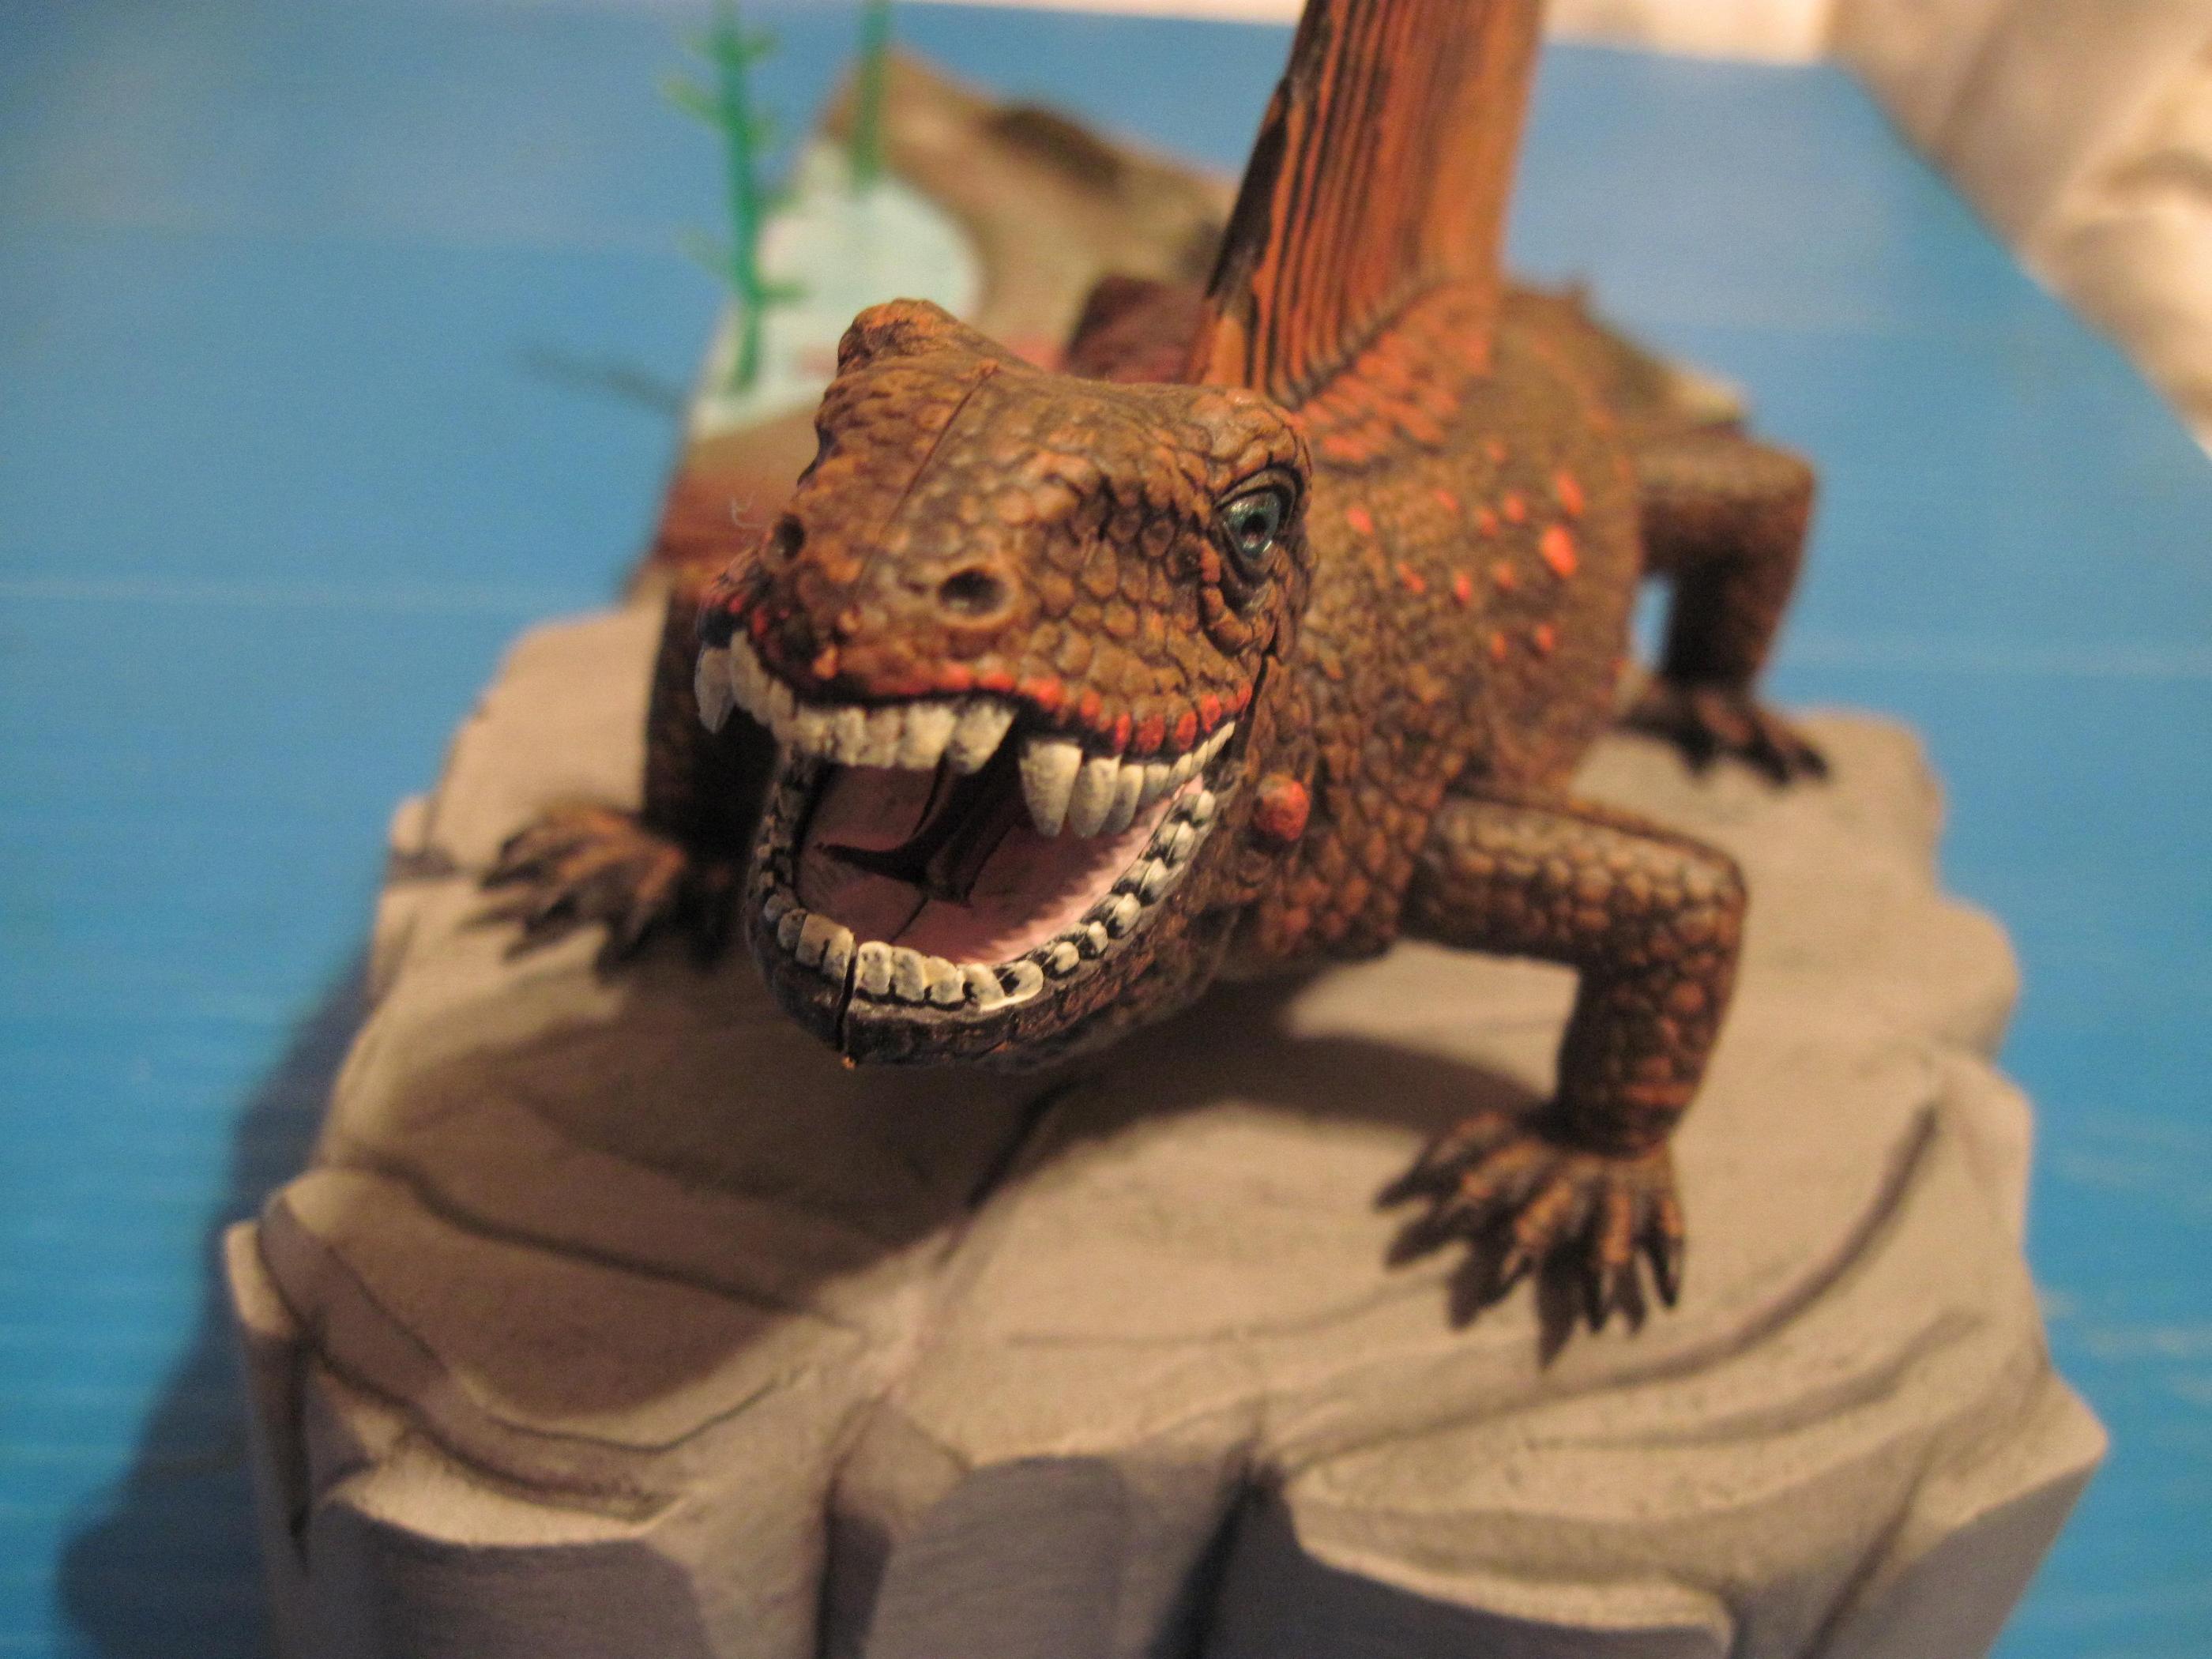
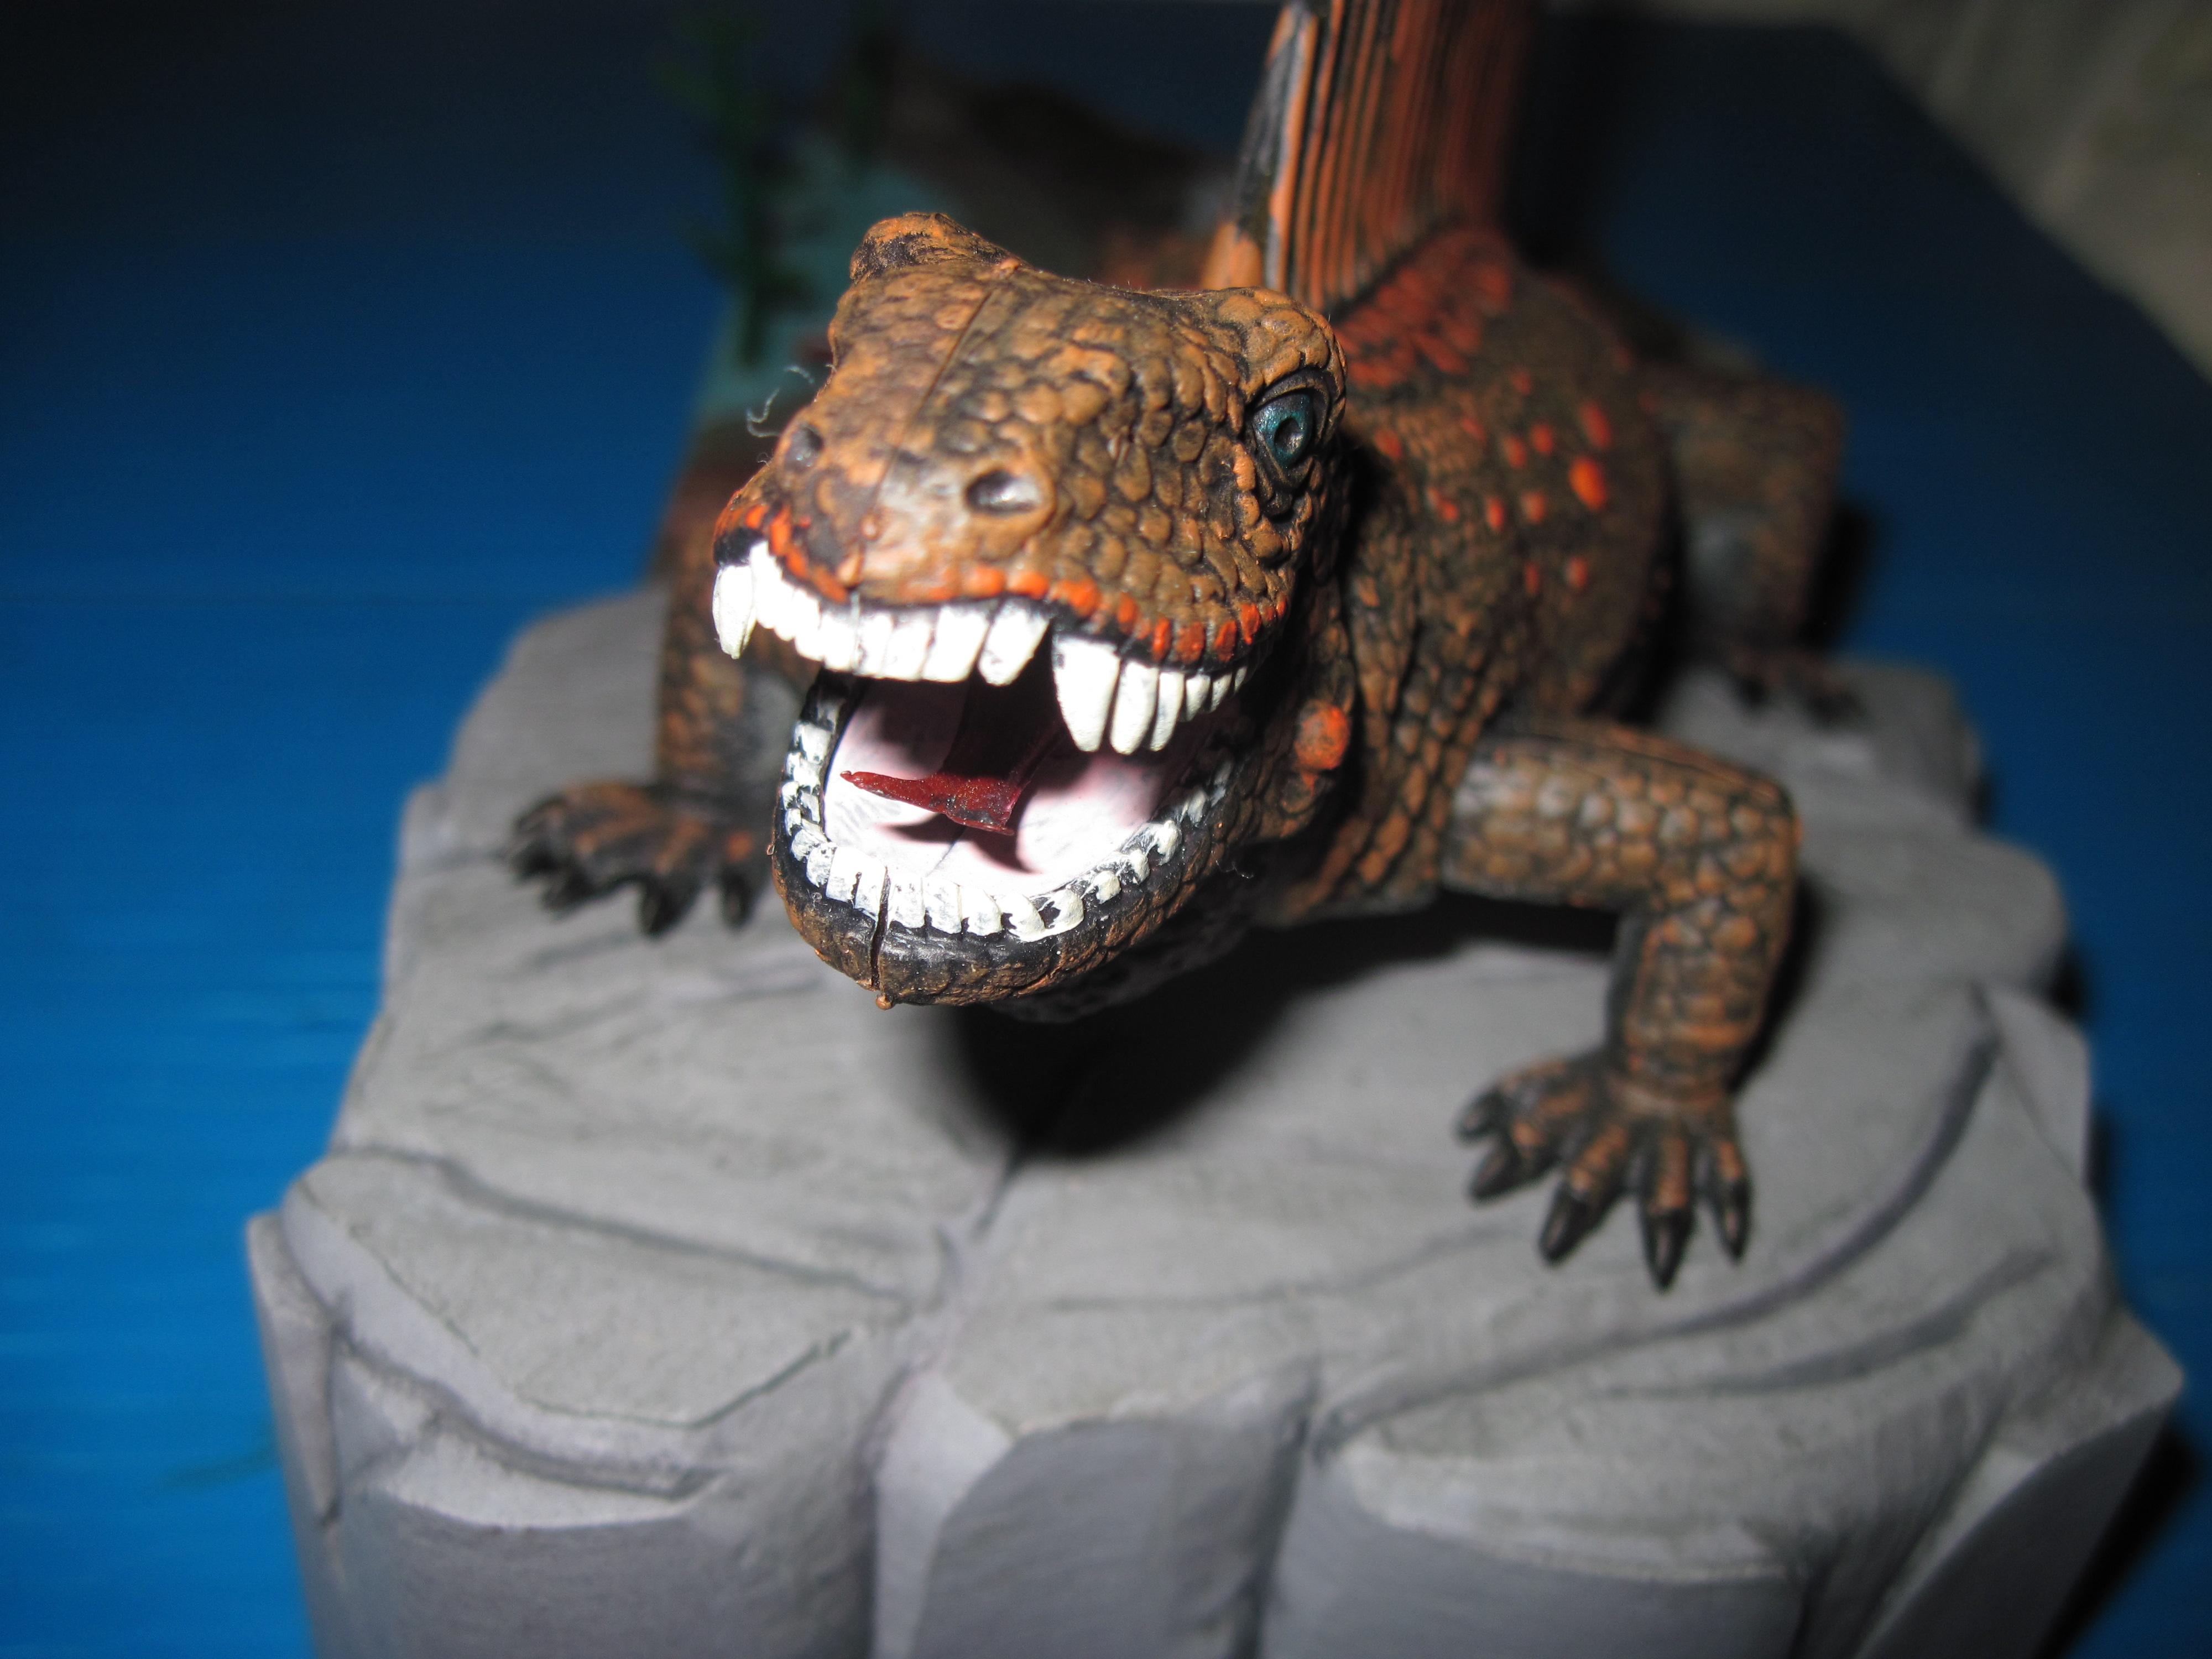
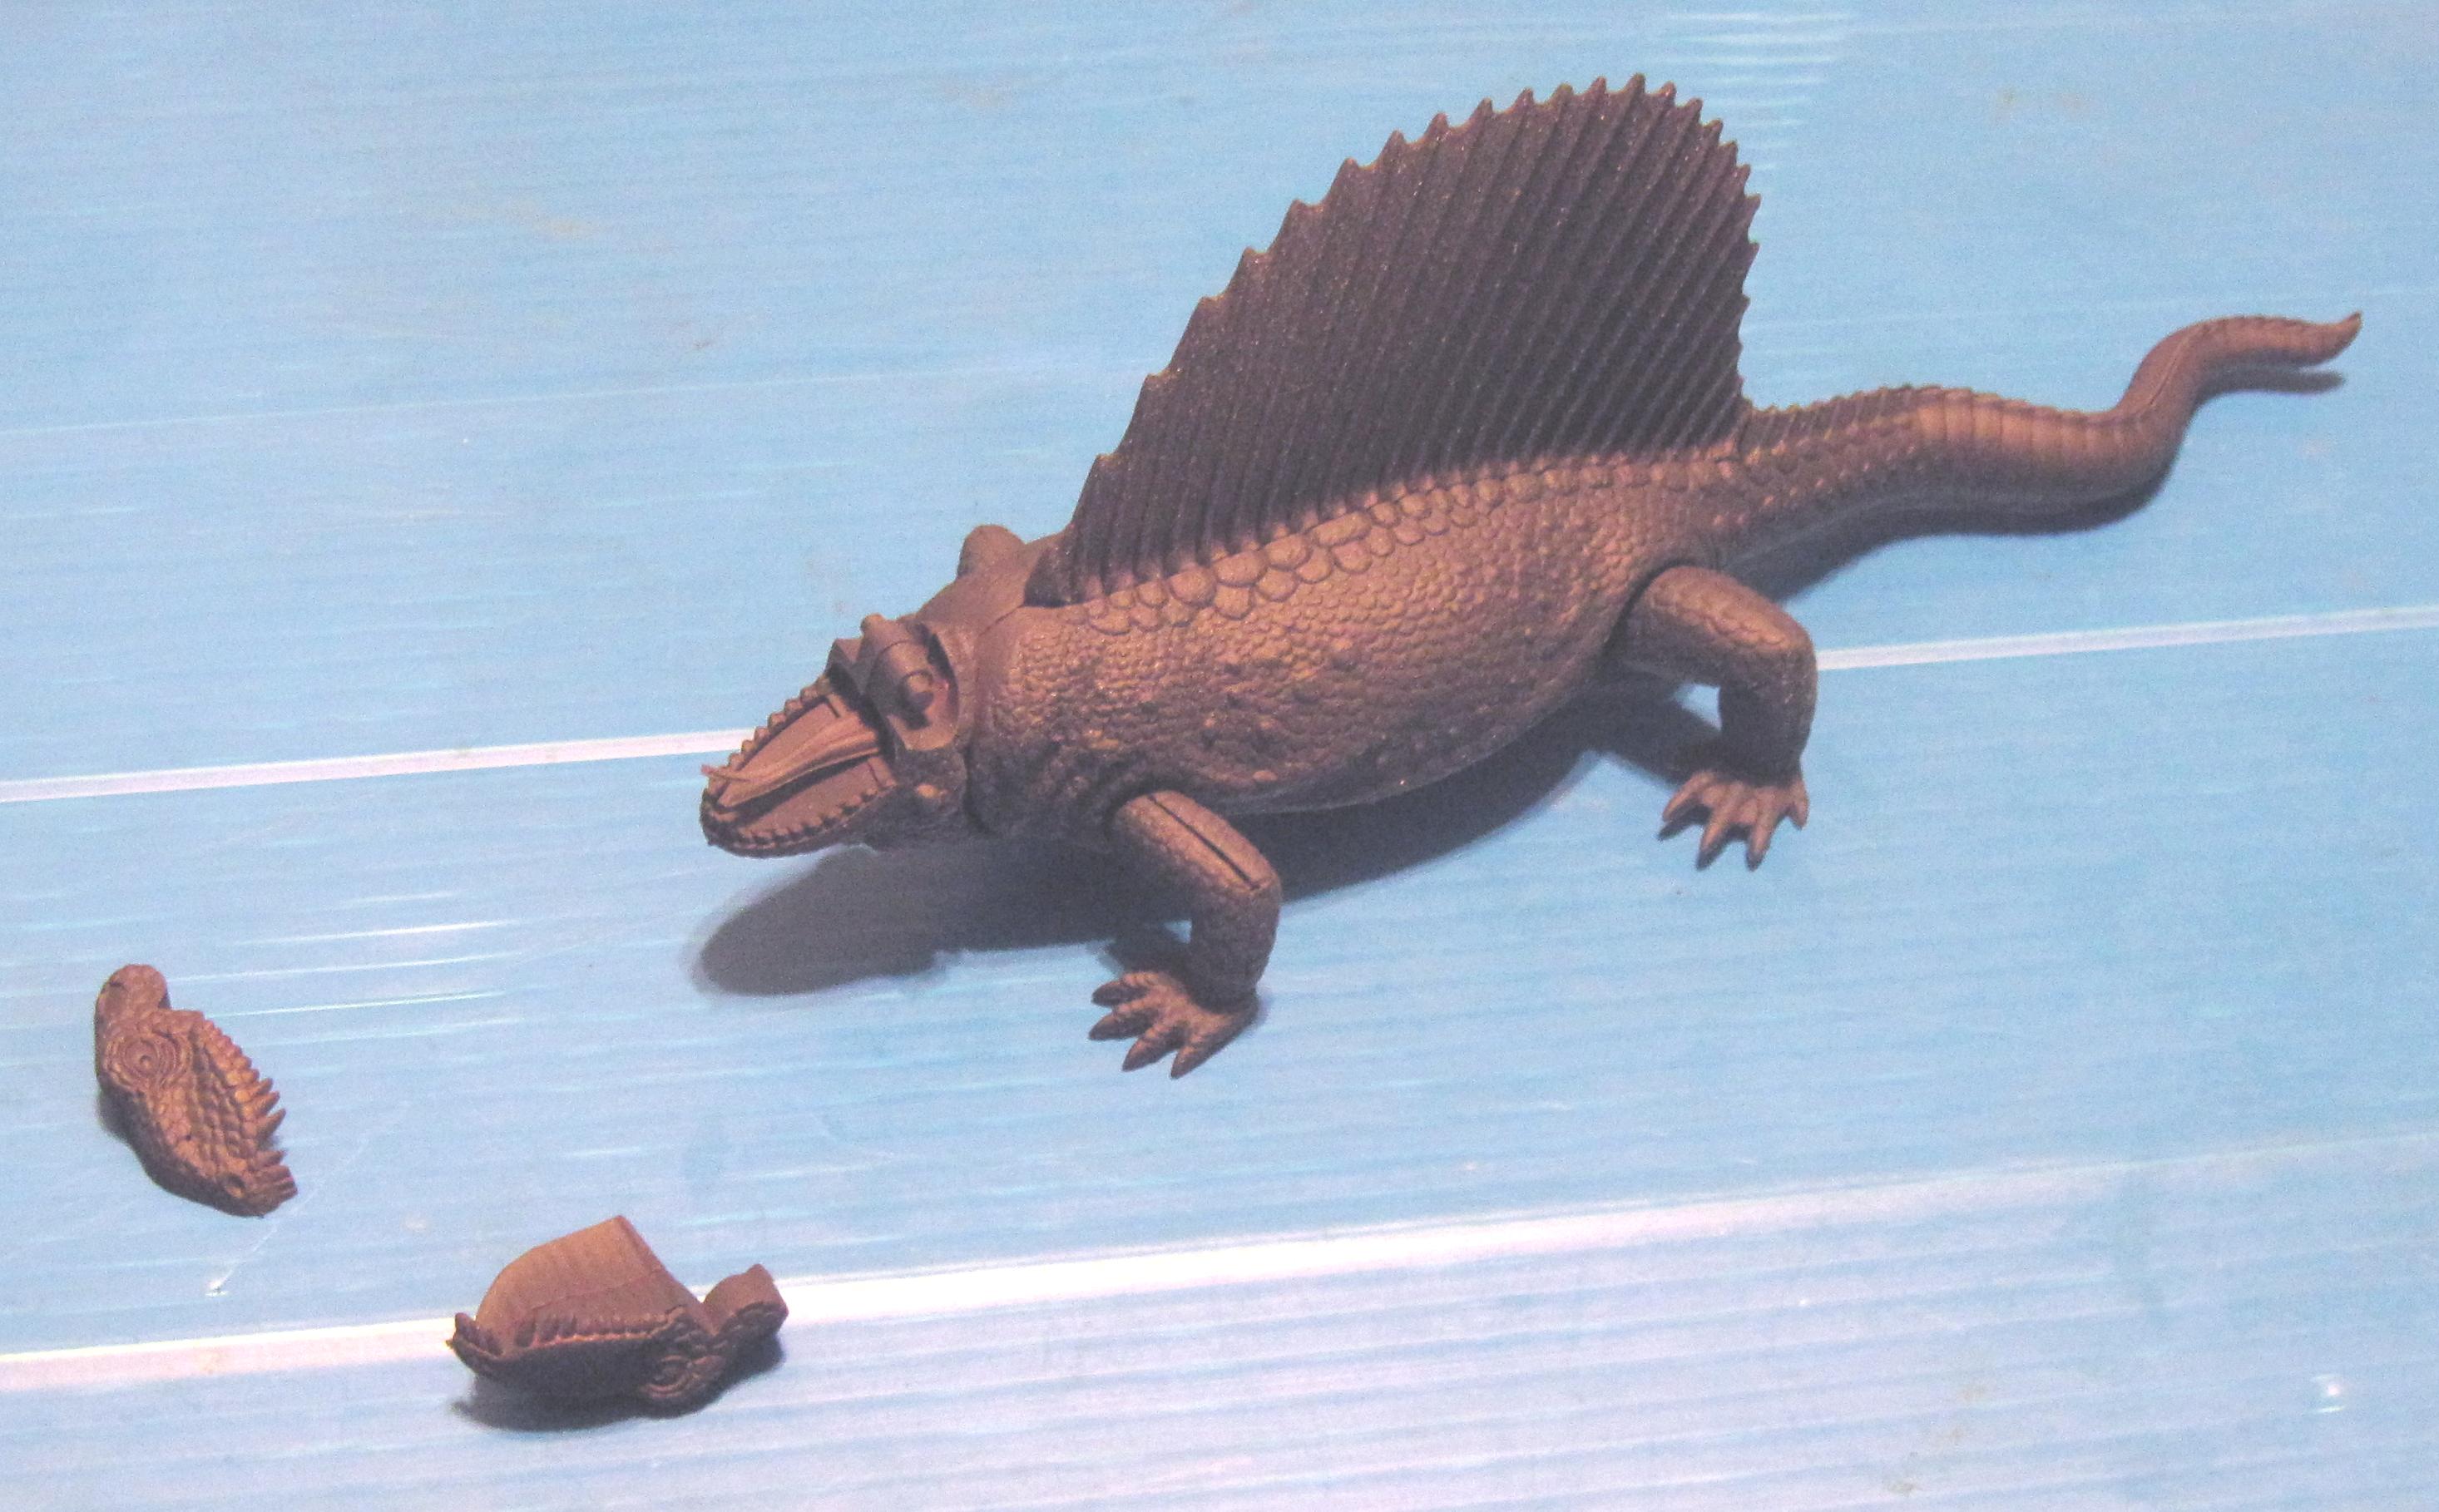
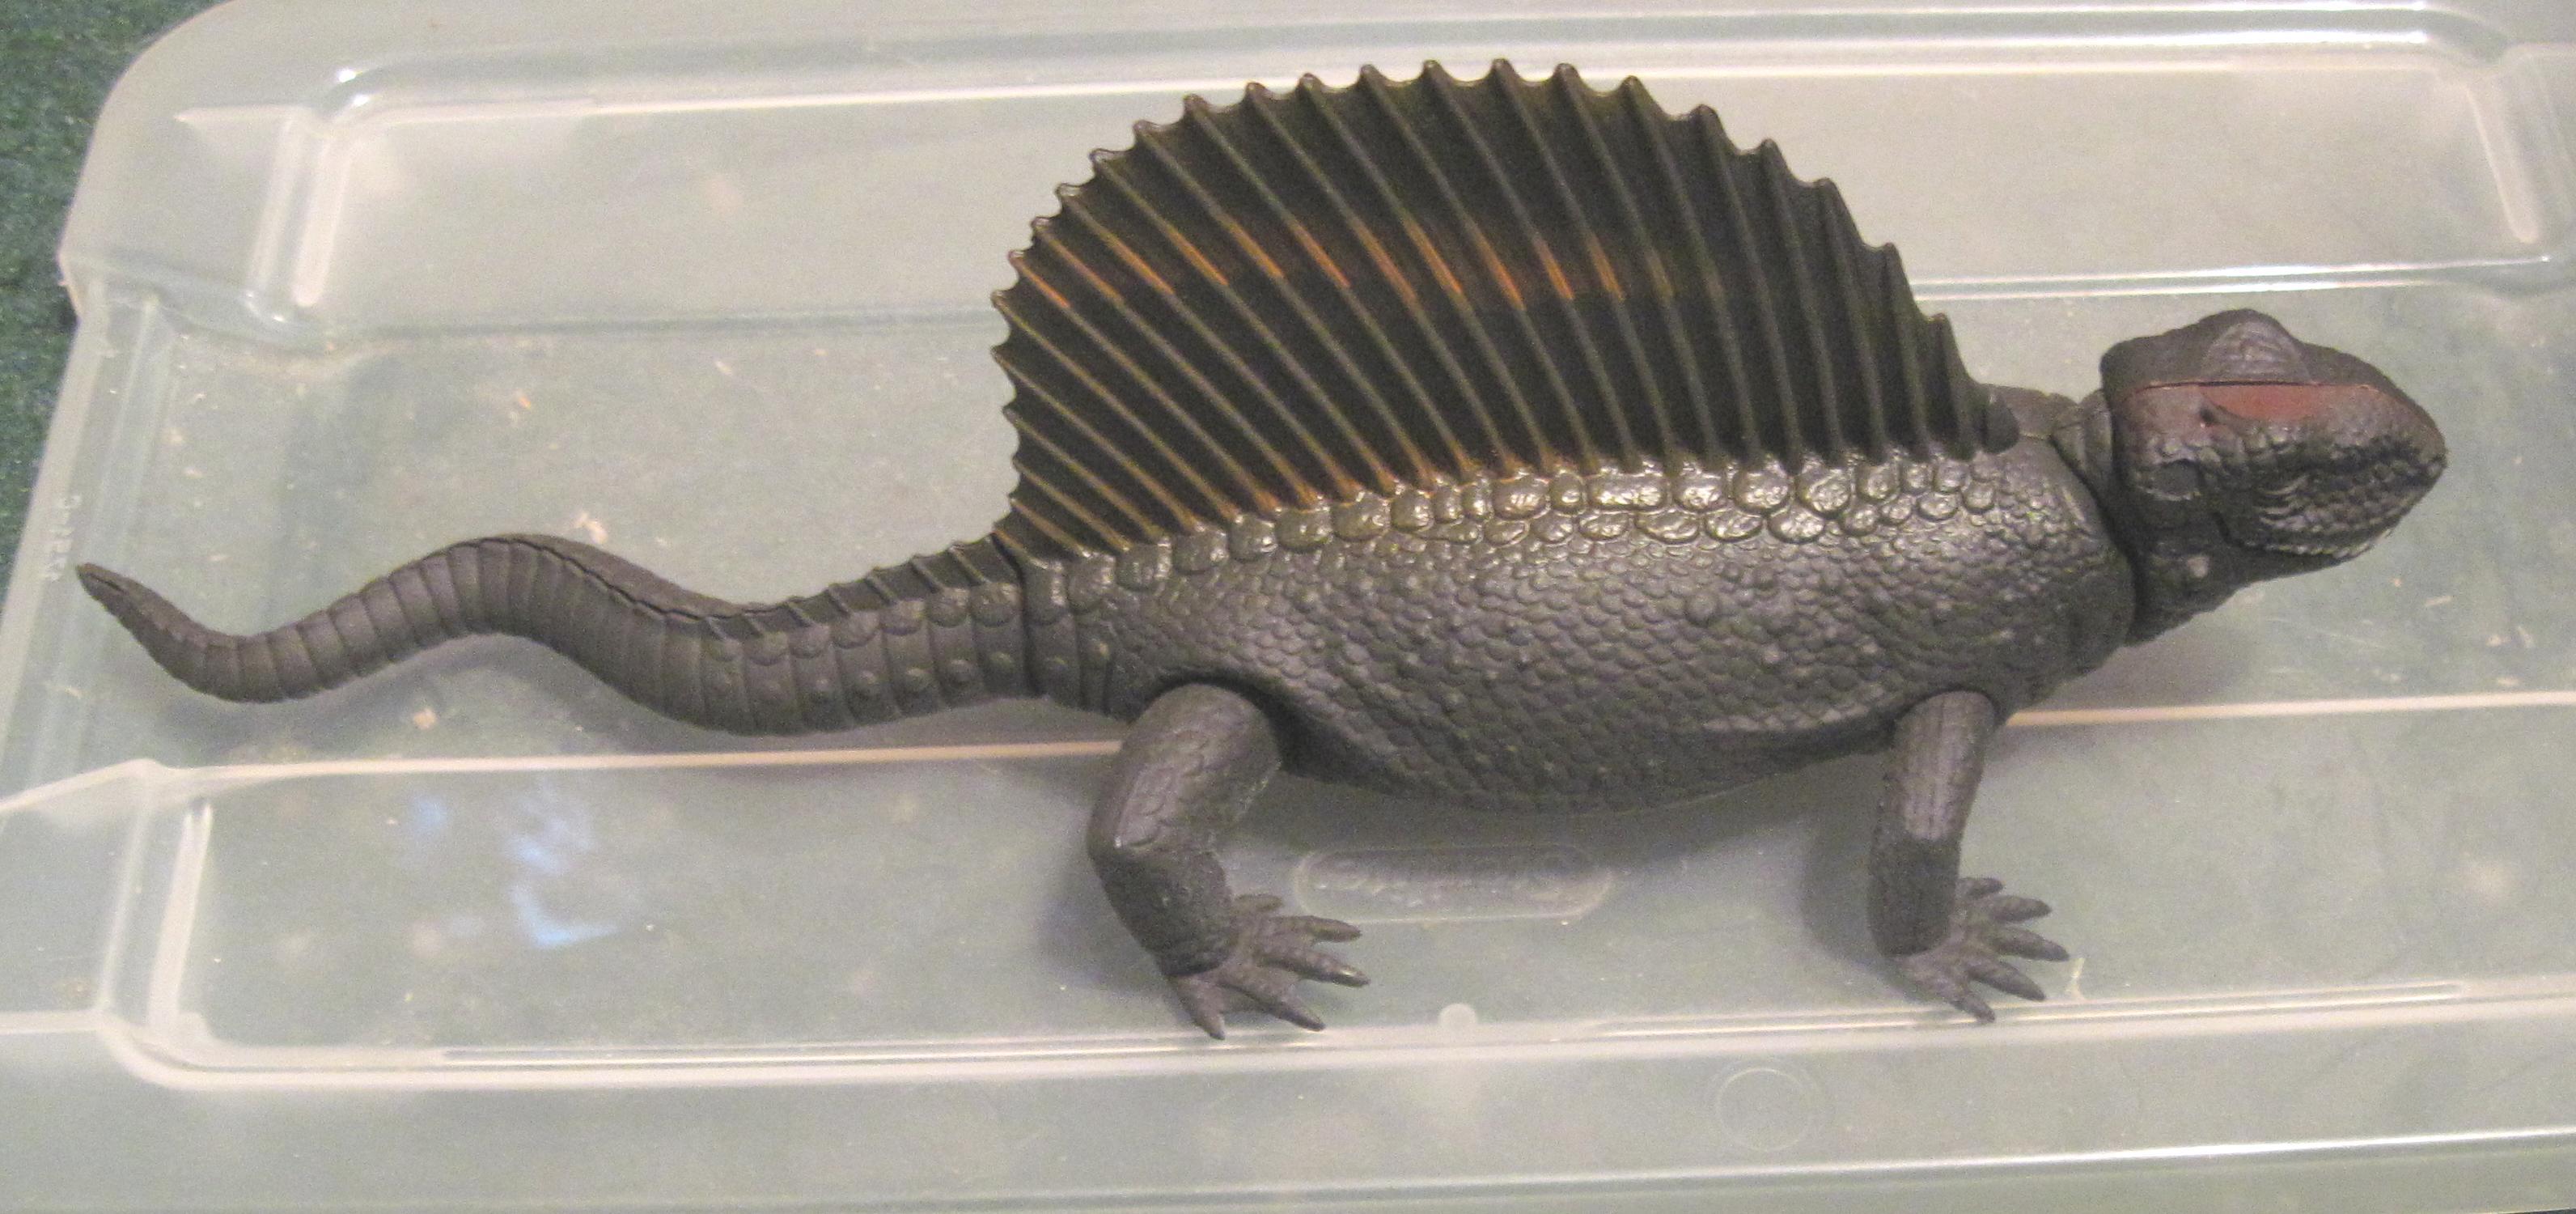
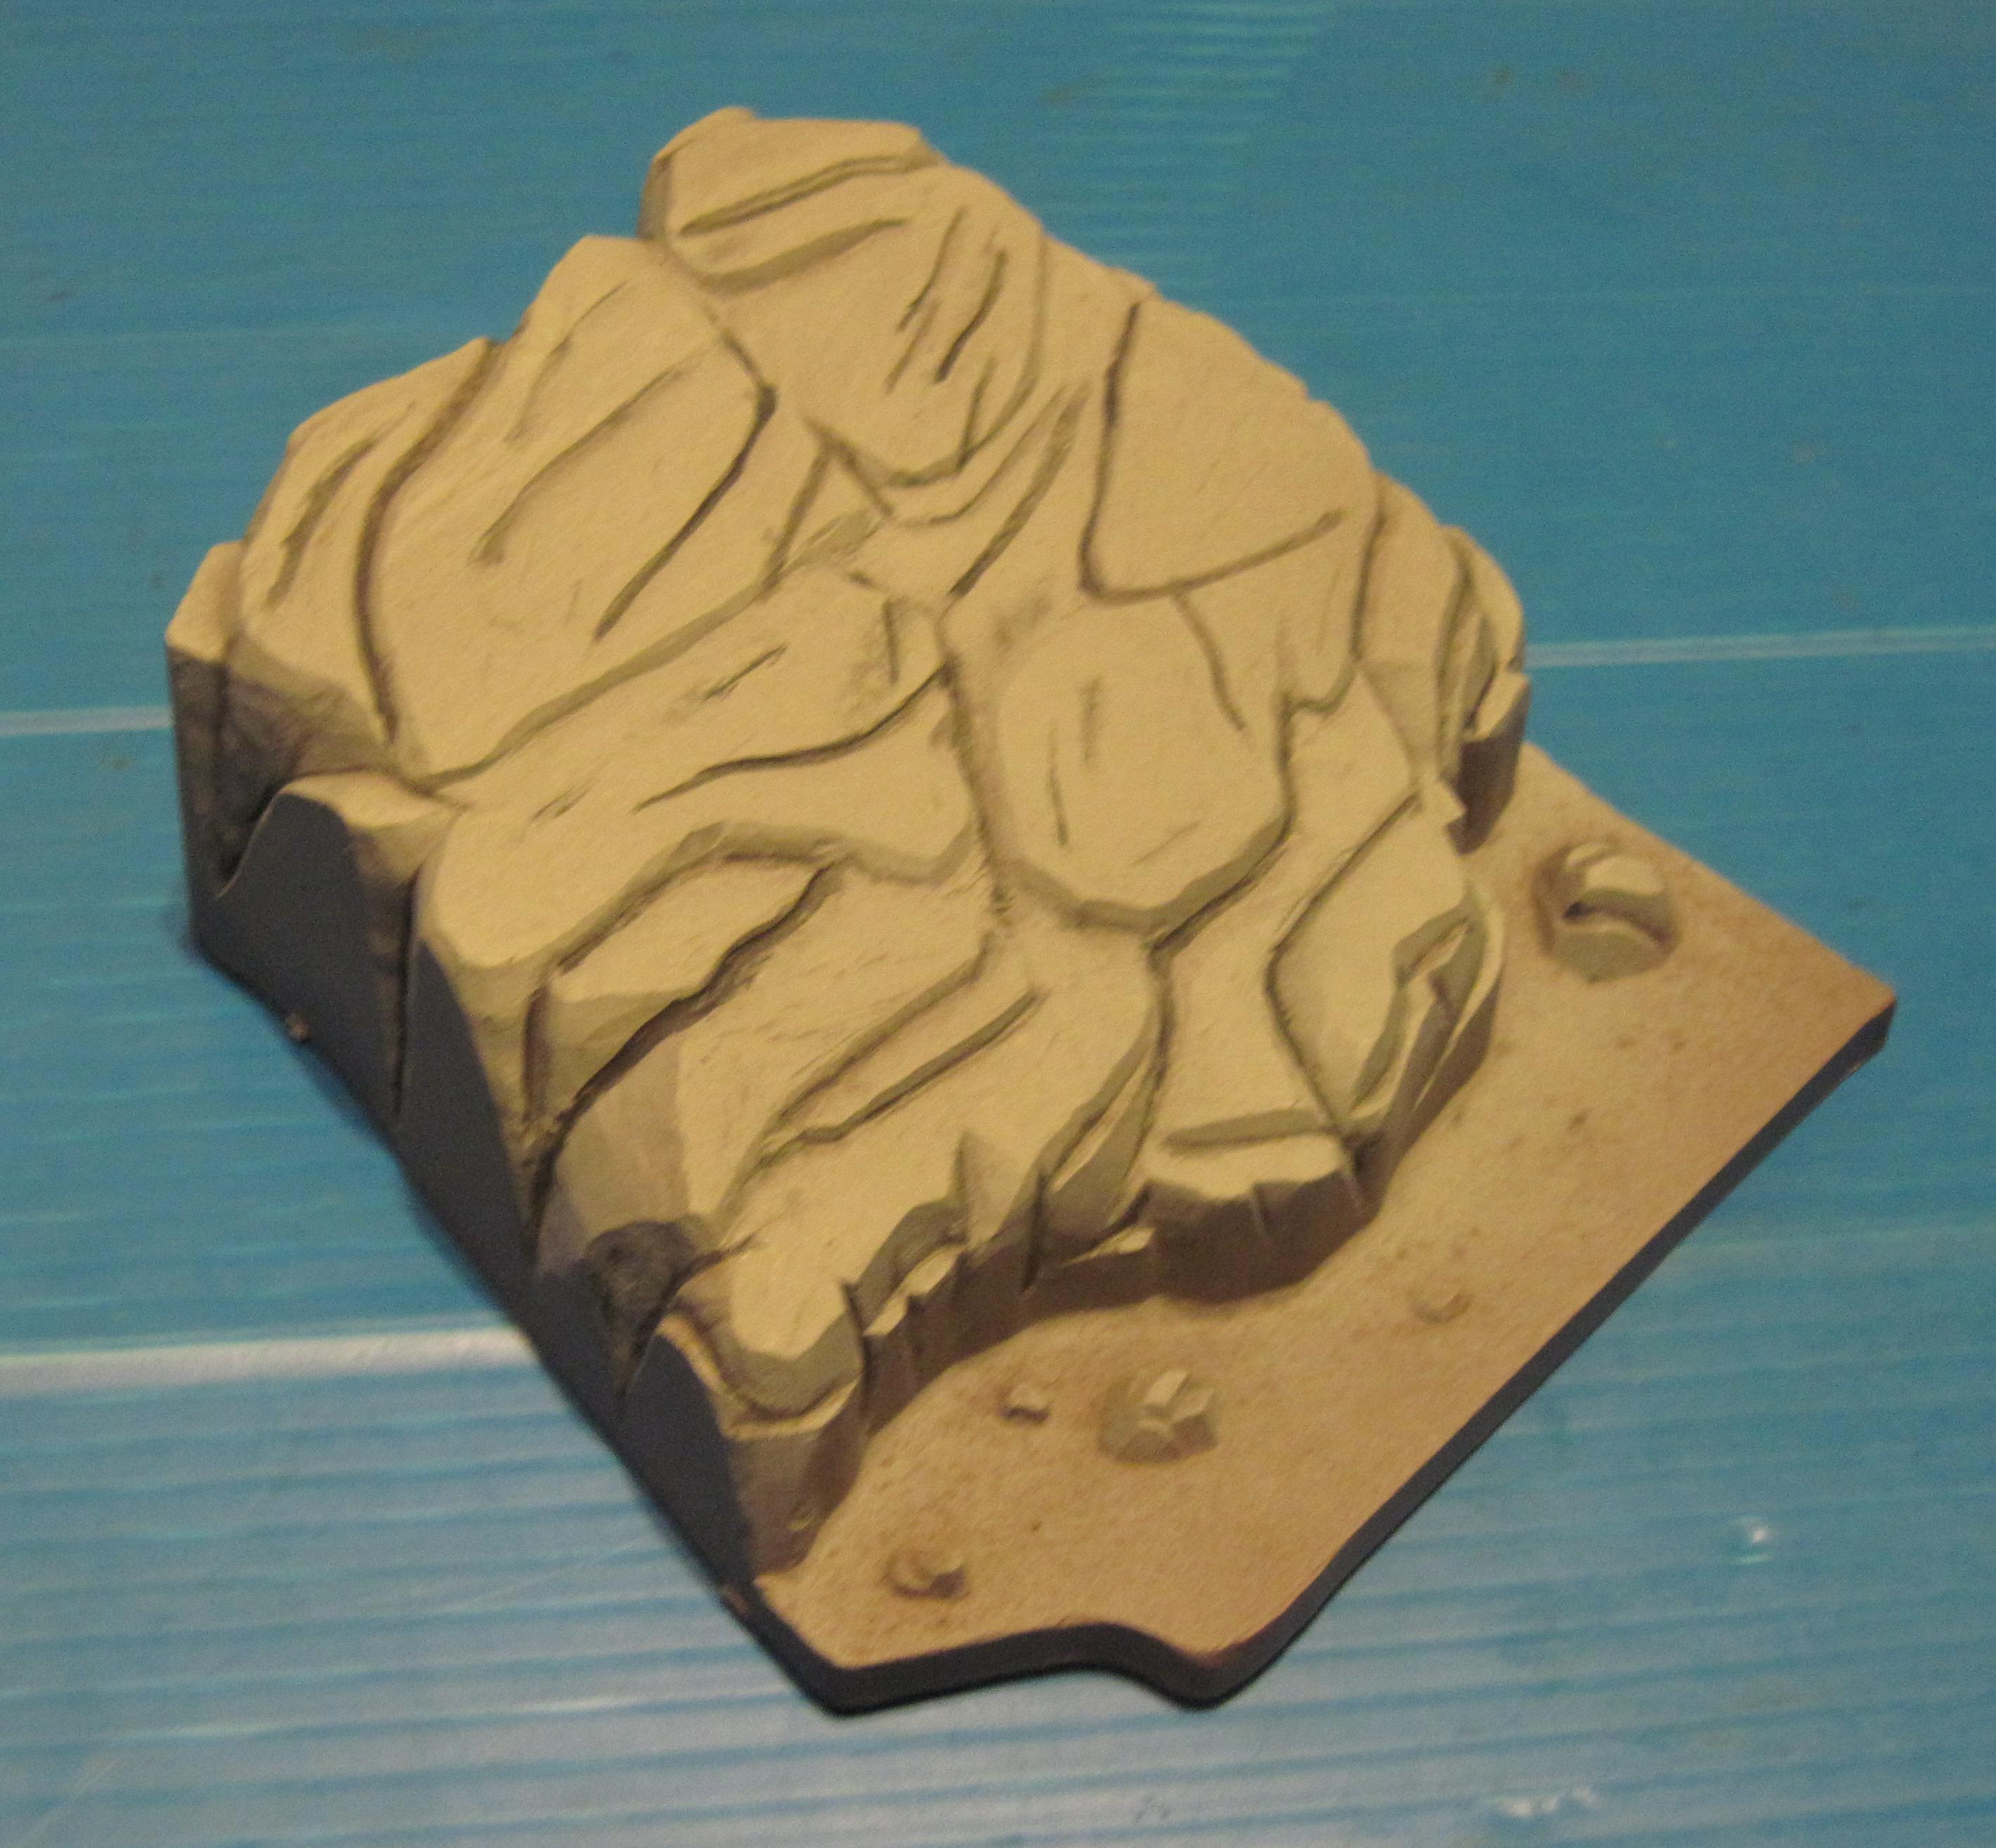
| I
primed it black. Hit the underside wtih some off-white. Then painted the inside of the mouth and teeth, and attached the top of the head. |
|
 |
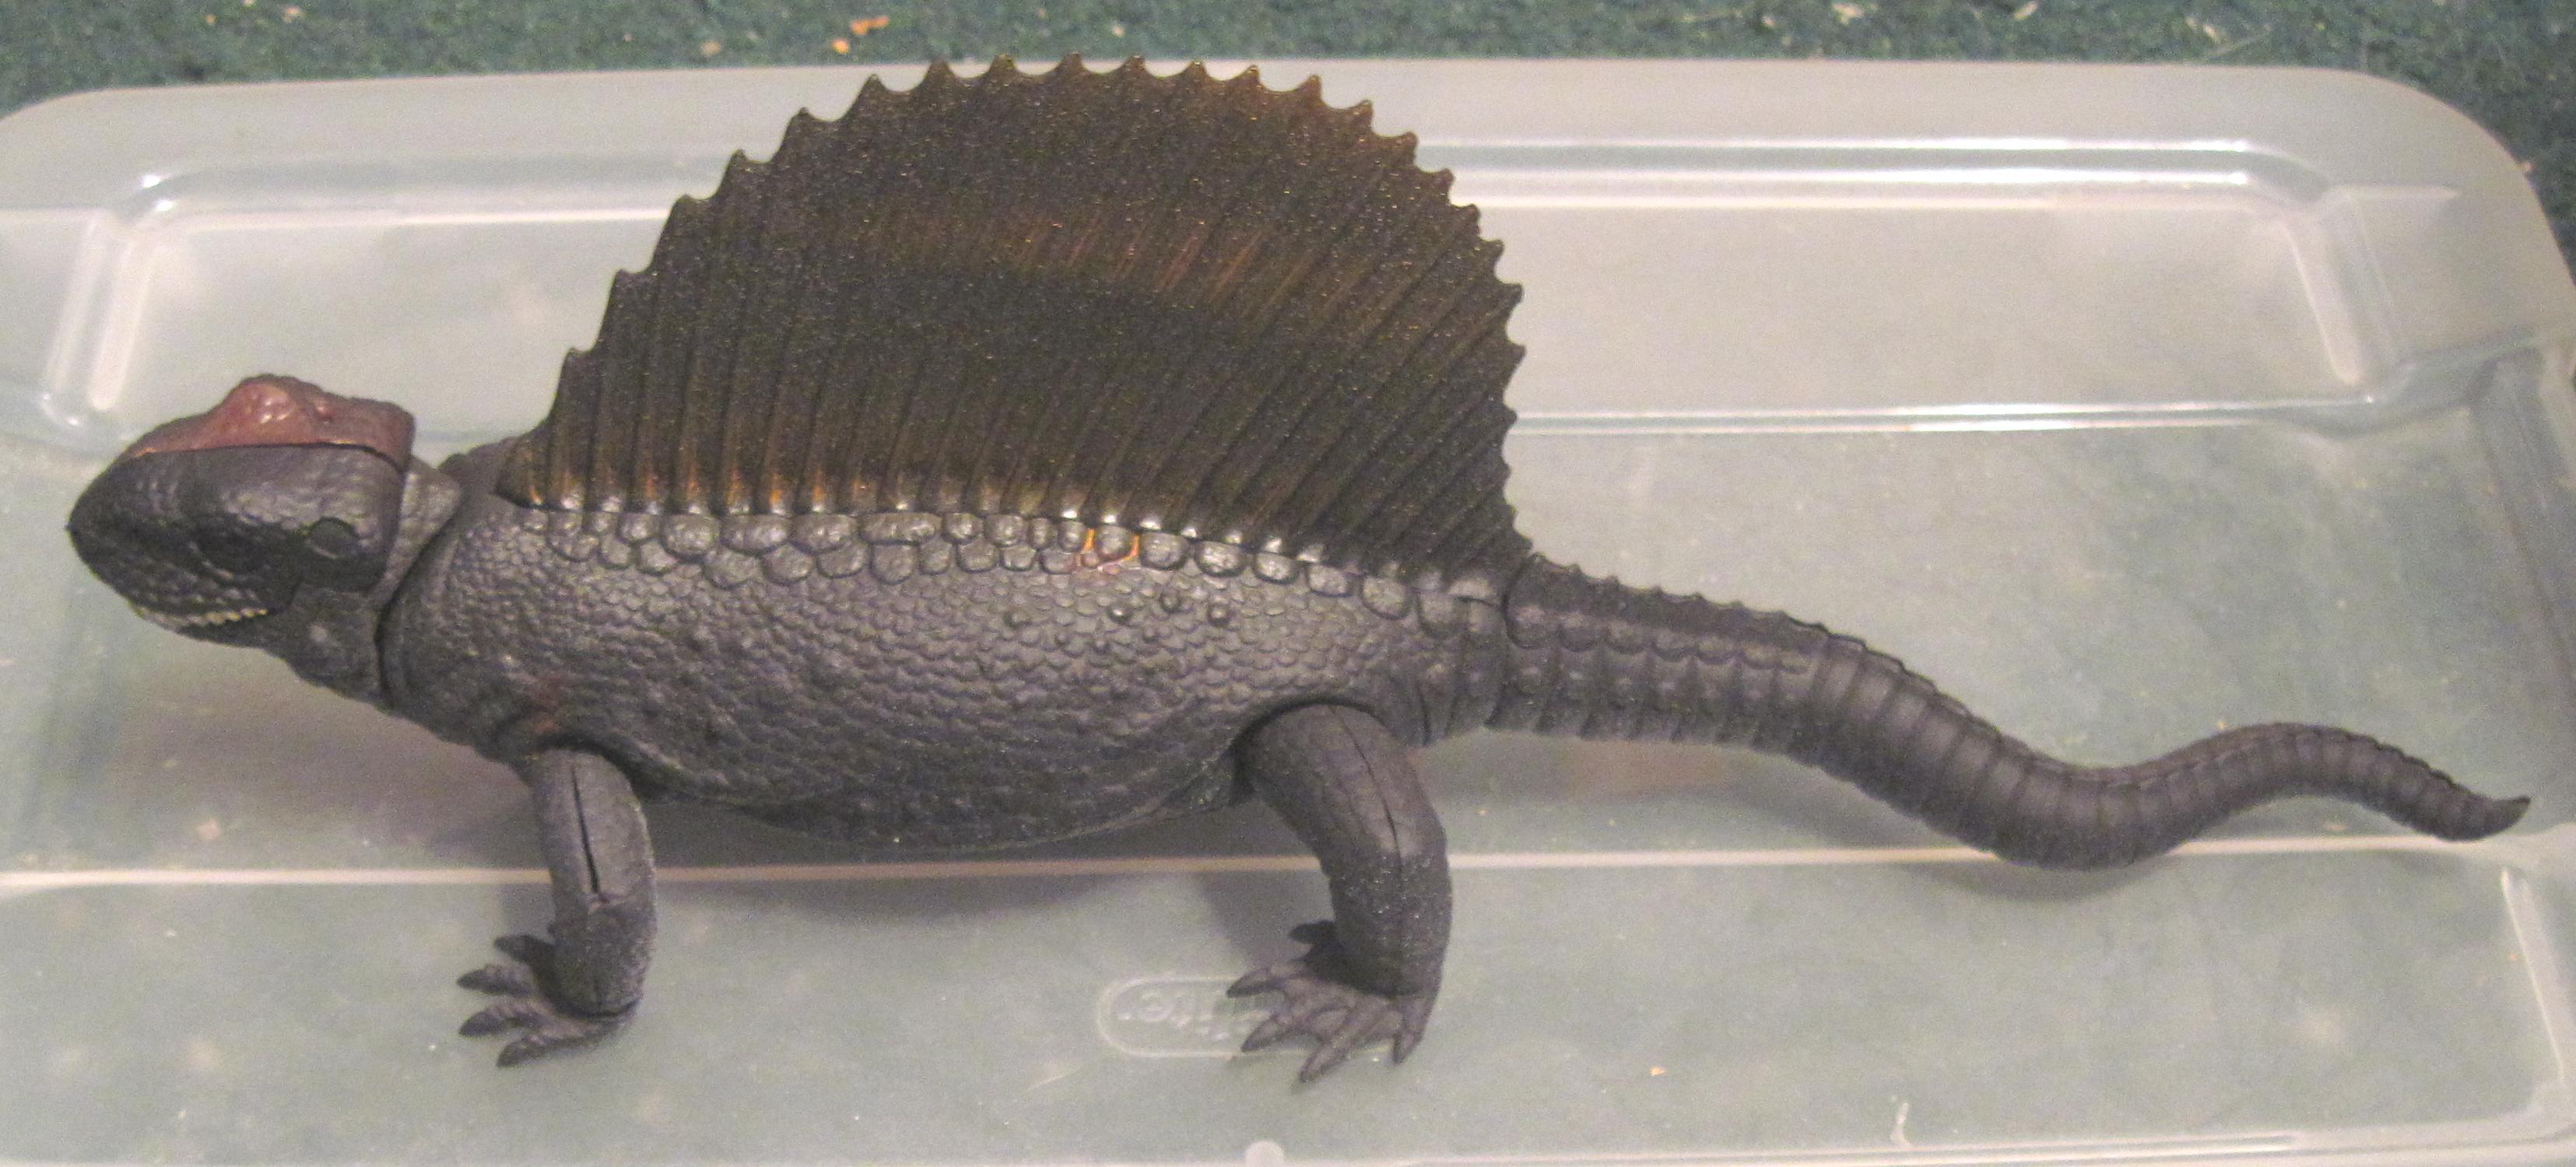 |
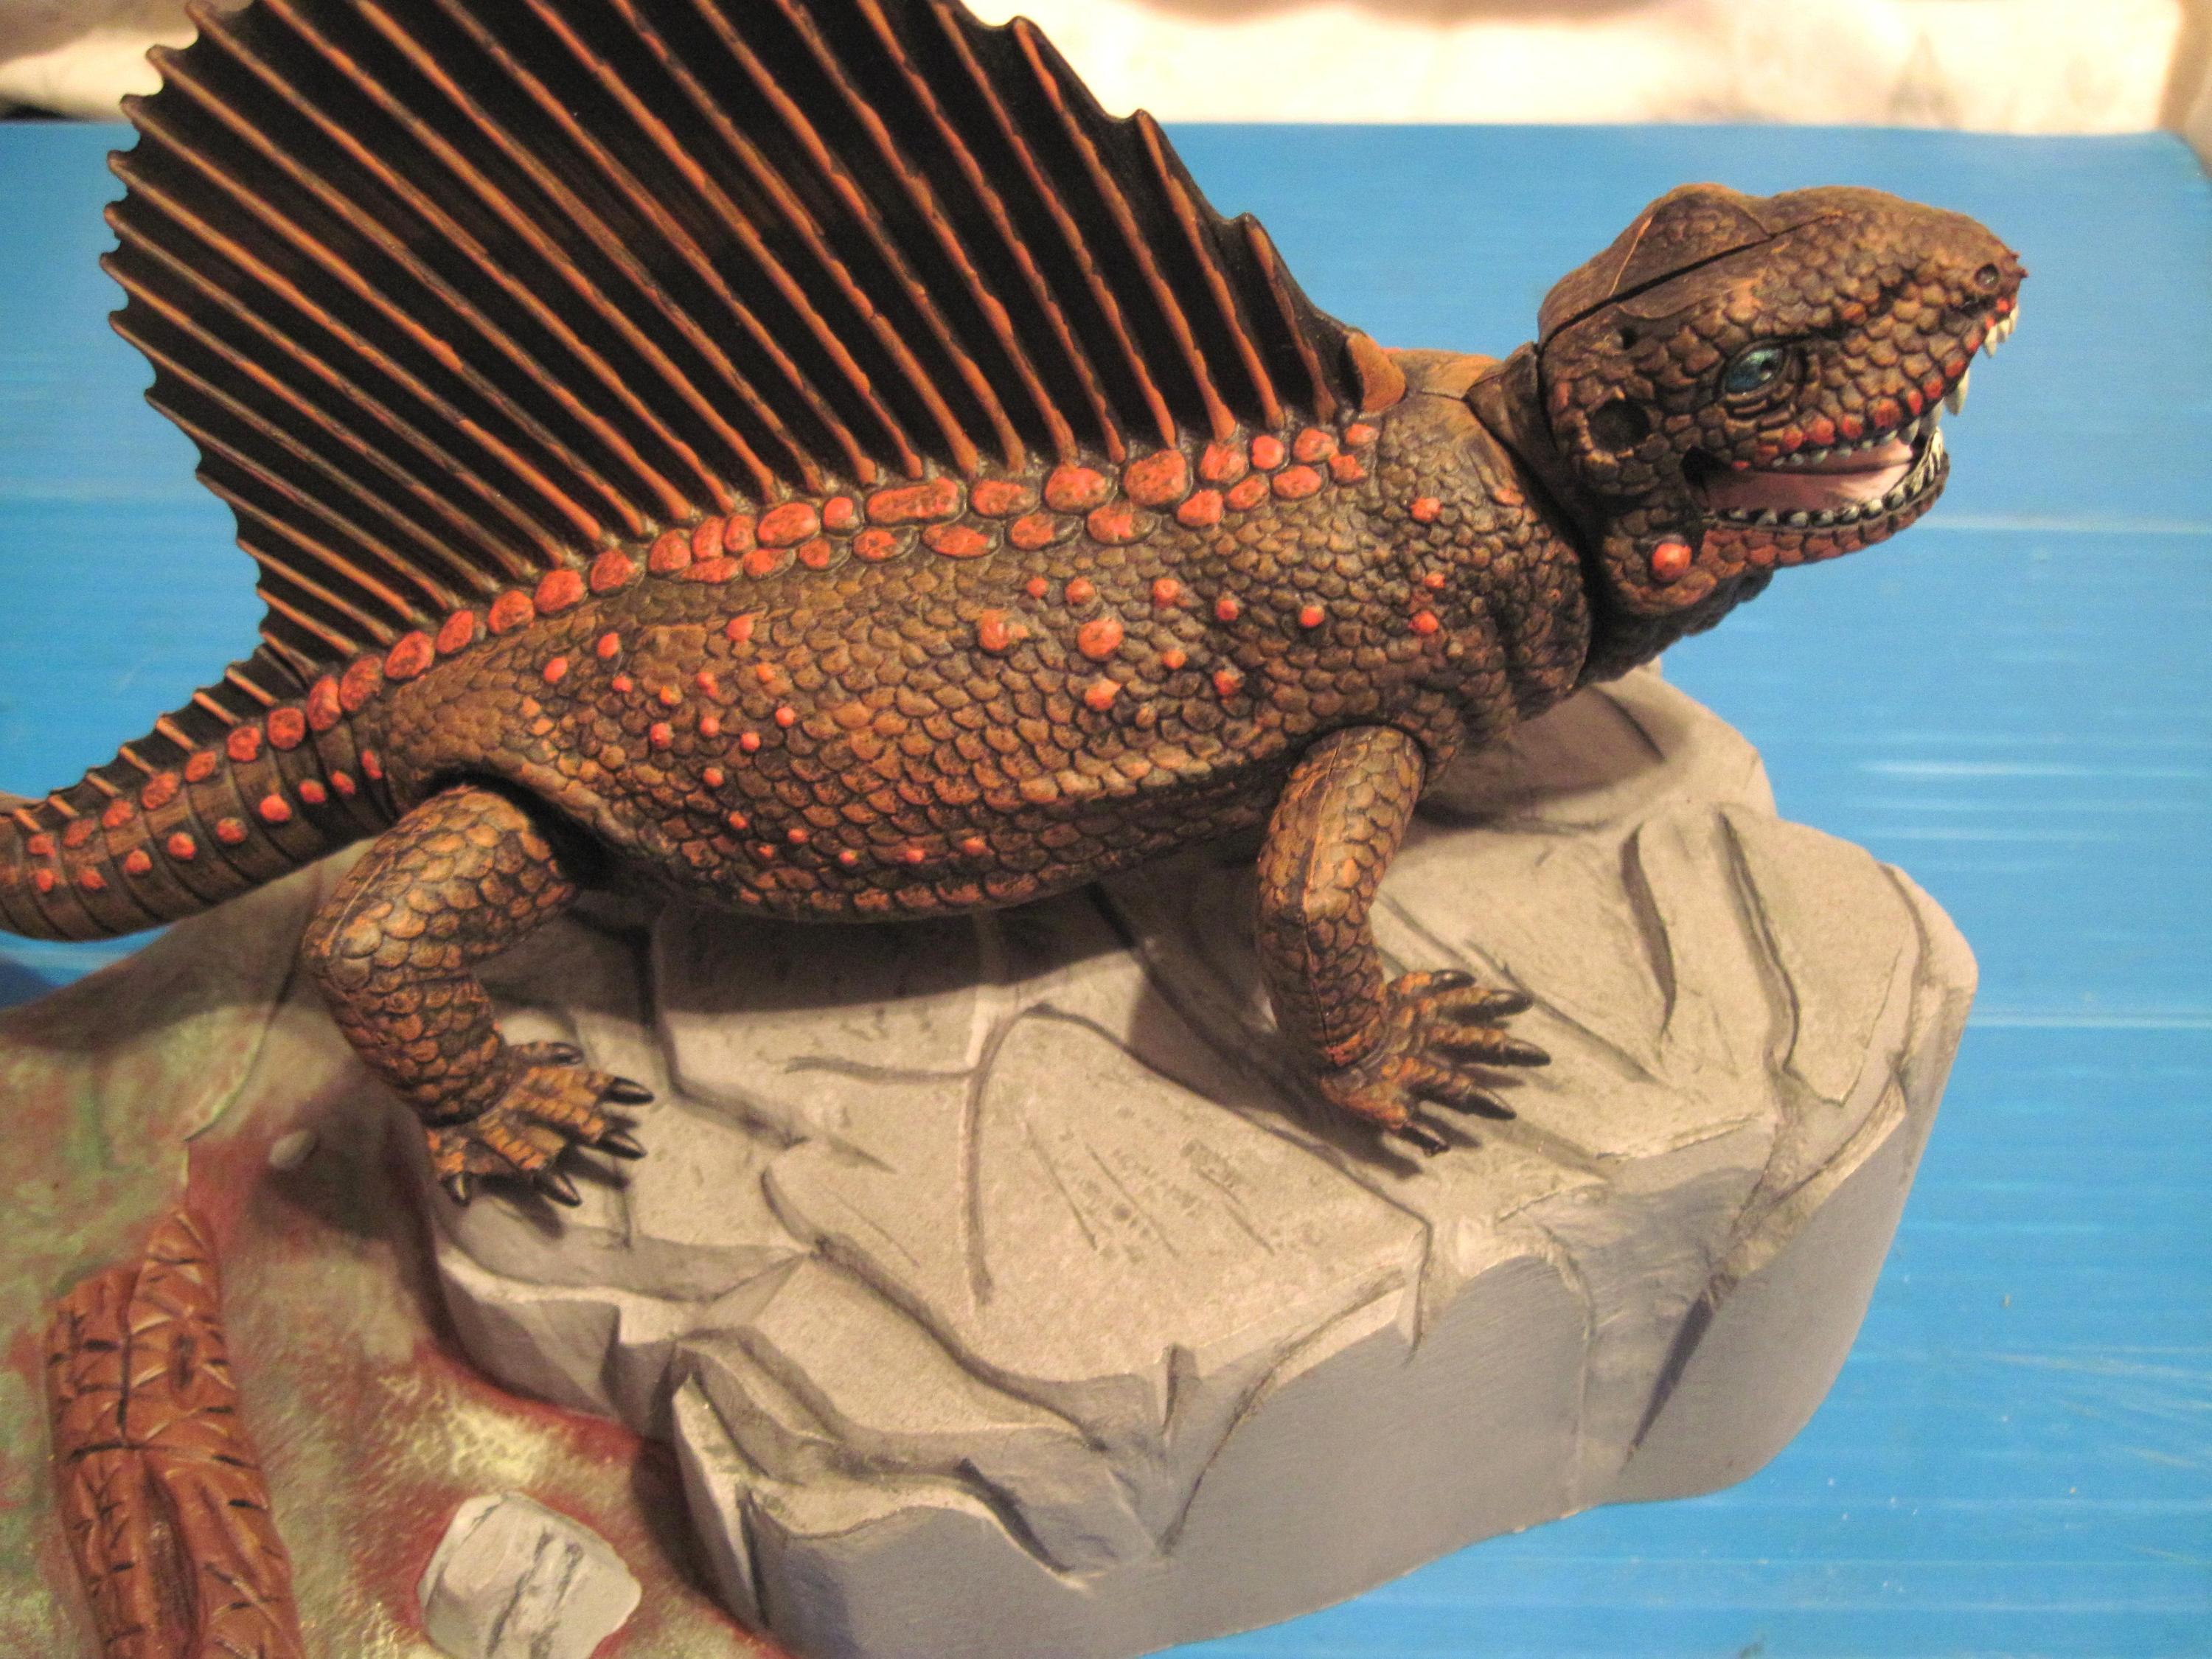
| Next I gave the sail a bit of an orange streak with a spray can, and carboard stencil. | |
 |
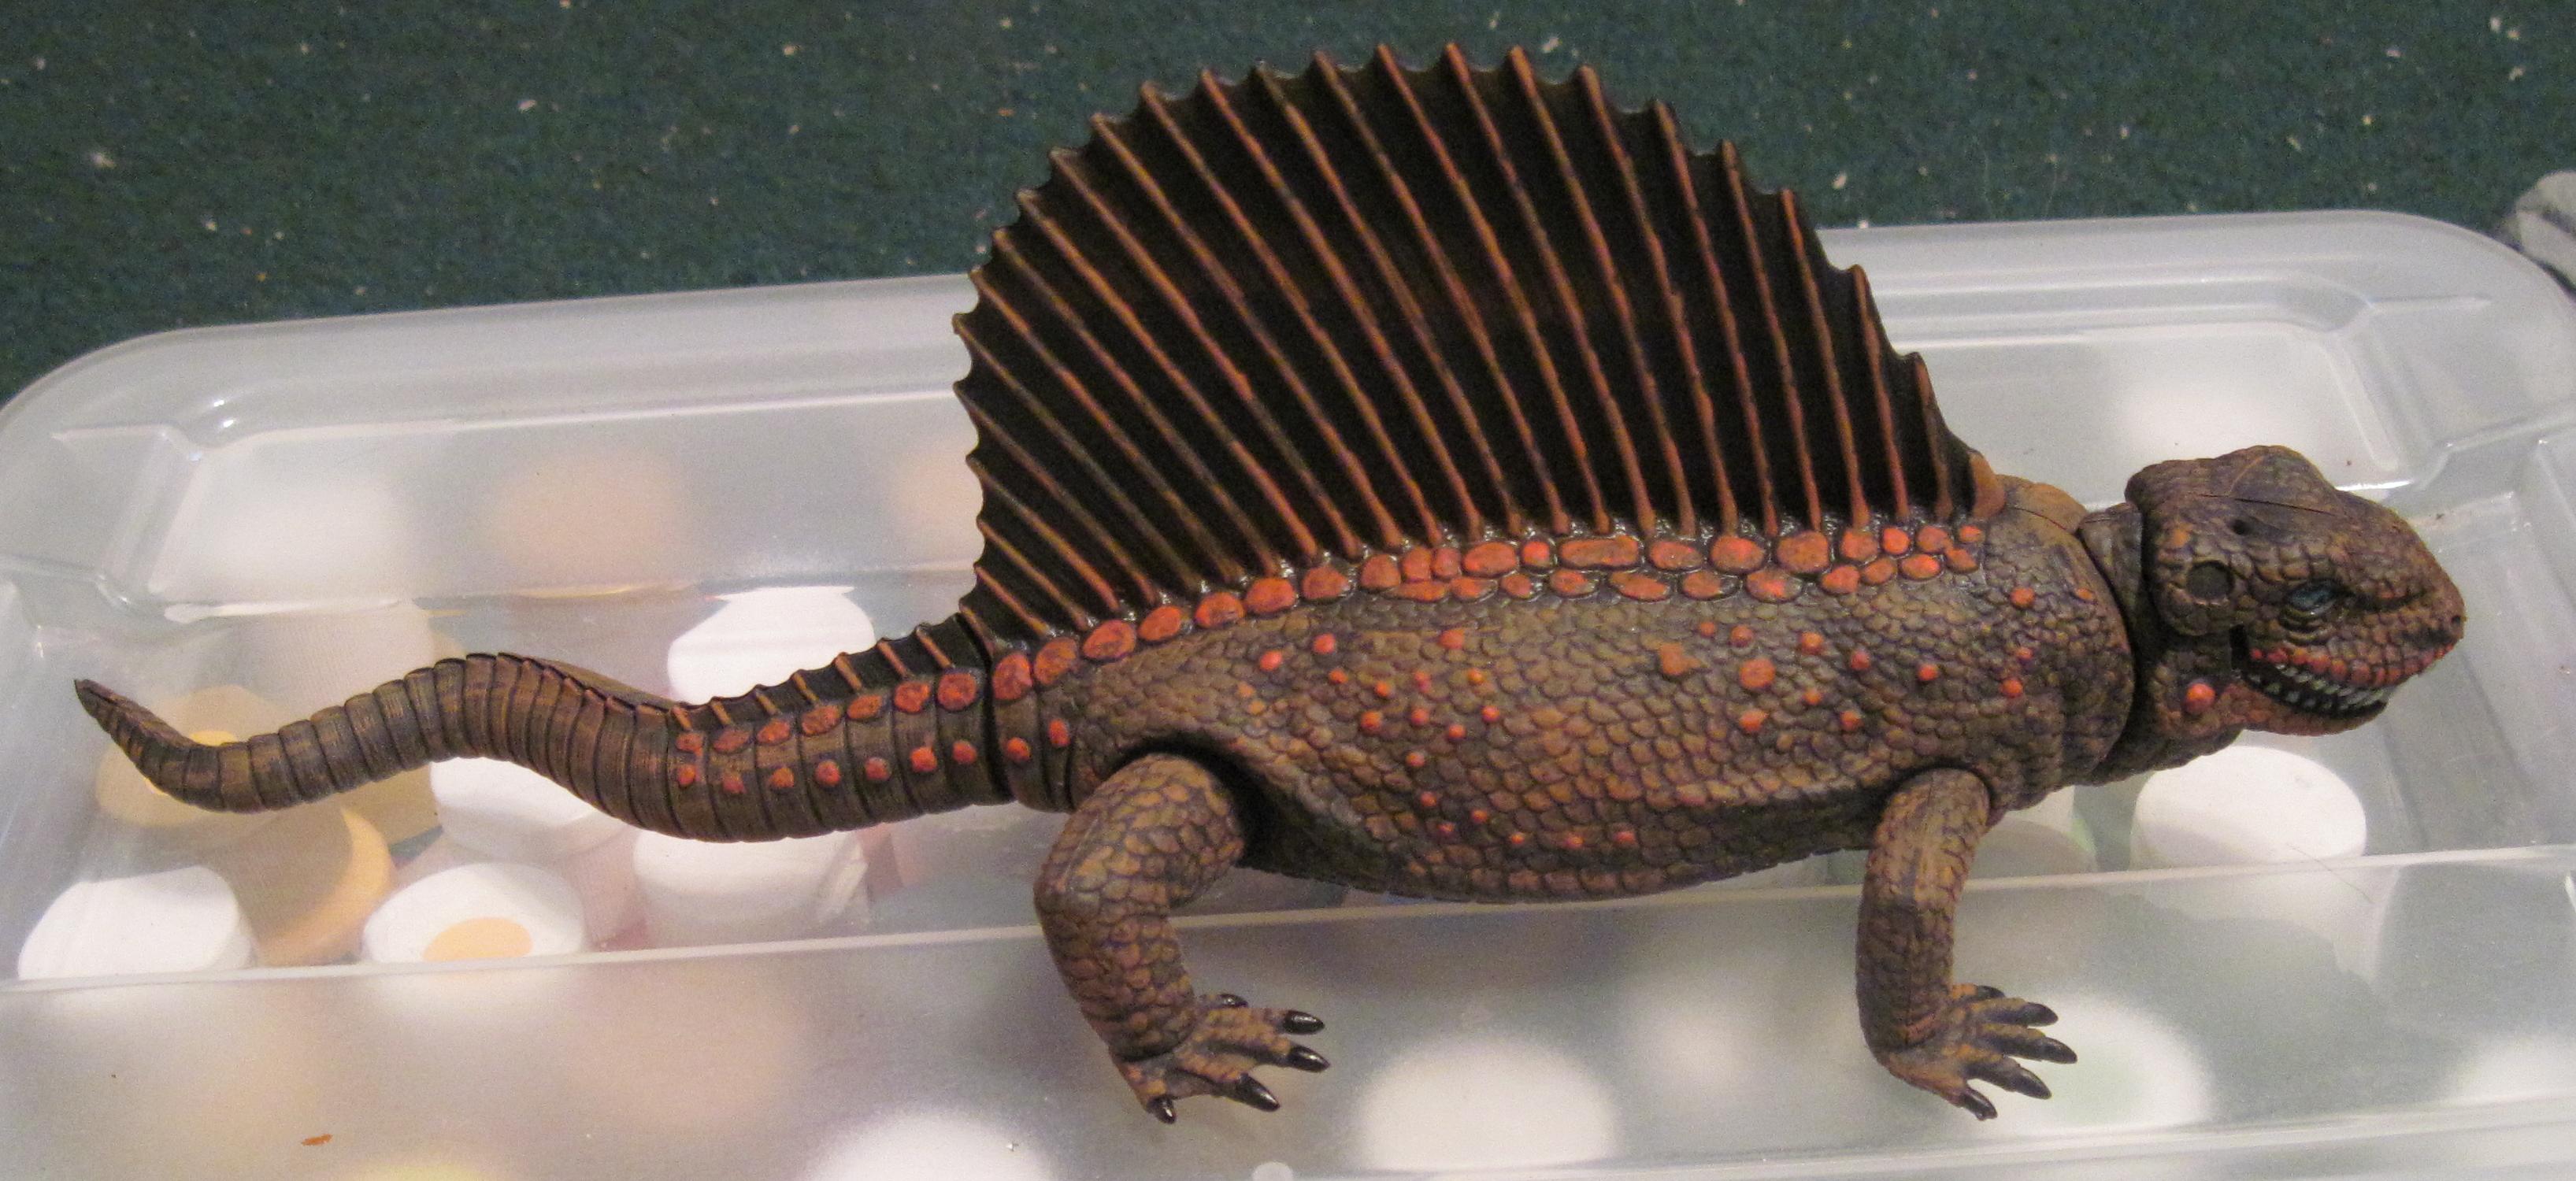 |
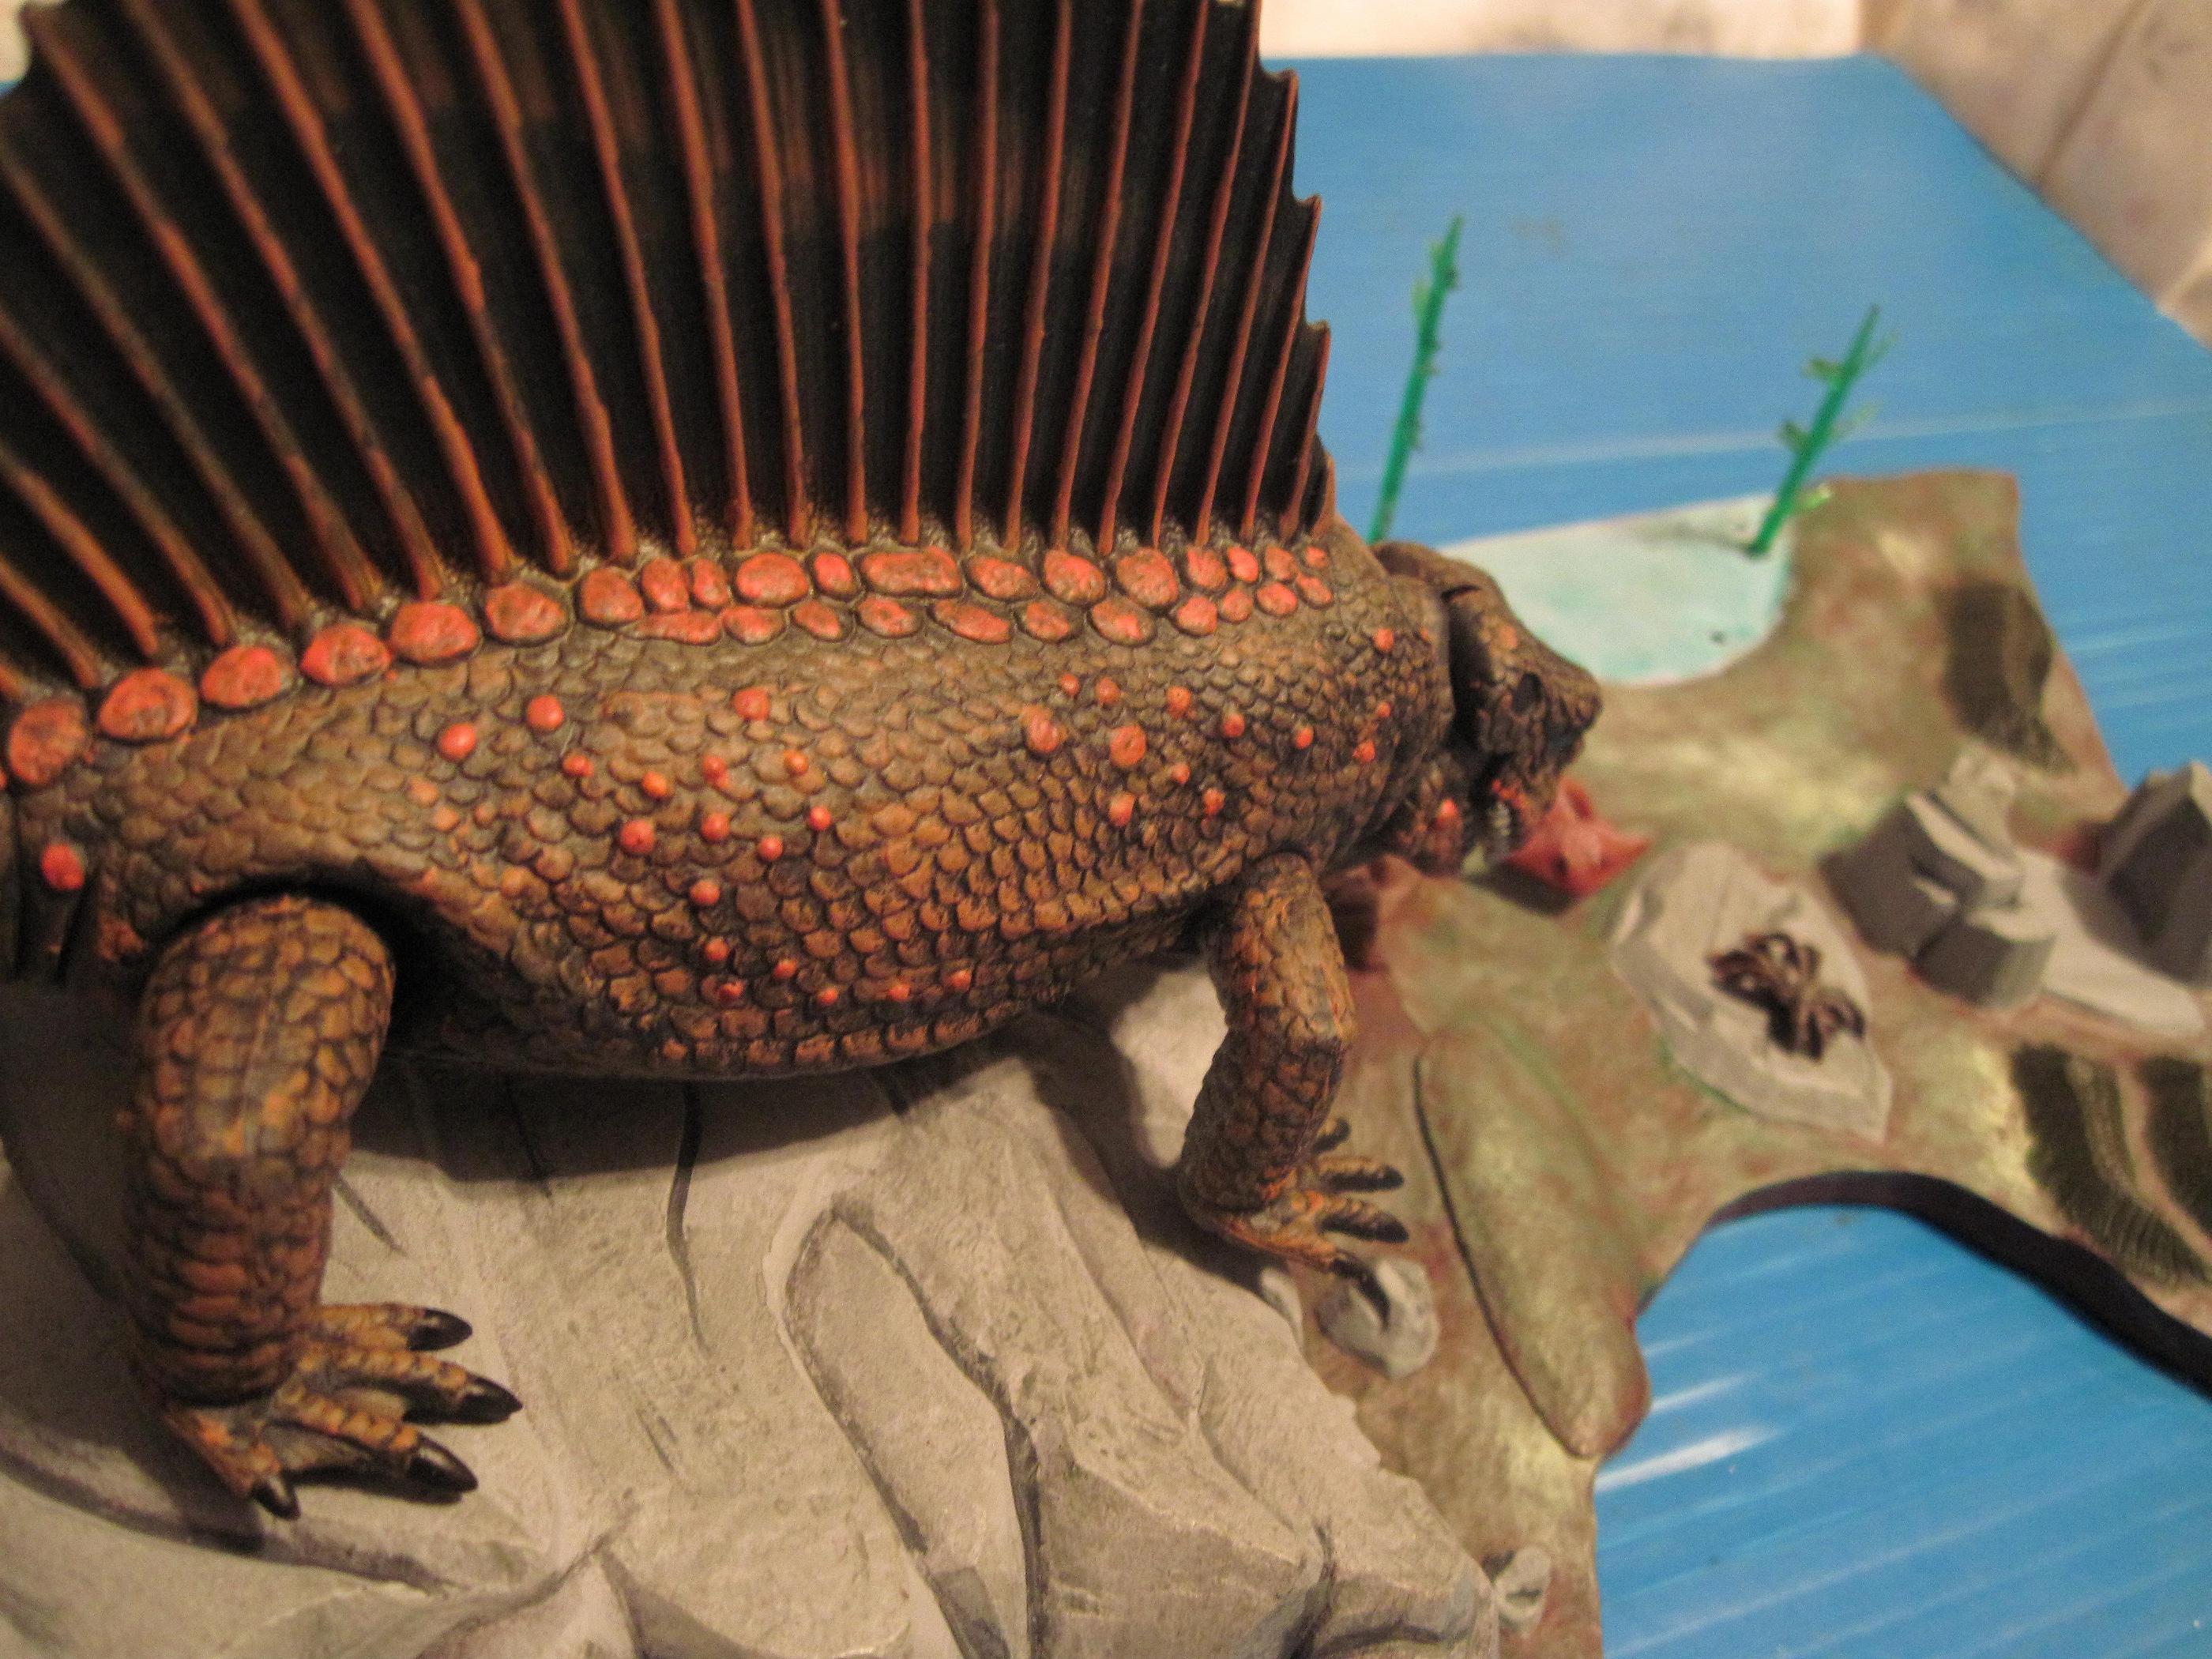
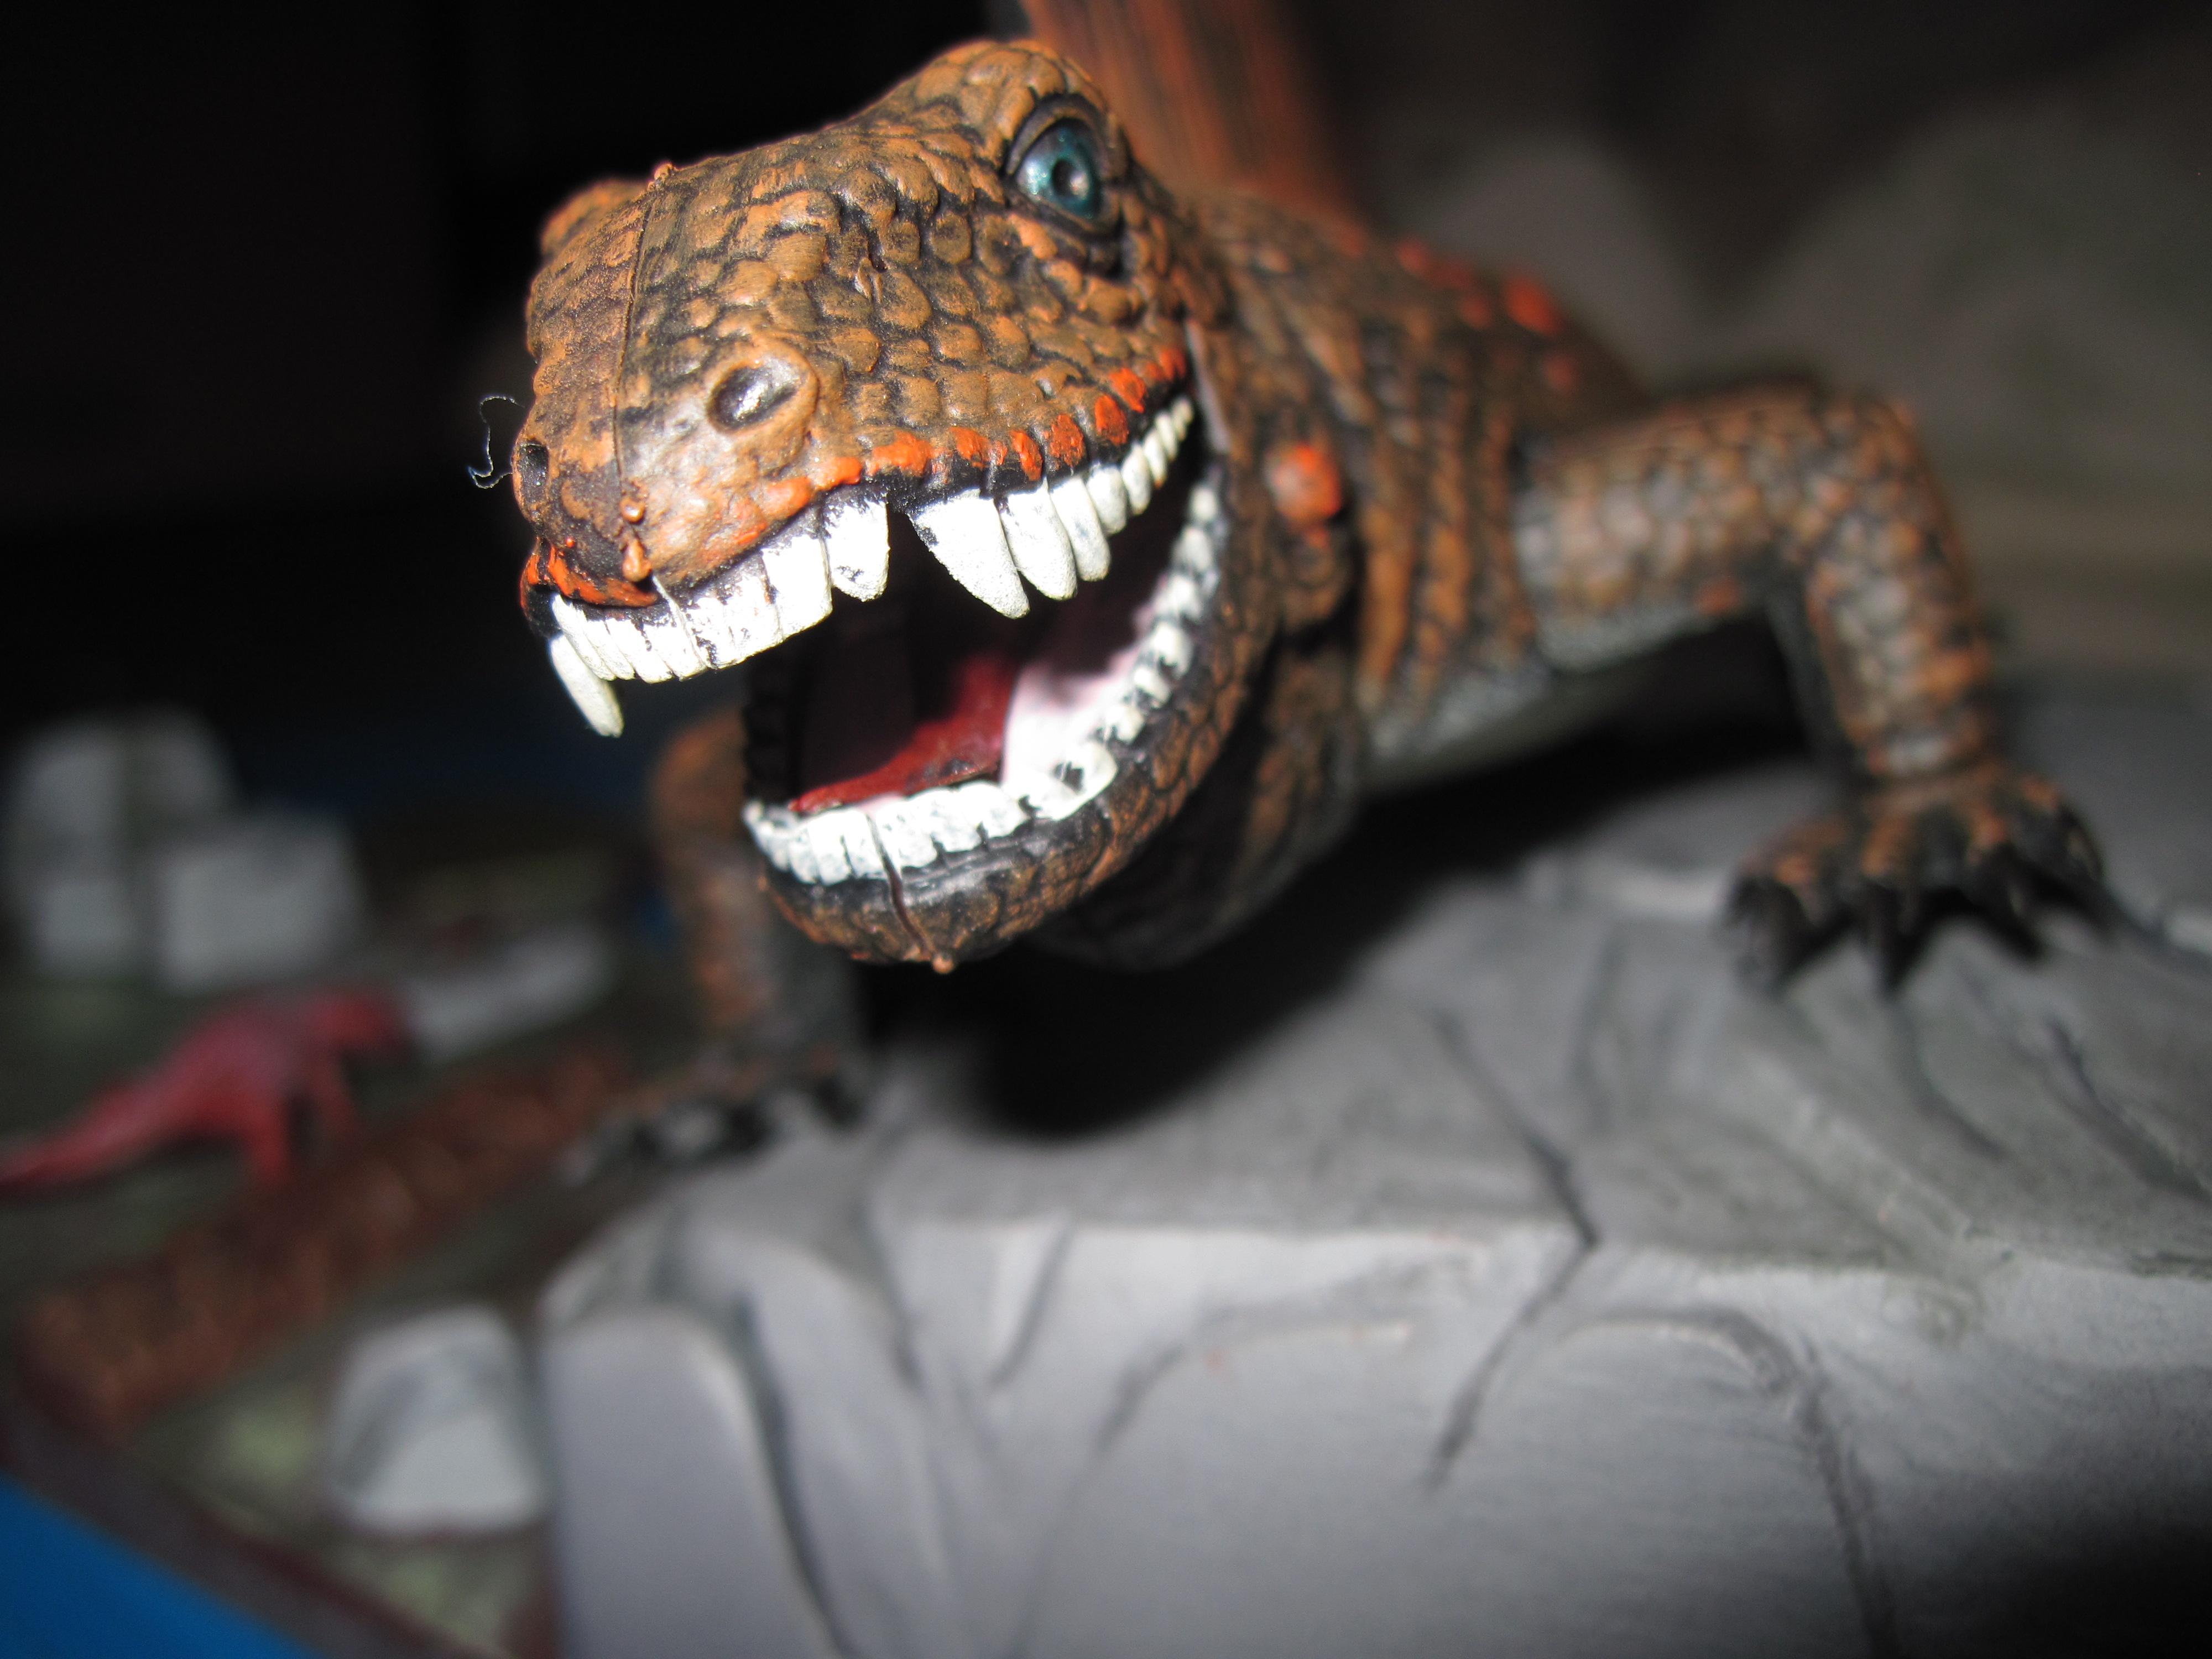
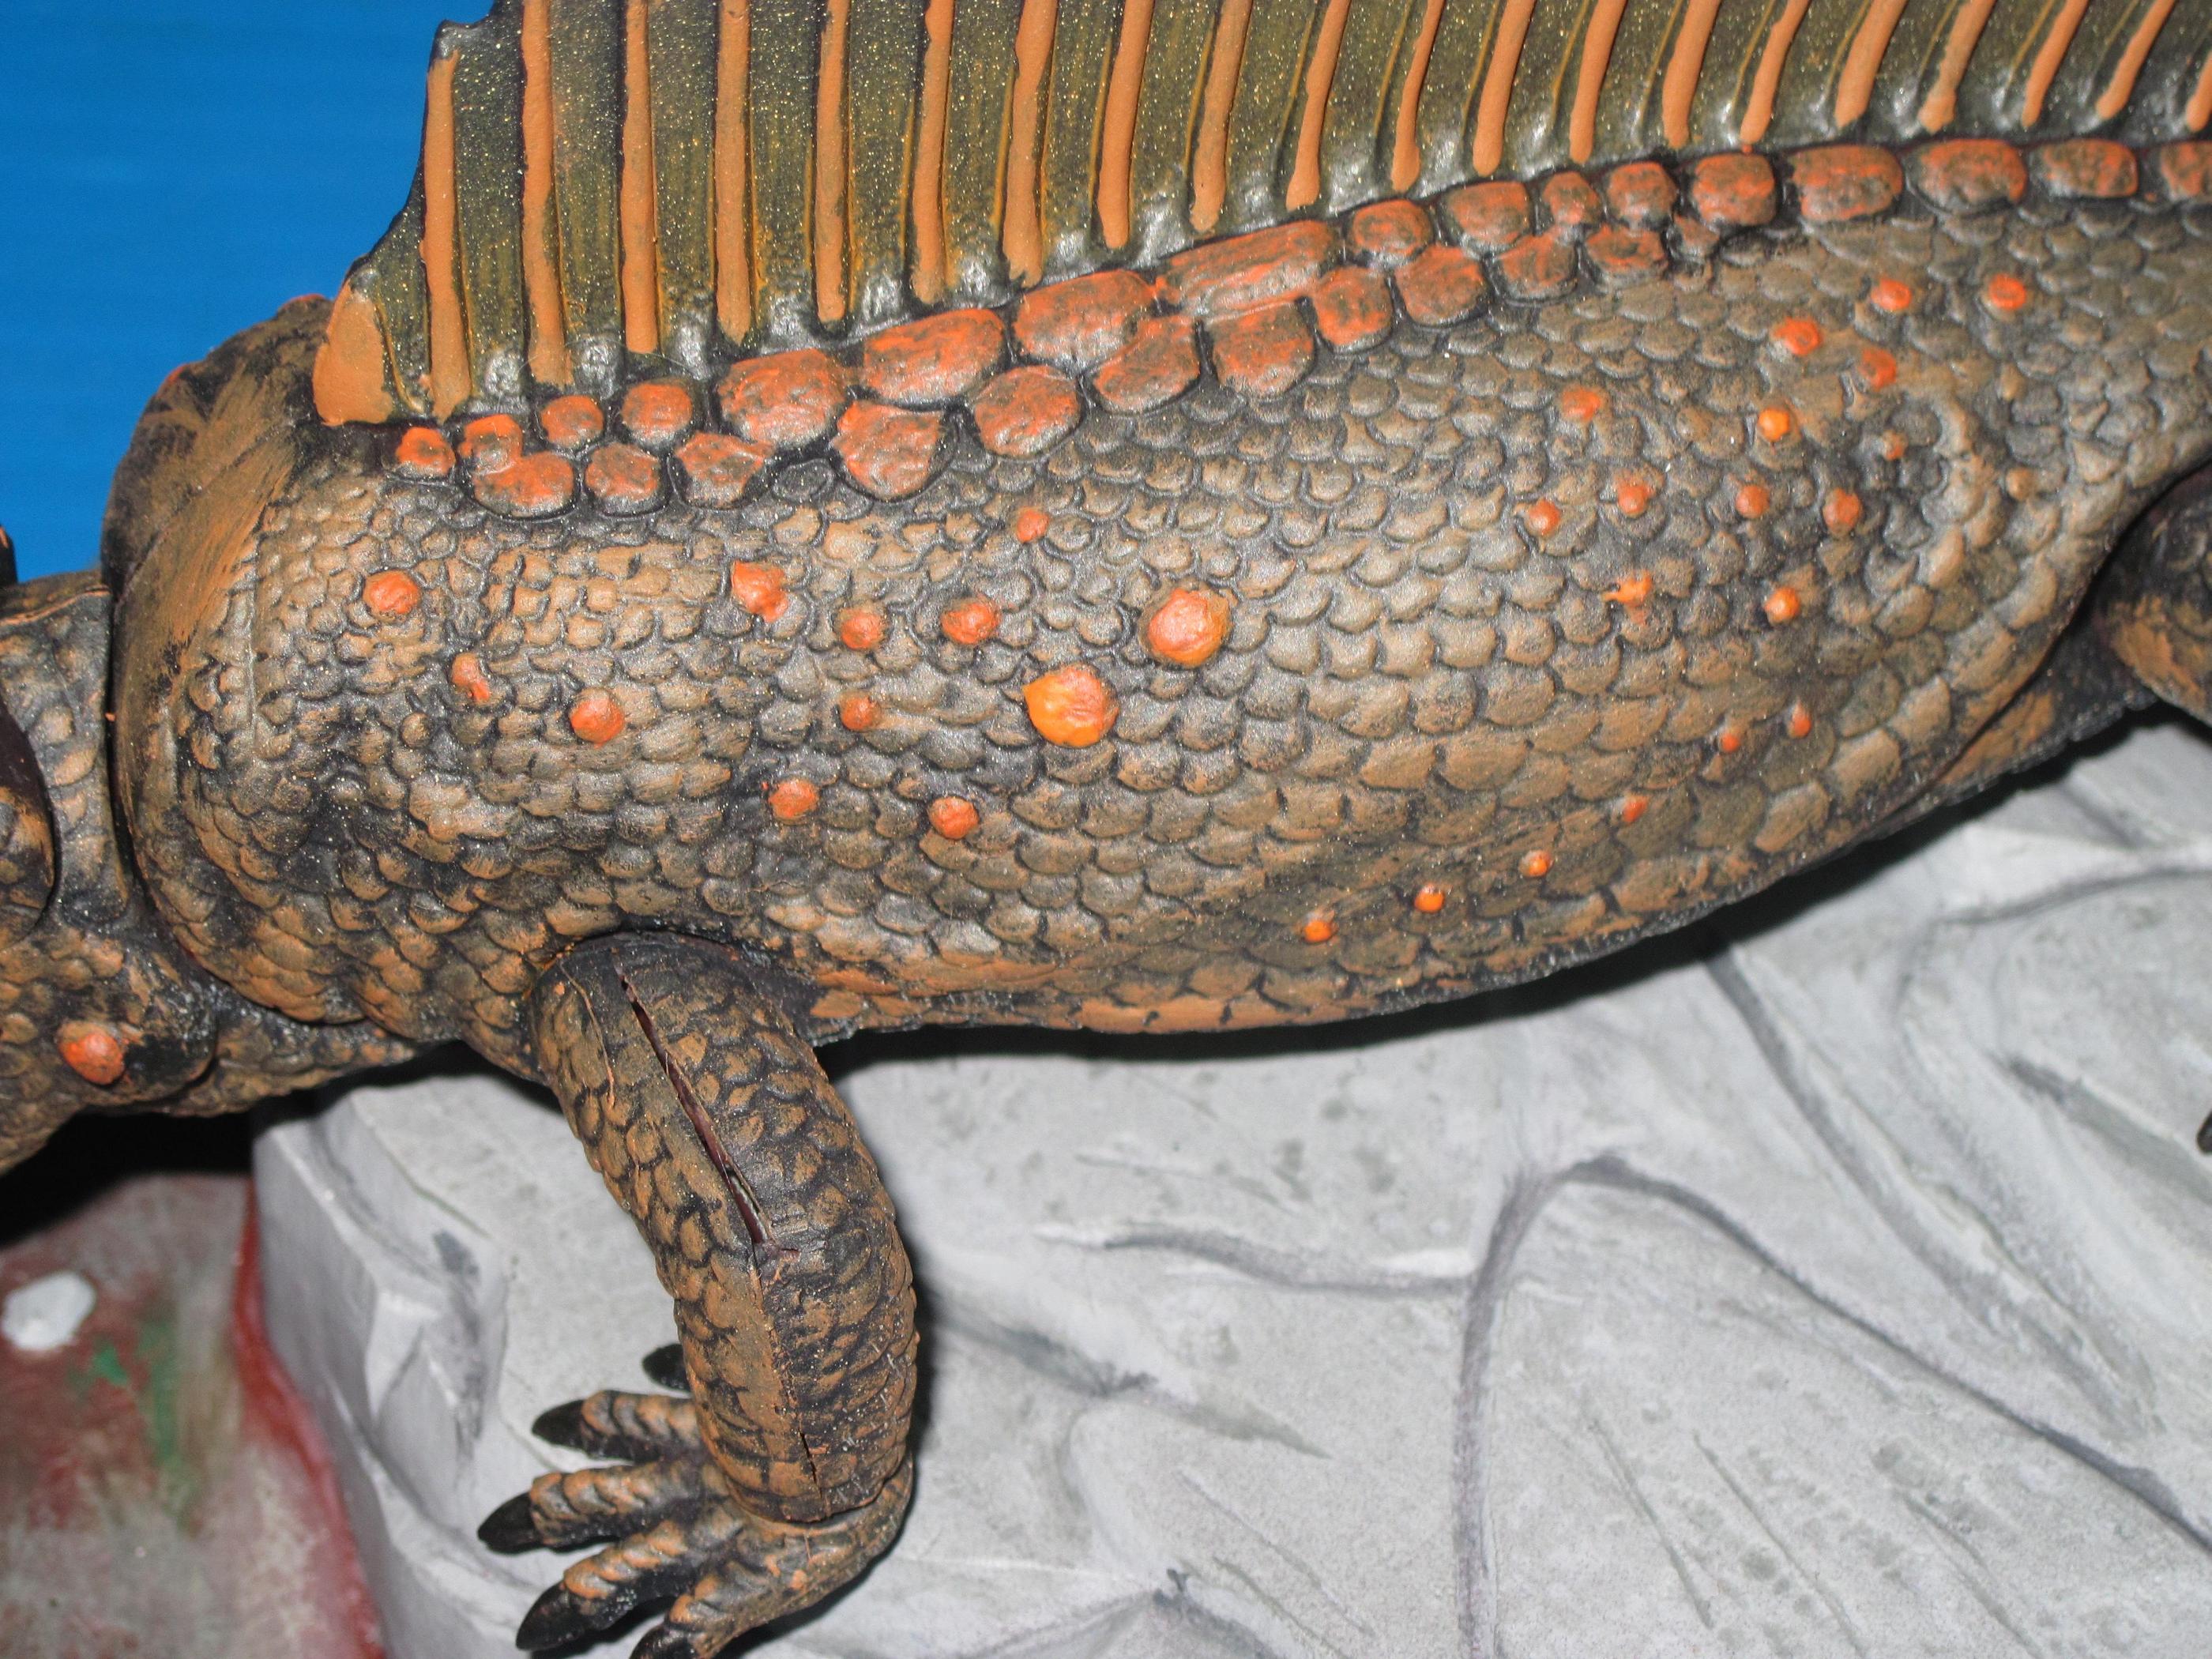
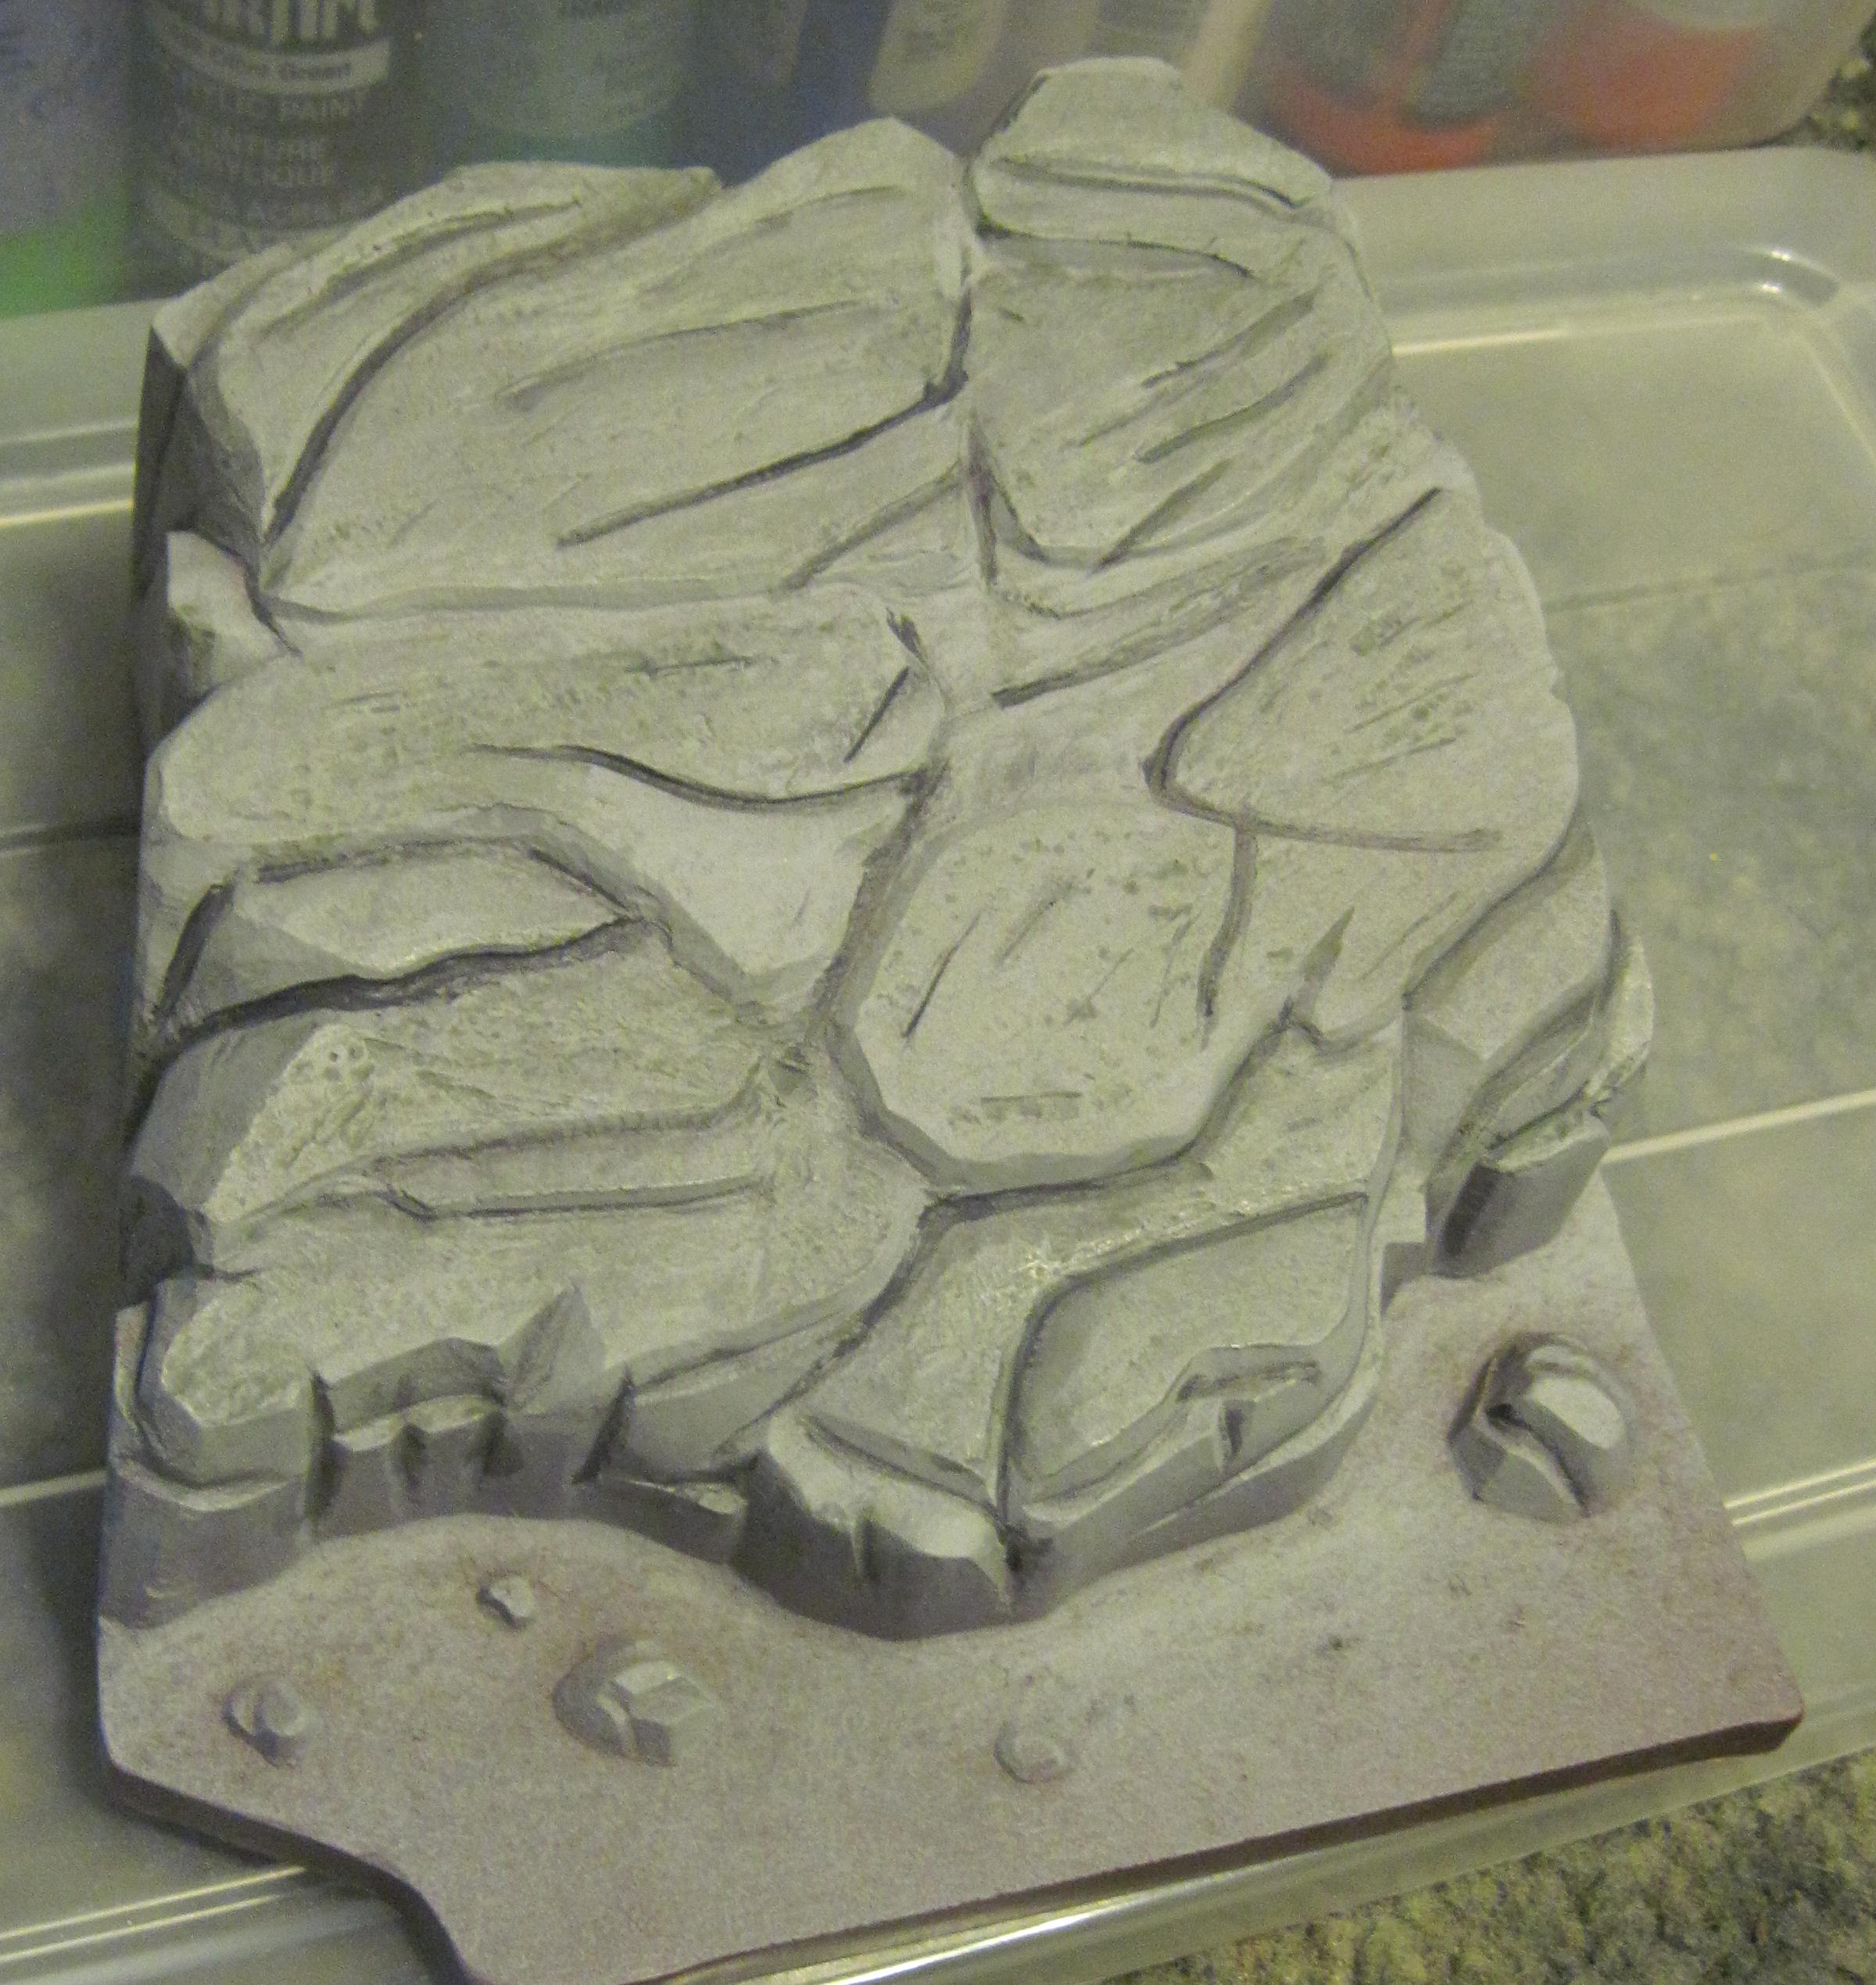
| Next
I drybrushed it brown. Then gave it orange highlights on
the prminent scales and sail. This kit is a drybrushing dream! |
|
 |
 |
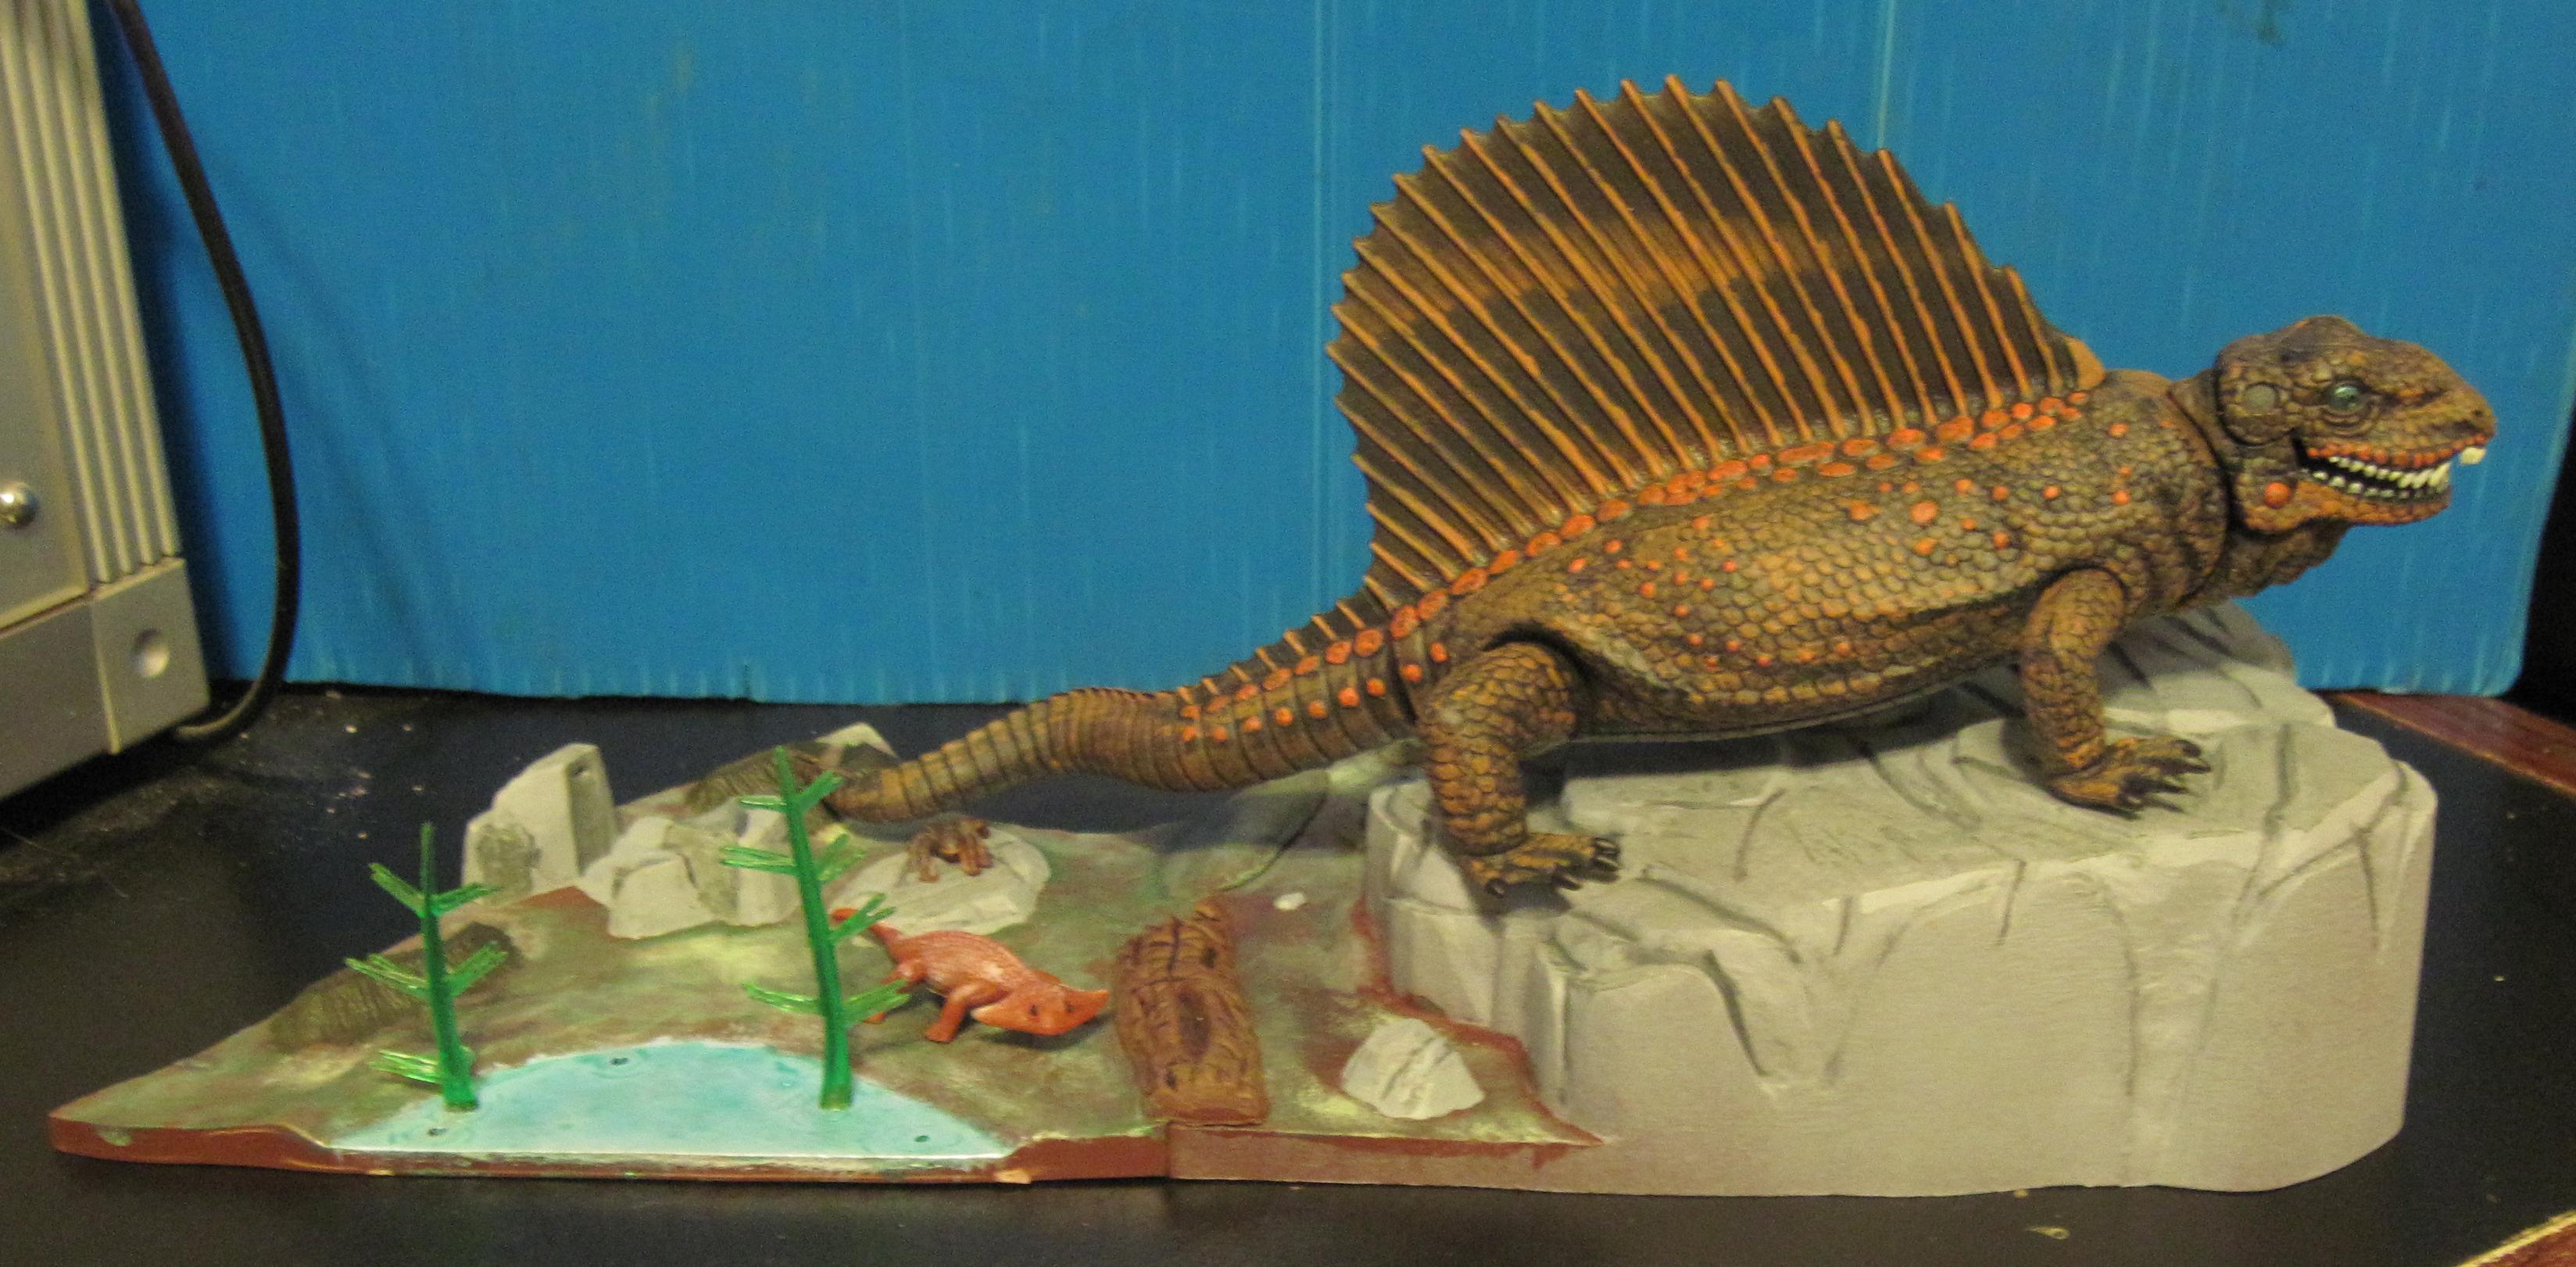
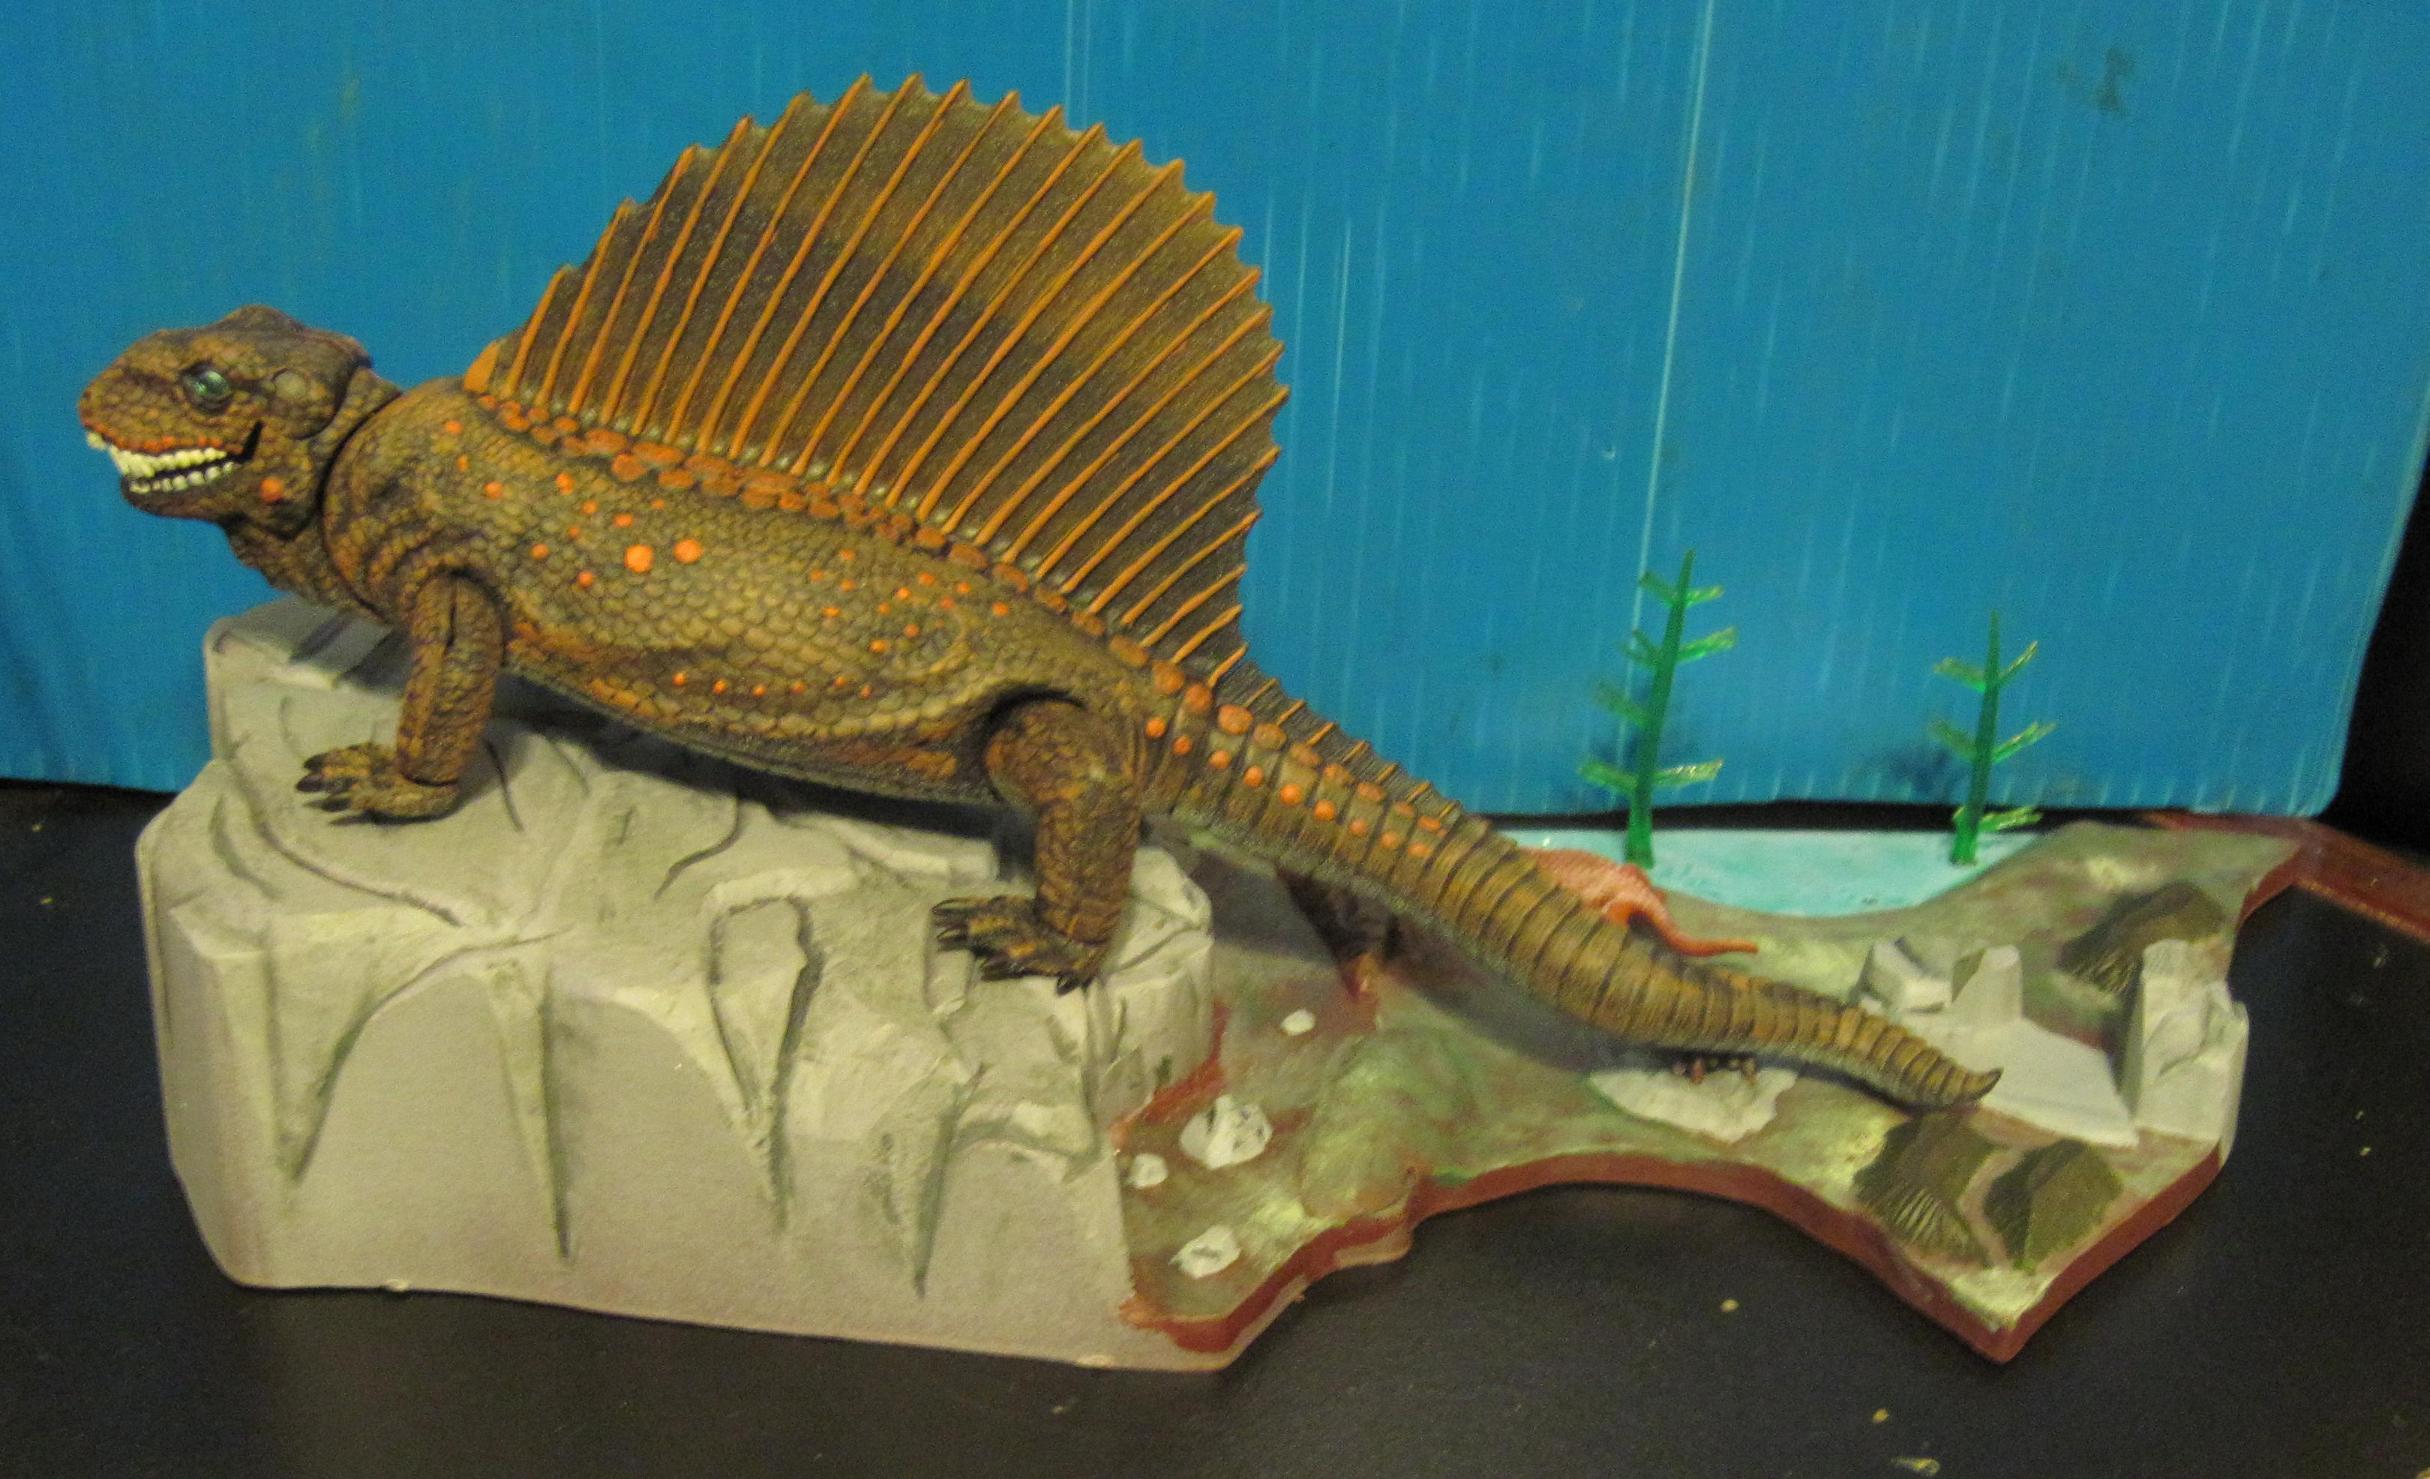
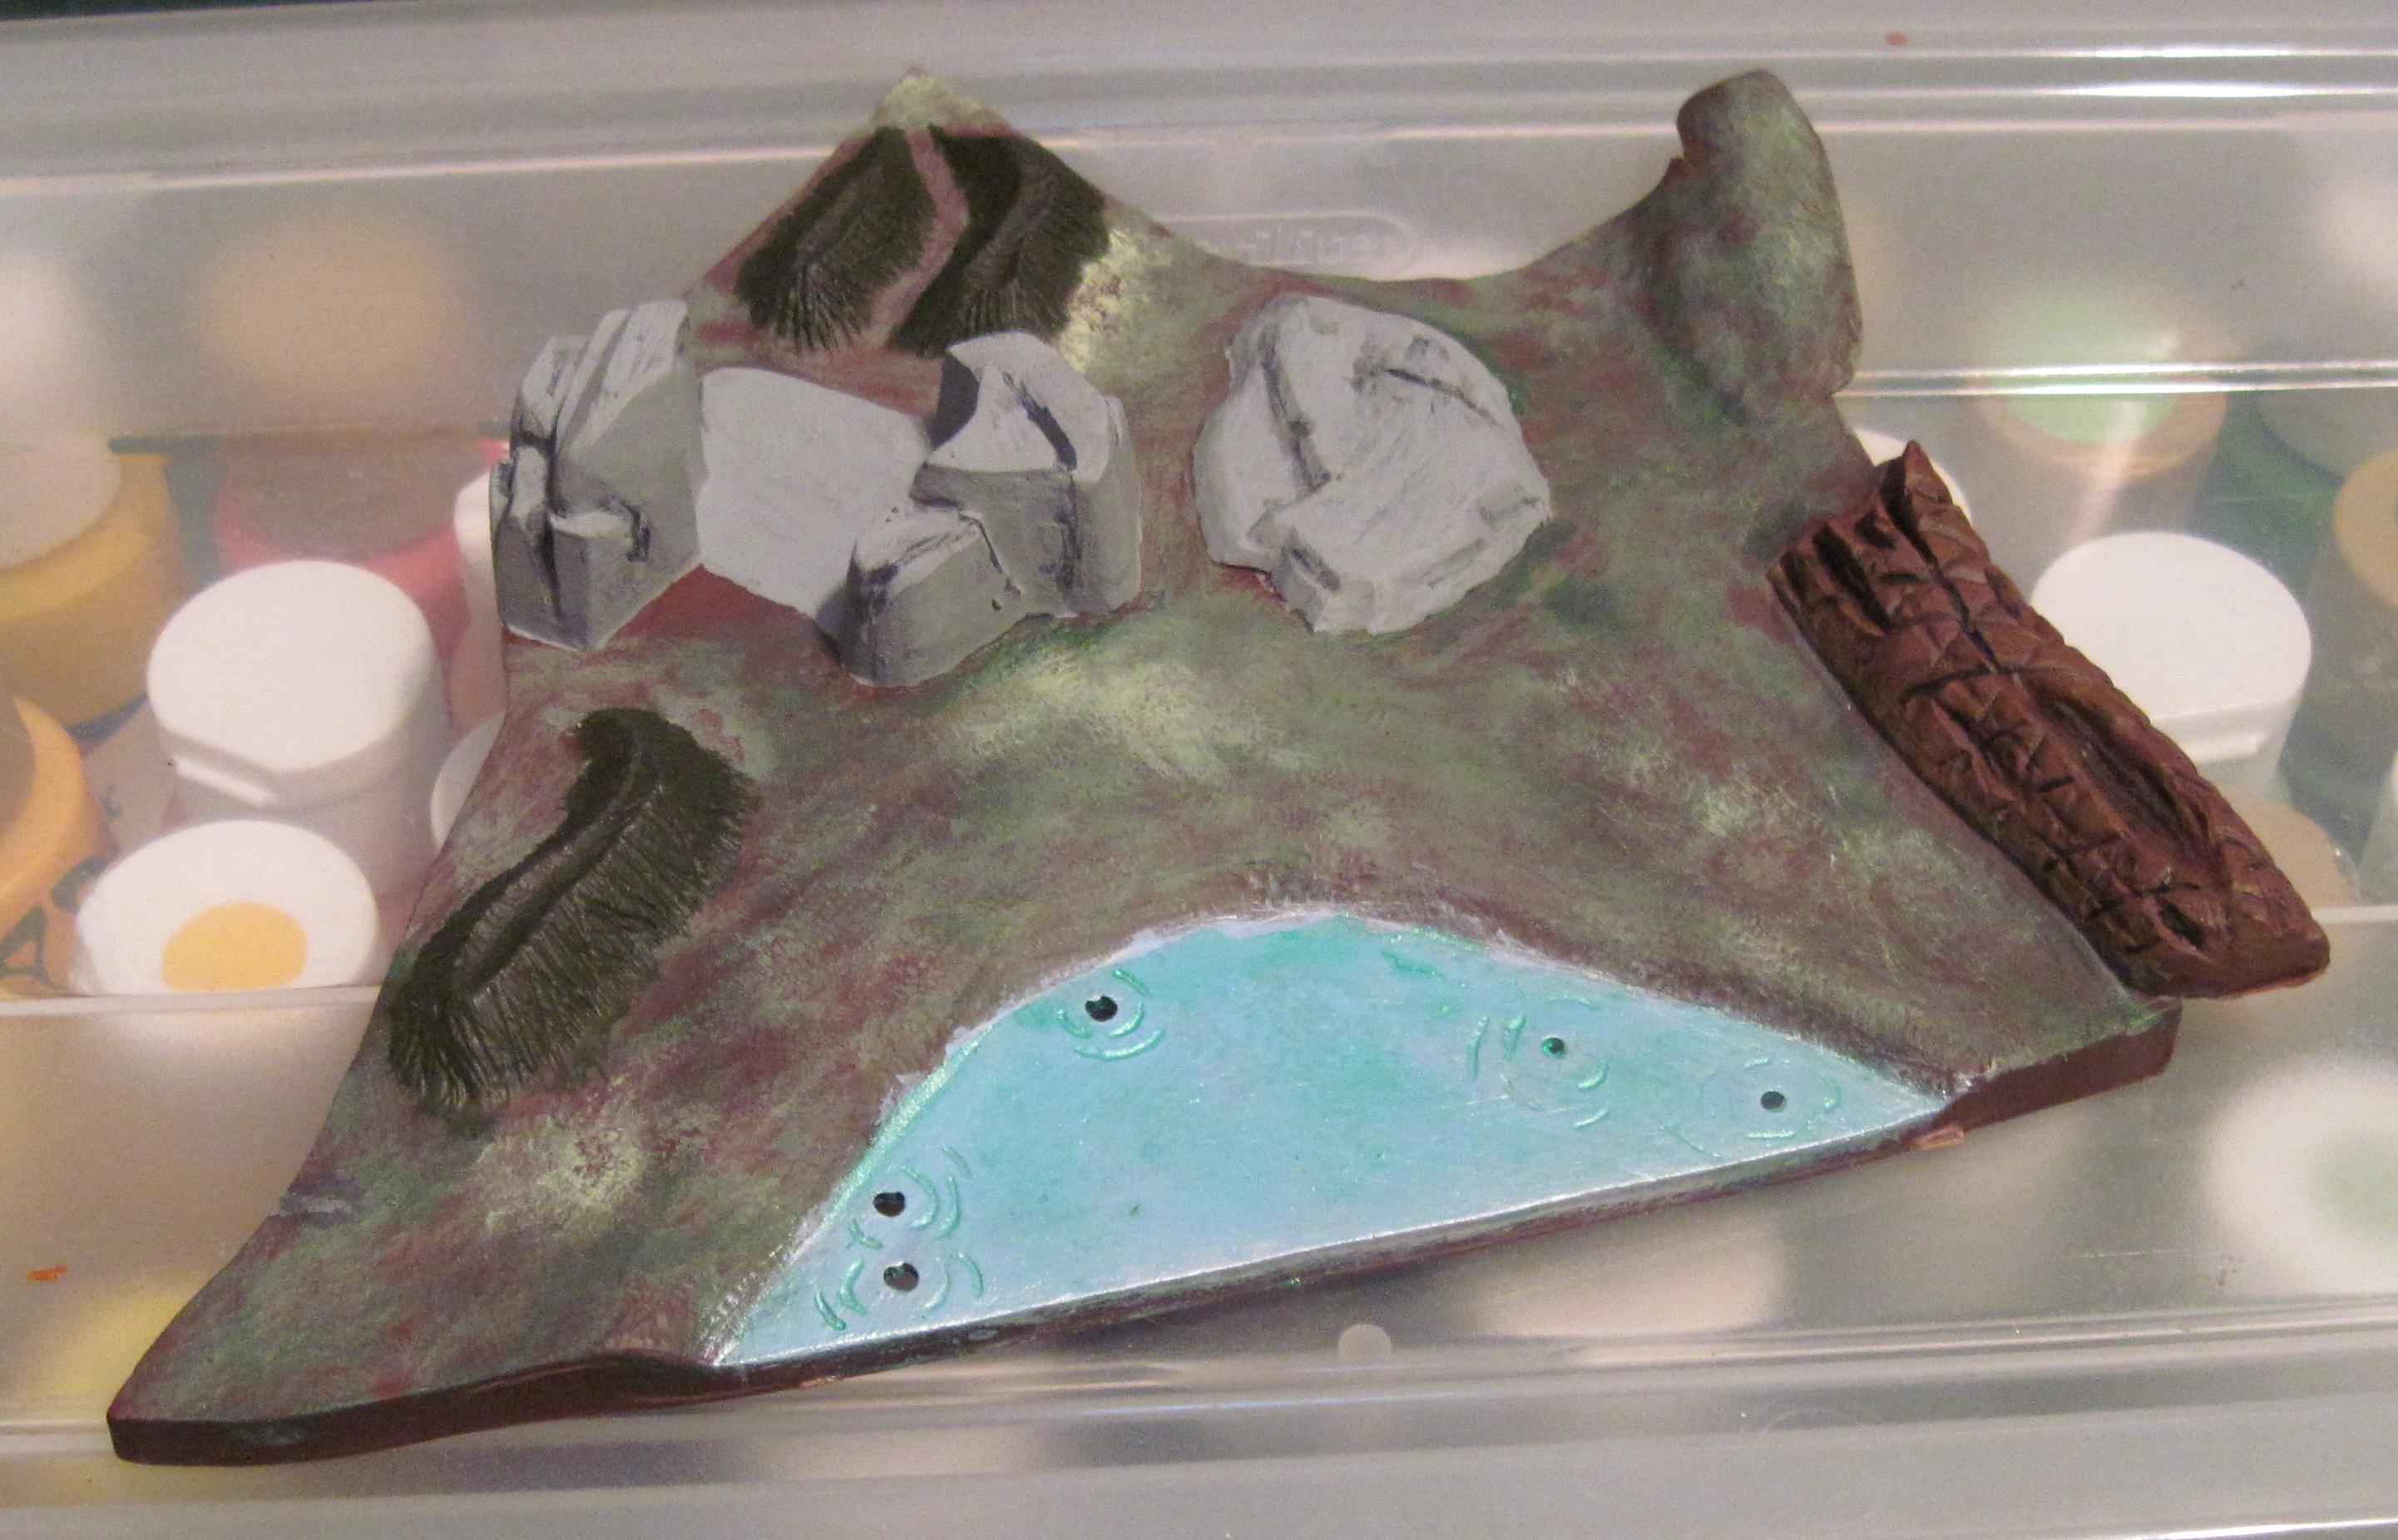
| Now,
onto the base. I gave the big end a coat of gray primer. Then went in and highlighted the details with a charcoal pin wash. That is wher you take the thinned paint and just apply it exactly where you want it to flow. After that I drybrushed areas with a darker gray to give it more depth |
|
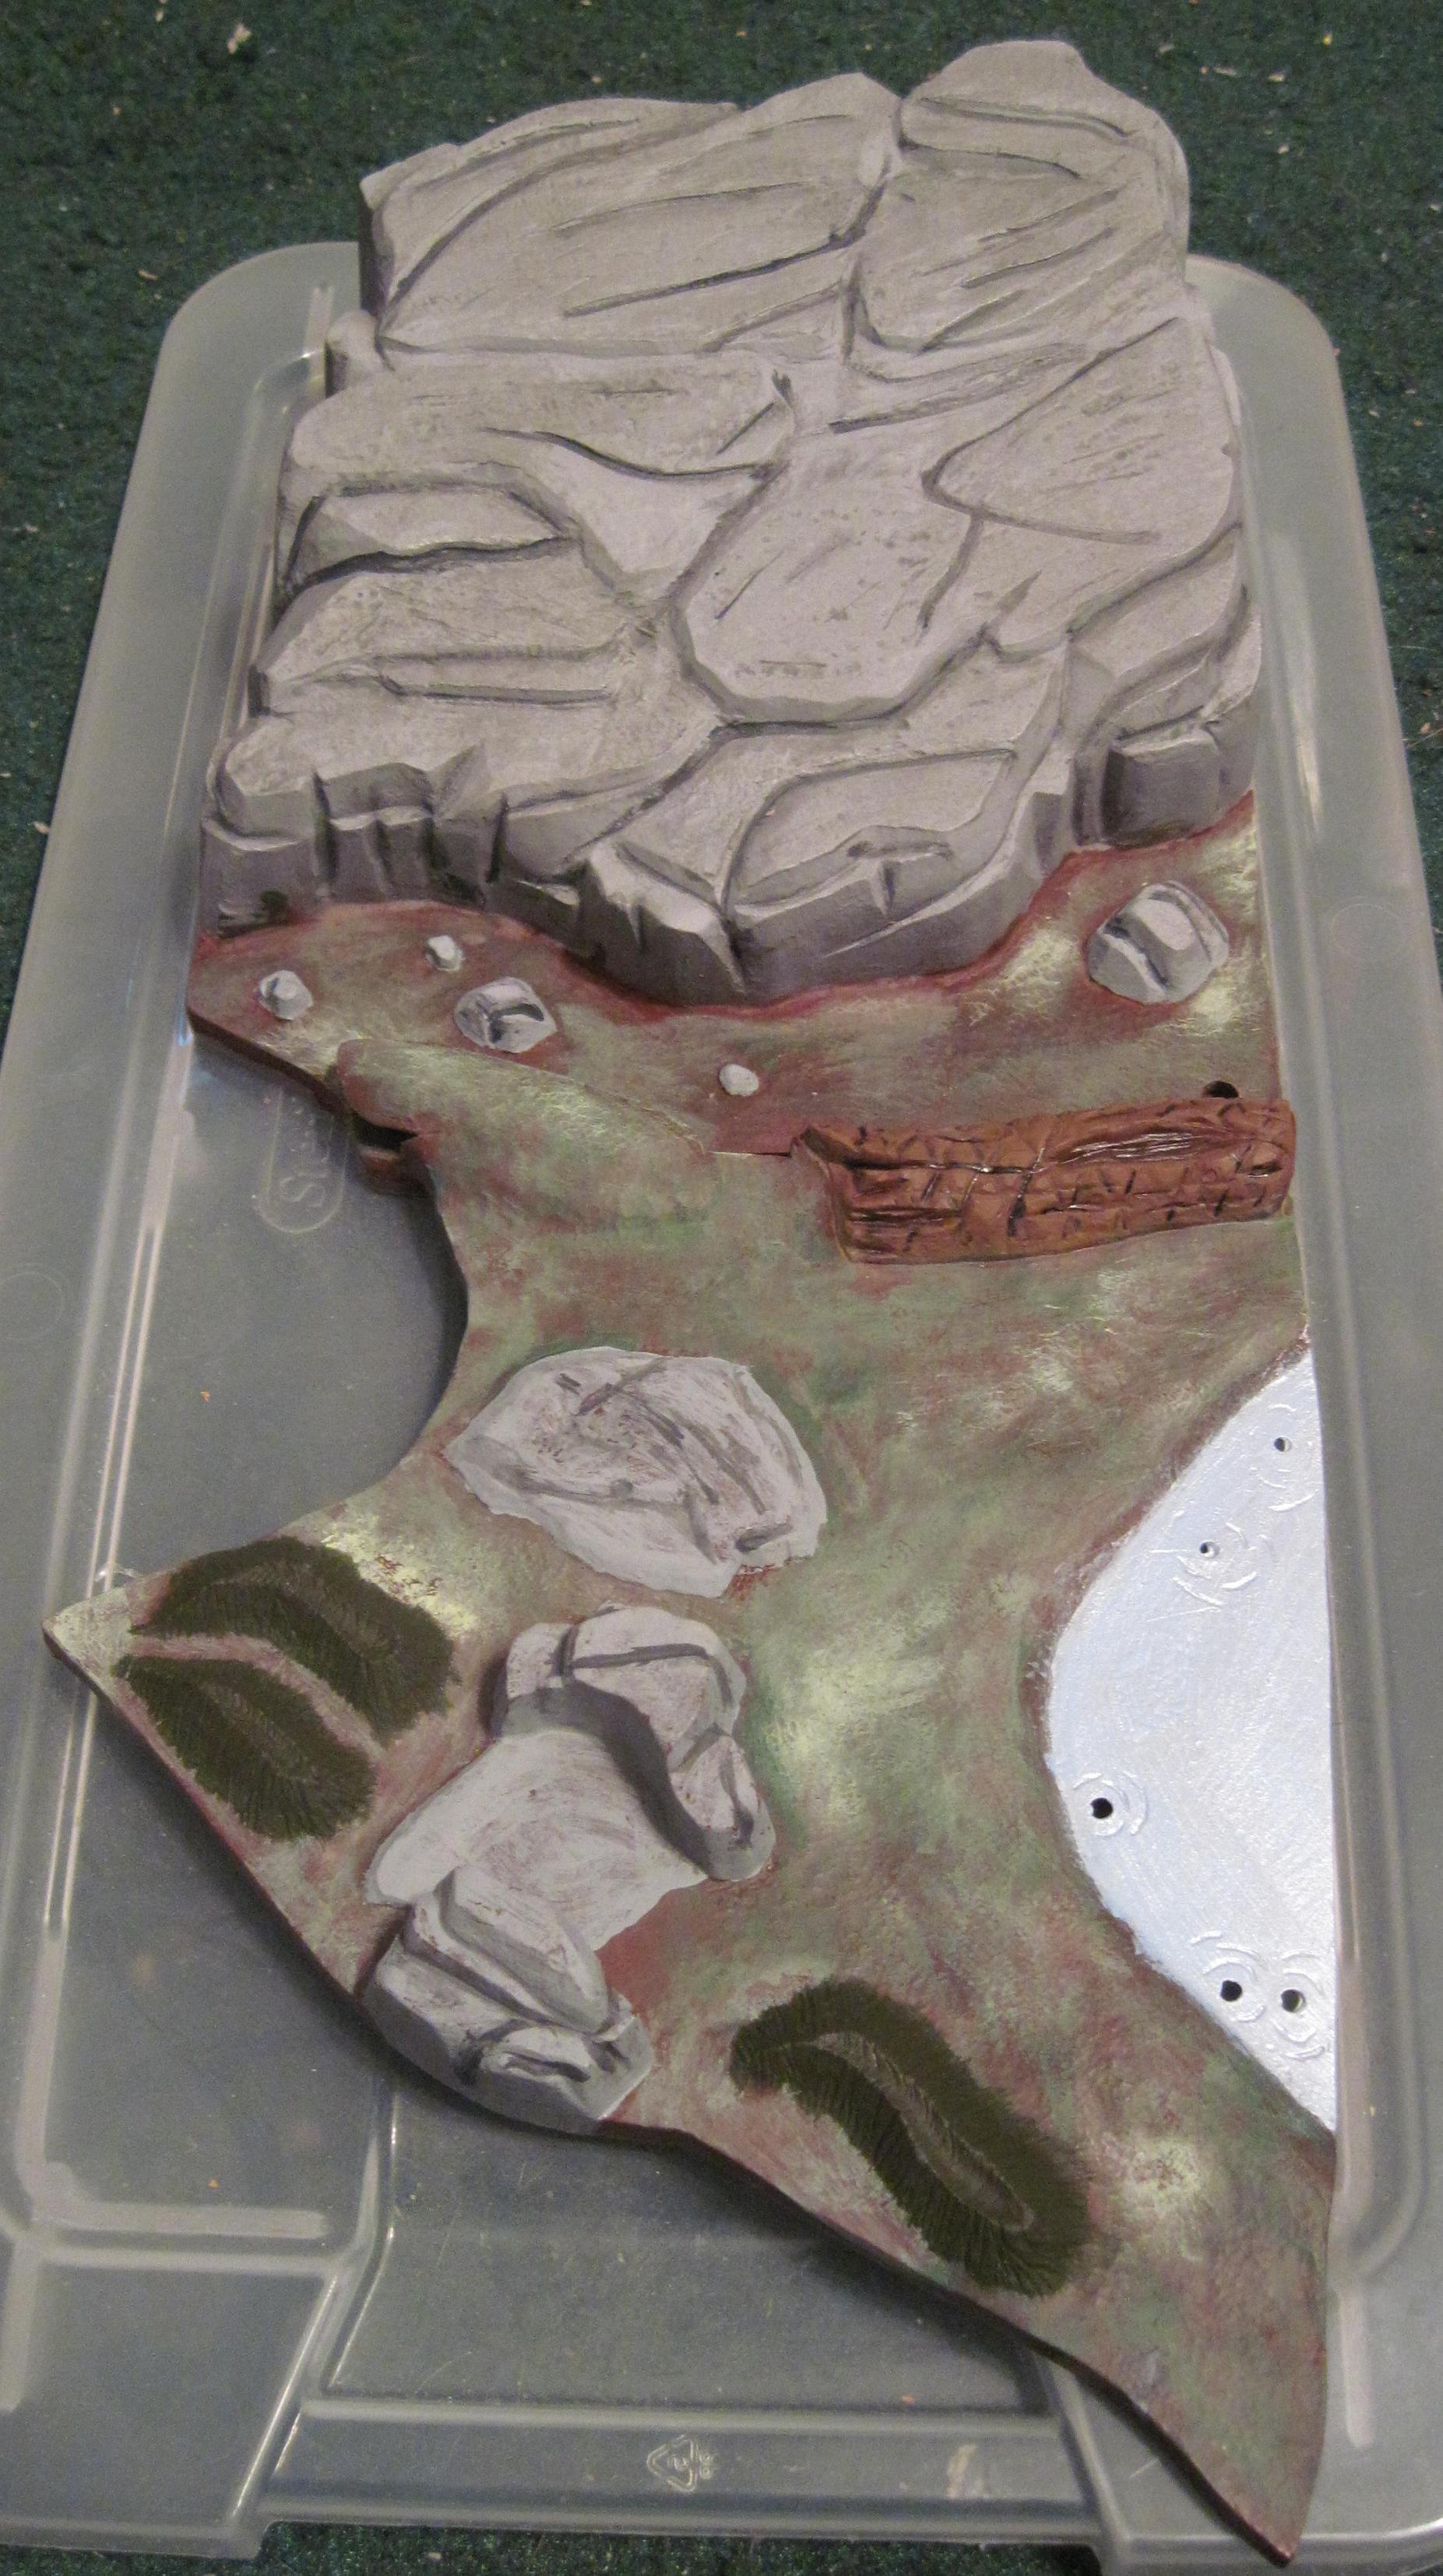 |
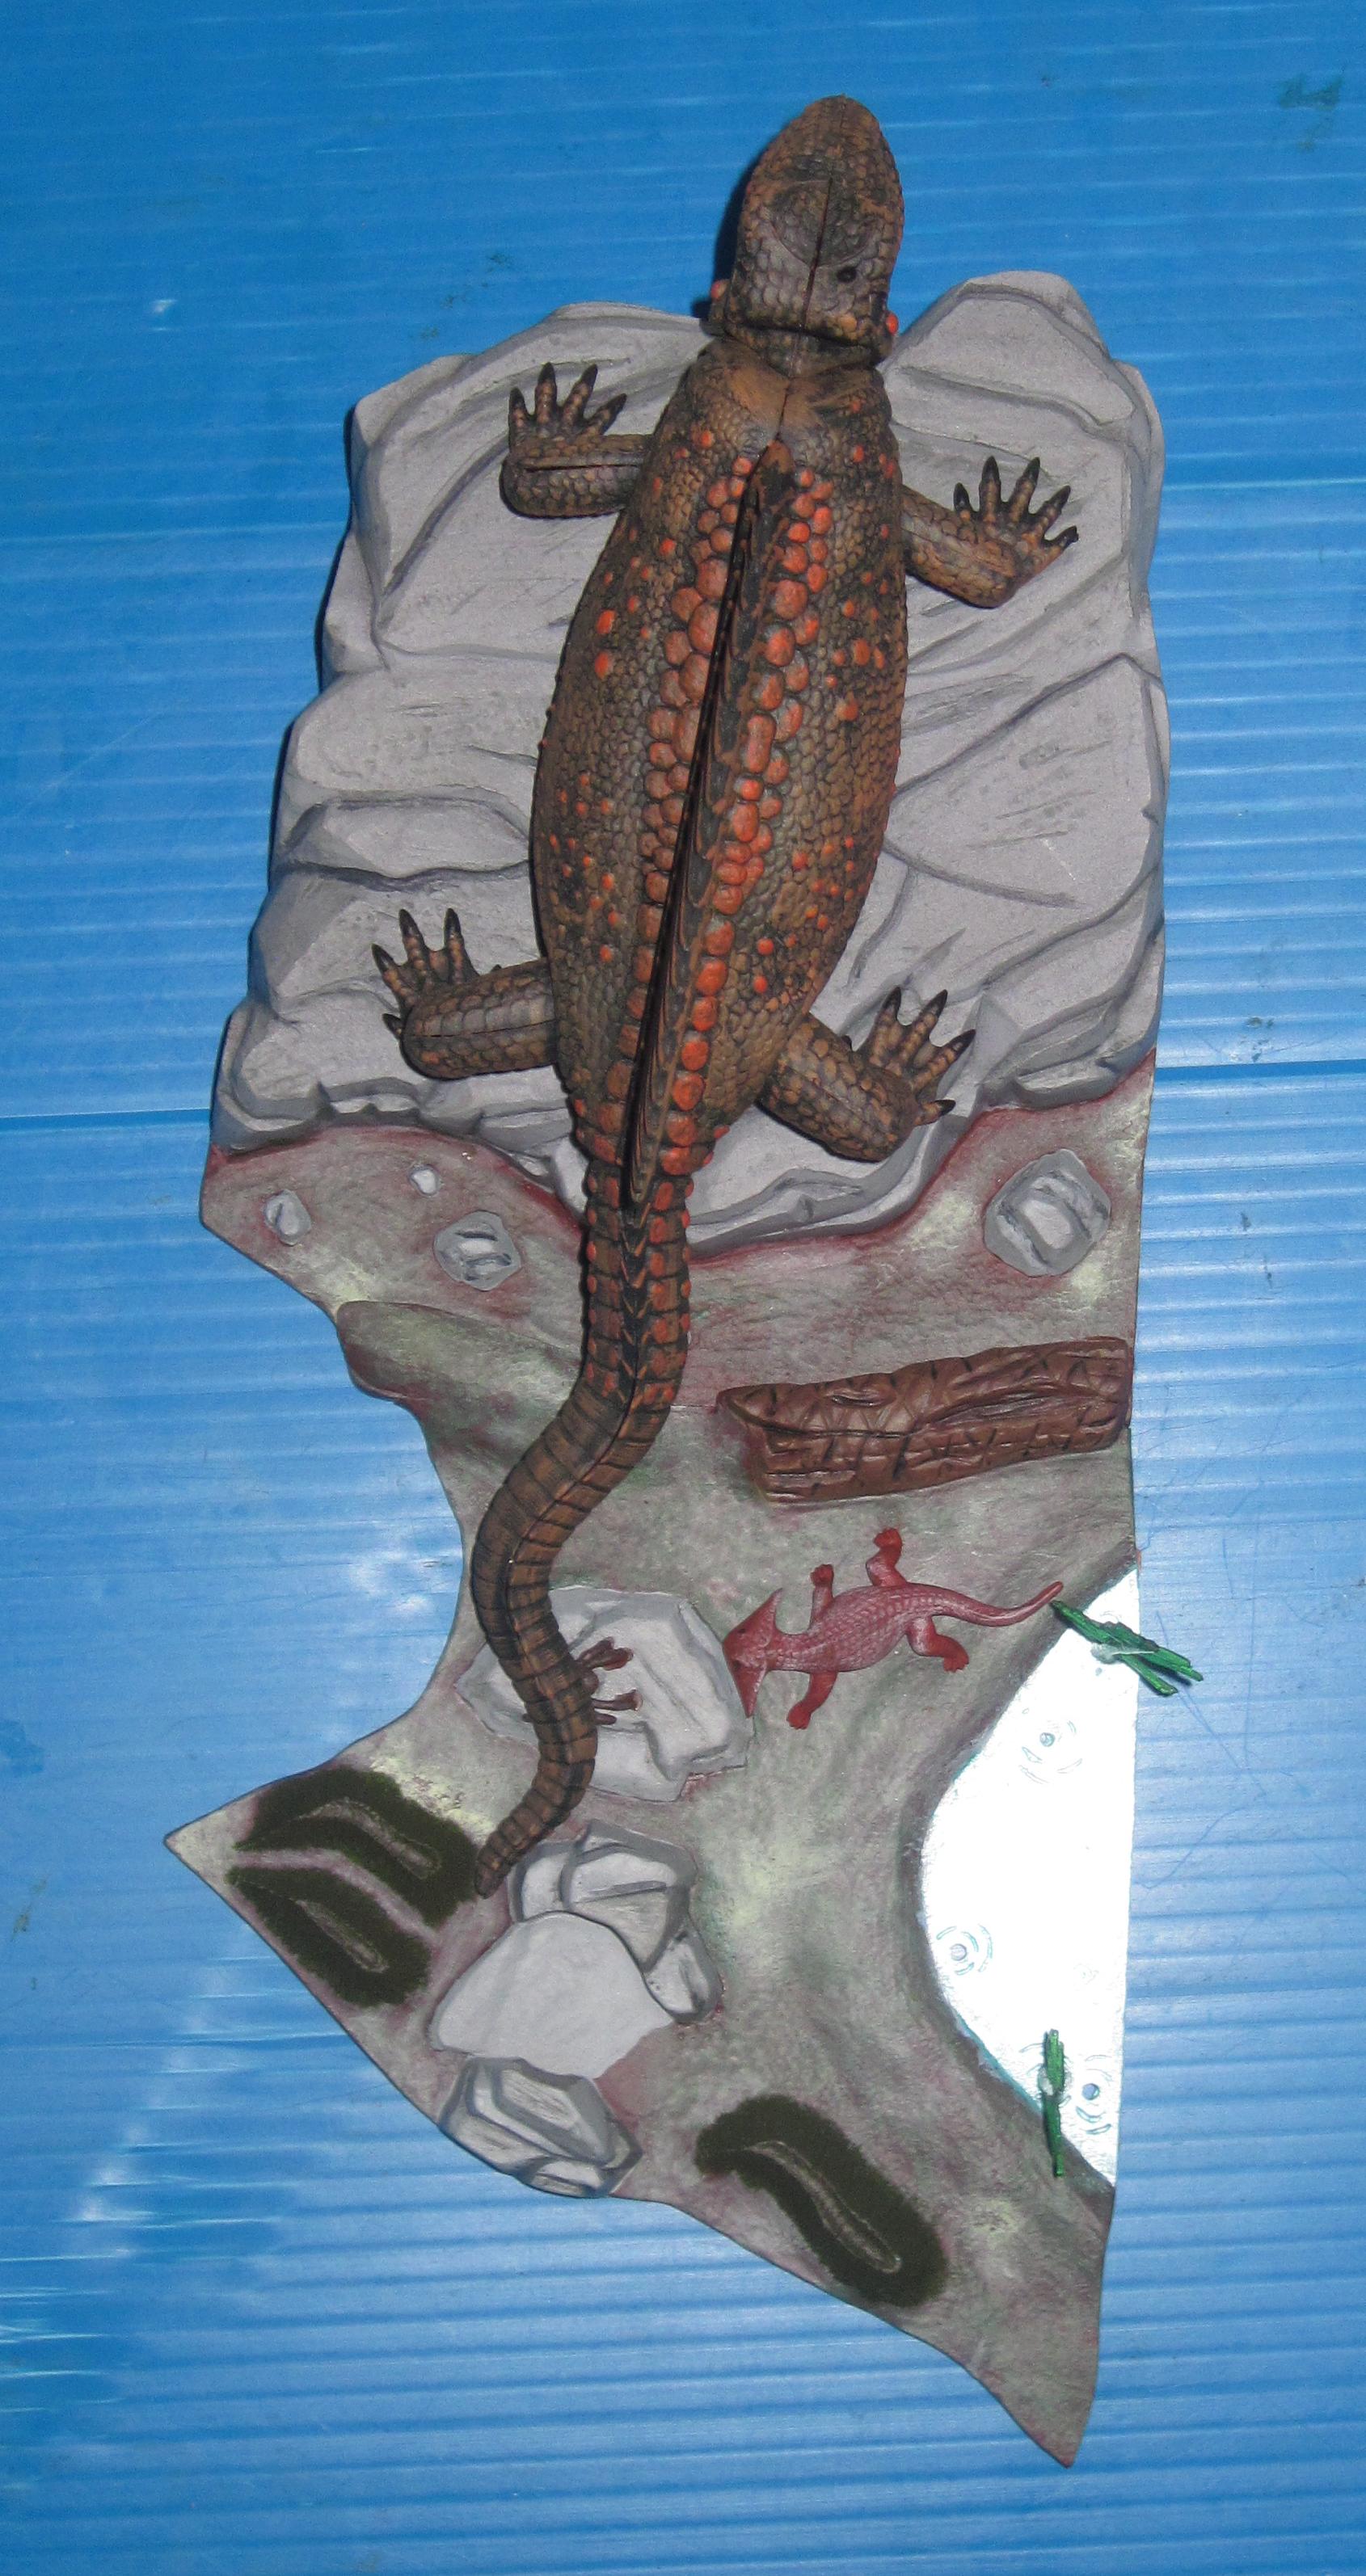
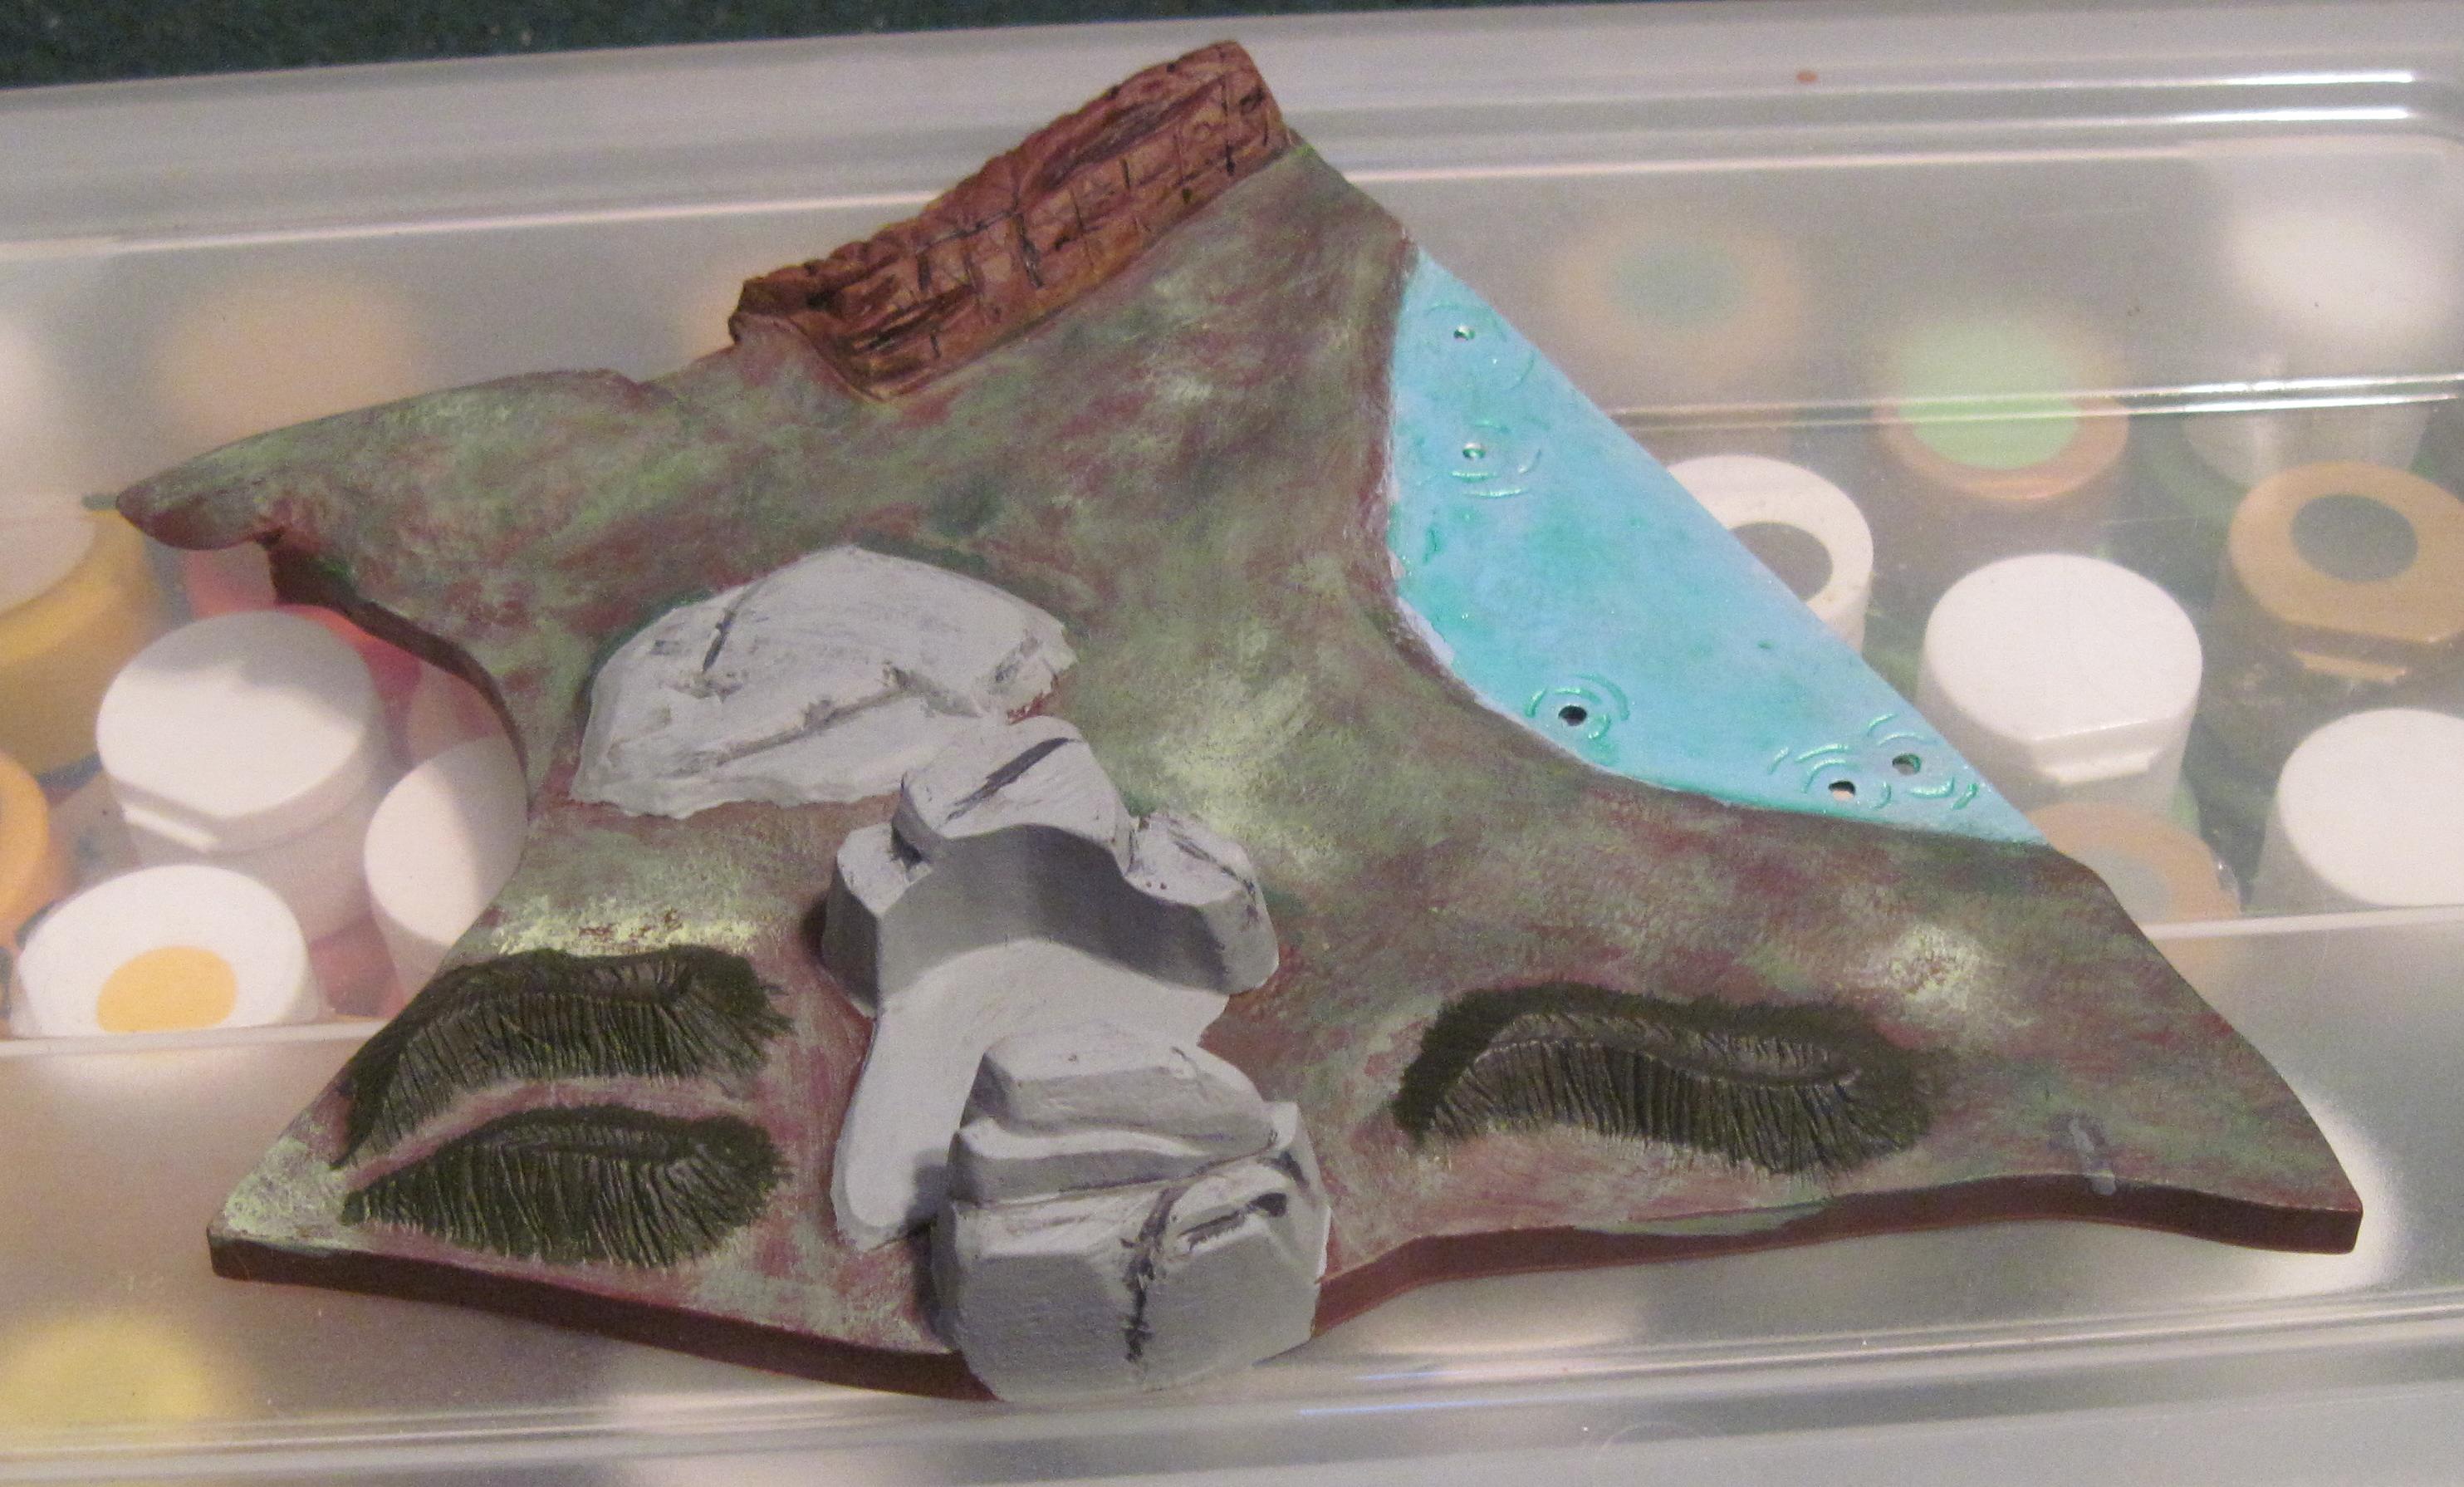
On the other half of the base, I
didn't prime at all. I just started working it with different shades of green, letting the brown show through. Then I worked in other browns also. Detailed the rocks, the log, and the grass. Then it was time to tackle the water. Hmmm. What to do about the water? Then an idea hit me. I base coated it with some pearlescent medium. After that dried, I gave it a very thin wash of a light blue. Then clear coated it. I think it came out ok. |
 |
 |